The whole SR series of cameras from Minolta are similar in their construction. The only departure from the theme would be the SR-7, which has an in-built light meter and battery, but the basic principle is actually valid for almost any mechanical SLR (with notable exceptions, of course, like cameras with removable finders).
I have prepared a short video to show how it can be easily and safely done without doing any damage to camera or yourself. What you do afterwards I can take no responsibility for. I only need to access inside the top to clean the prism faces and check the cleanliness of the film-winding mechanics. In the case of a stuck camera, 99% can be done just by removing the BASE plate and adjustment or cleaning of the slow-gears are inside the mirror-box, as previously described.
Here is a link to the video, while I try to resolve the uploading problem that I now seem to have…
https://www.dropbox.com/s/wezkvi41sao6h2z/Video%2006-12-2019%2C%2014%2043%2017%20Copy.mp4?dl=0
The video will soon be uploaded, but first I have to do a light edit to remove my head from blocking the view… 🙂
Interesting for those that have never looked inside one of these, there are internal differences even between early and later versions of the SR-2, as demonstrated here!
This is an early model (1100783) and just look at this! The inside of the top pressing has been hand painted in black on the inside
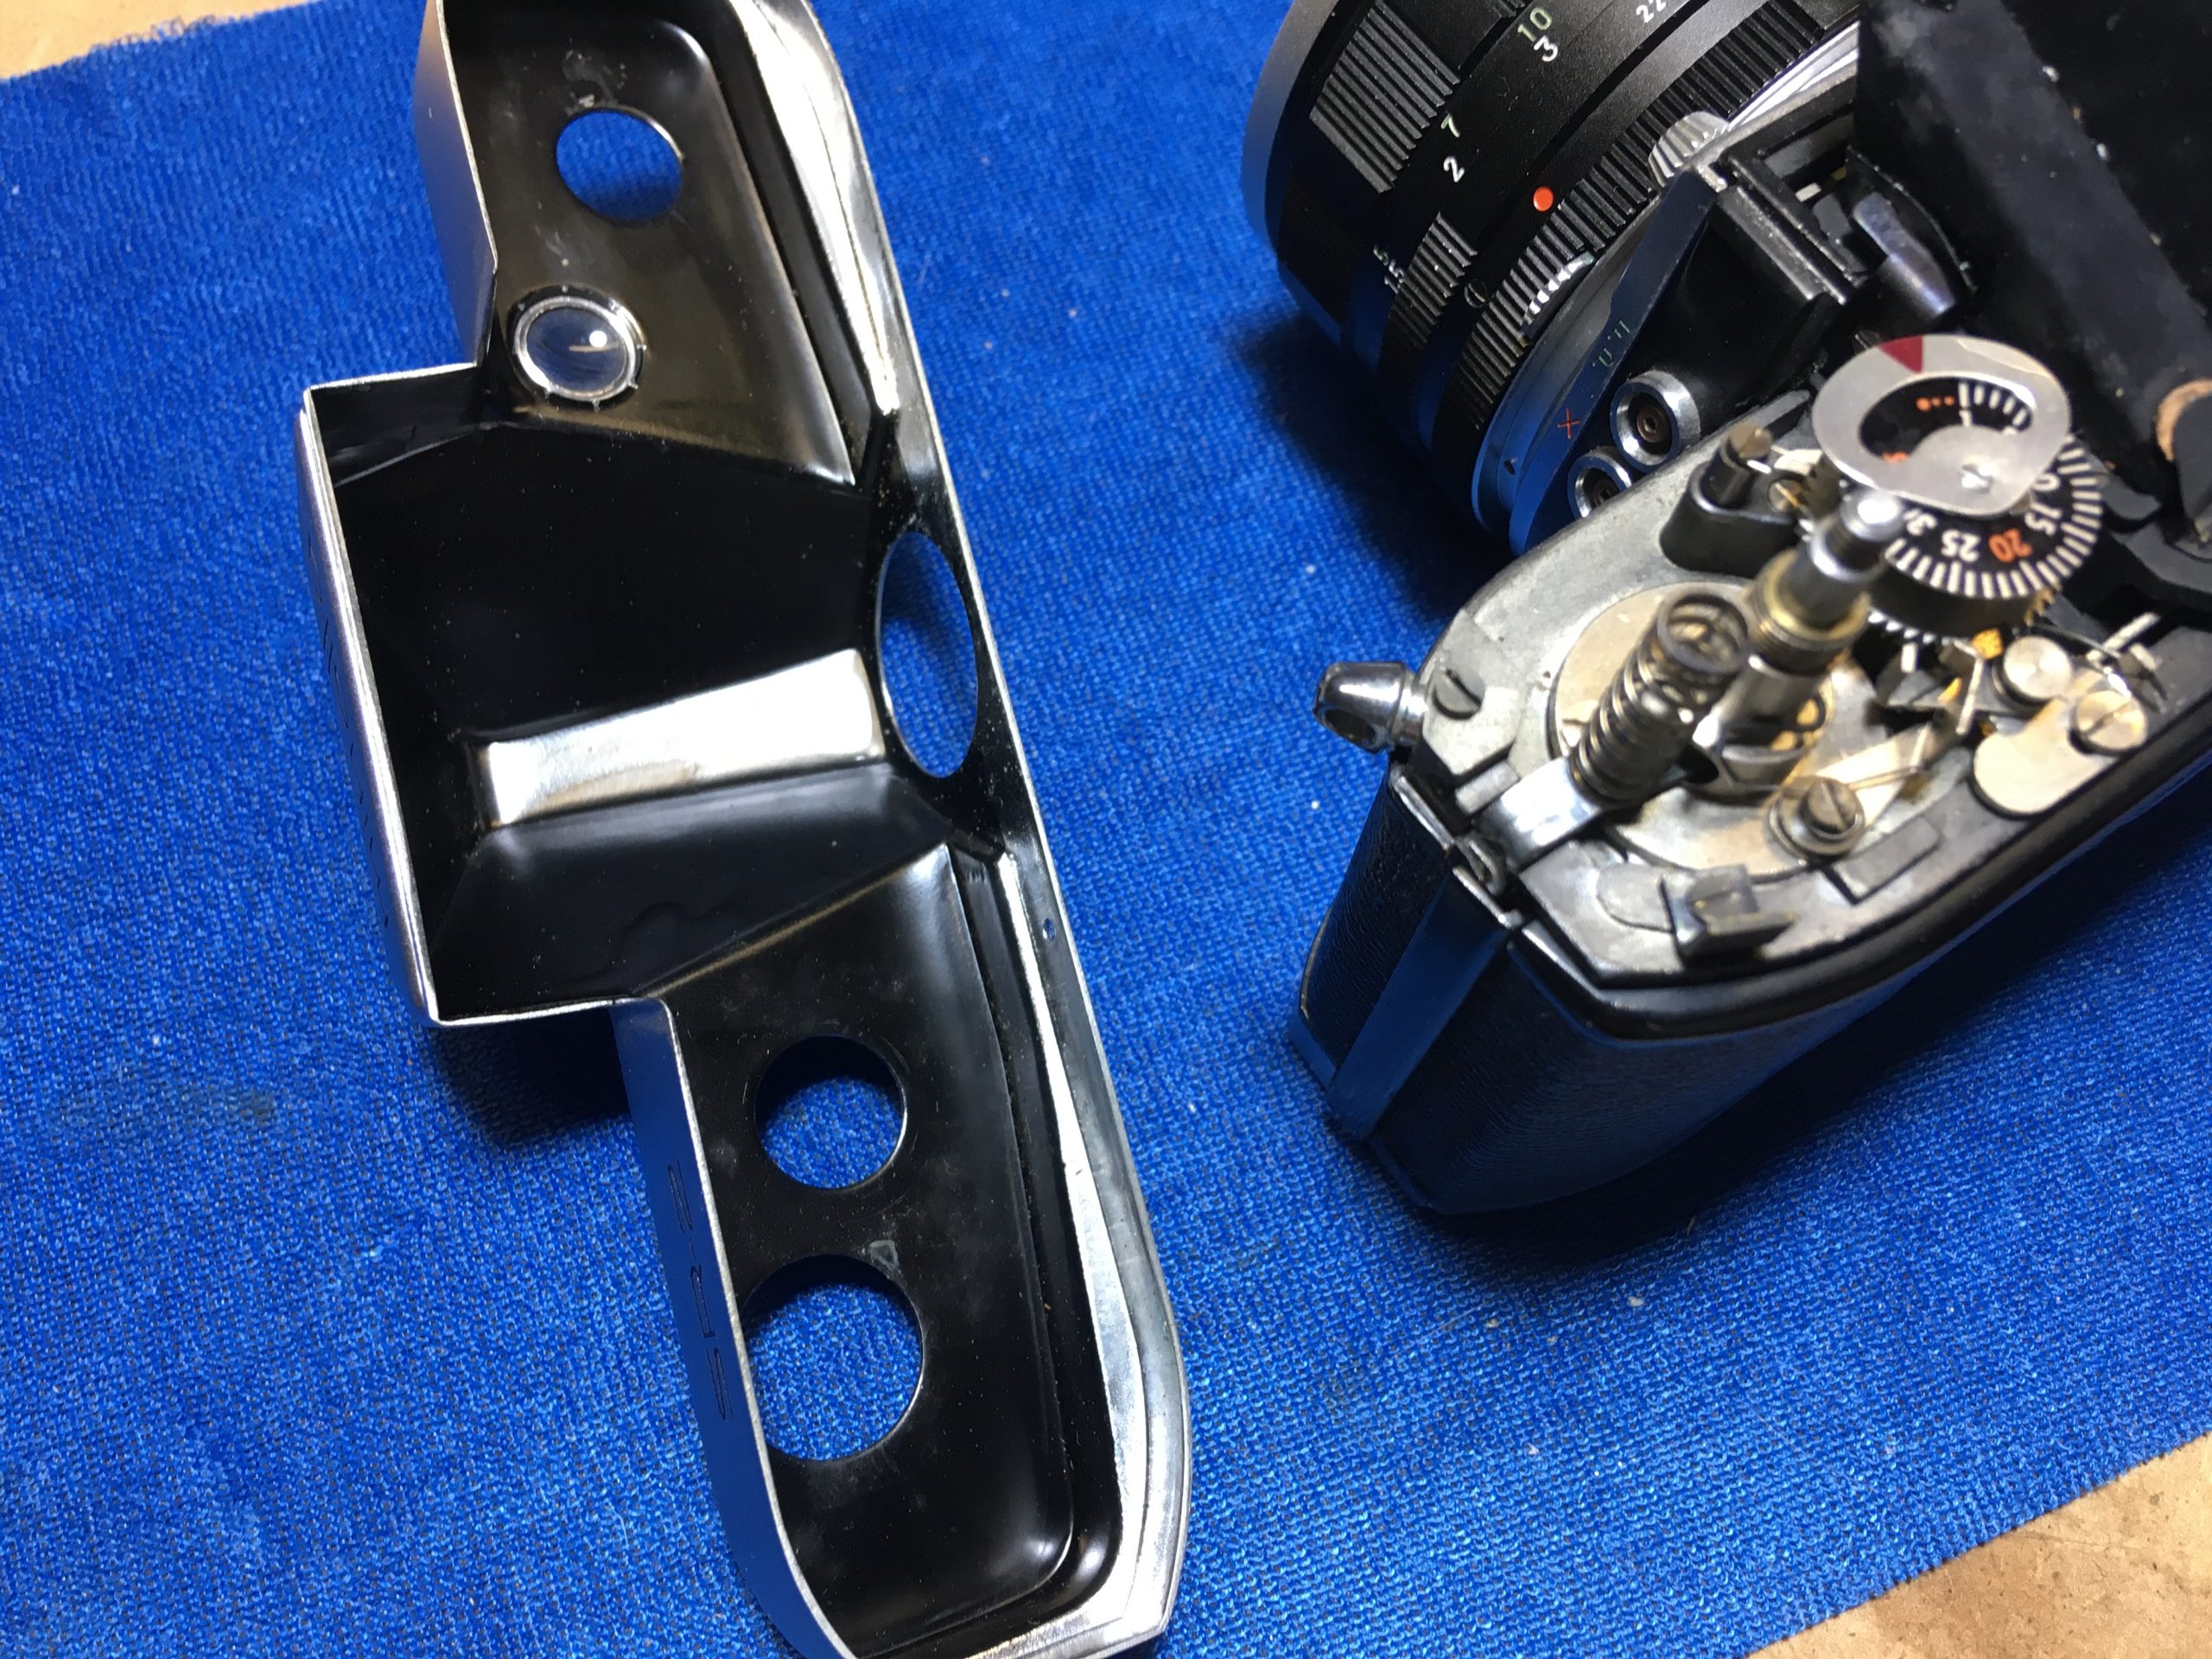
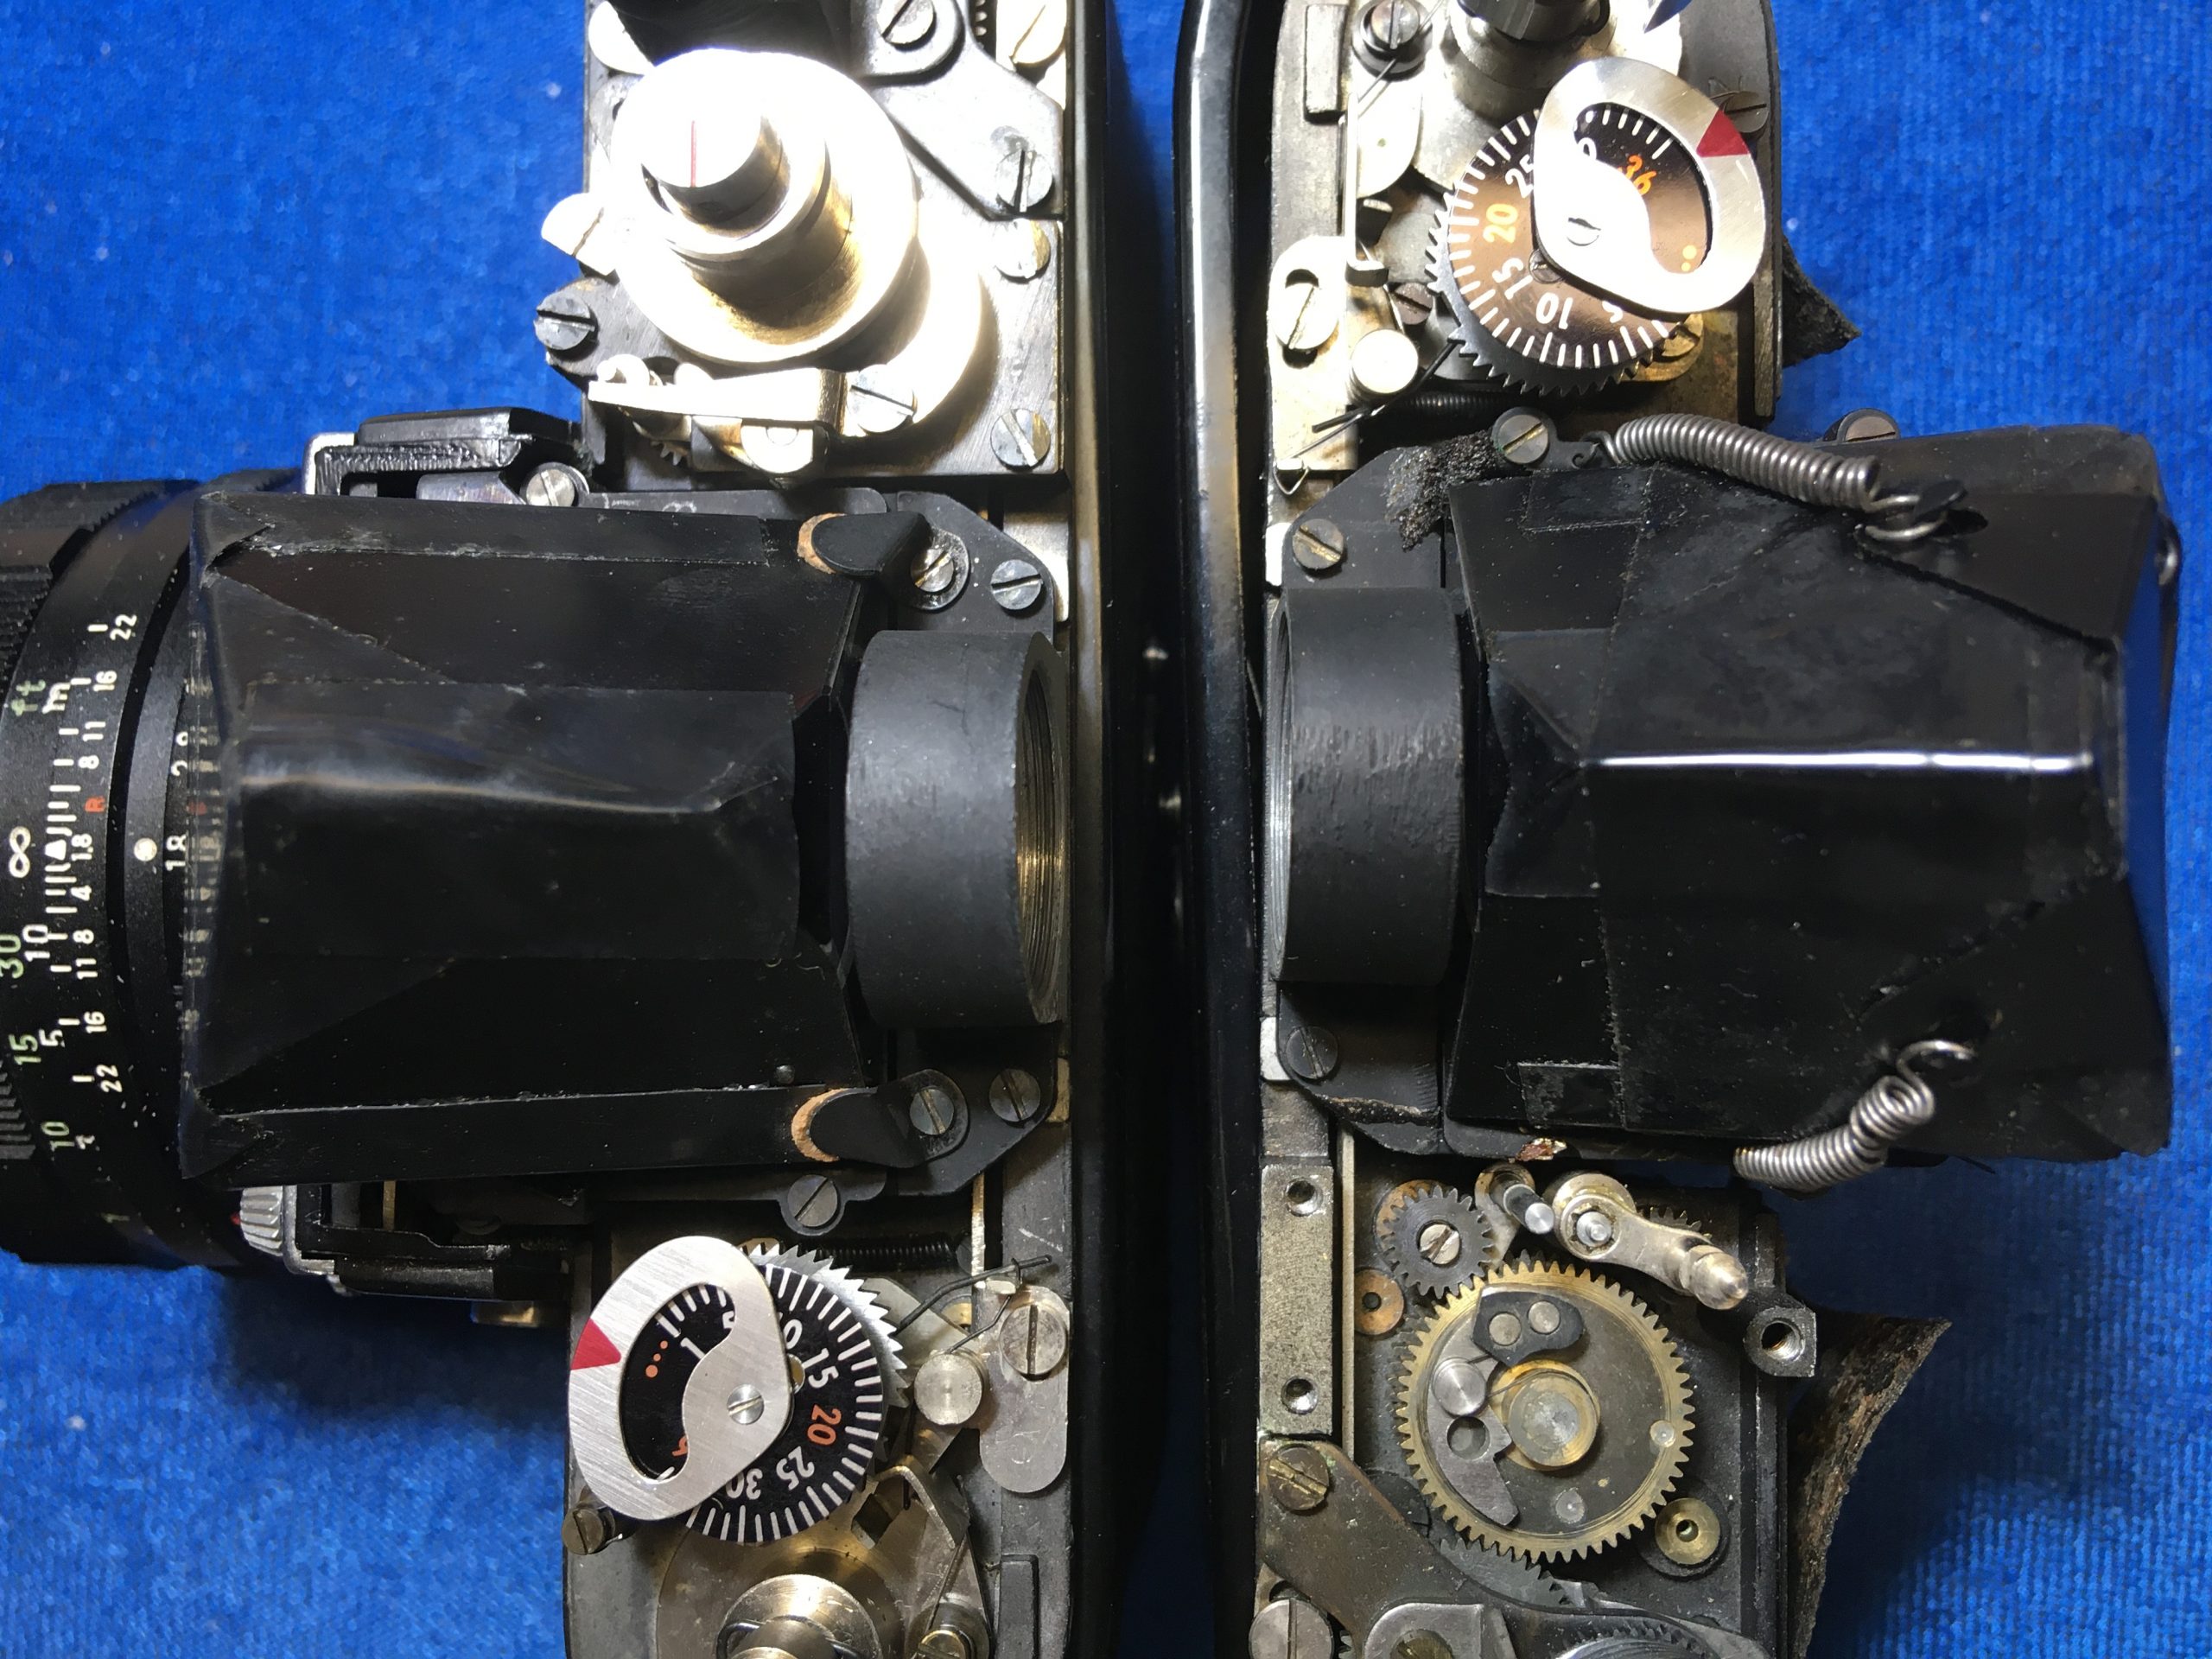
Before wiping off, there is a little mould on the prism (corners masked off with black insulating tape) and the holding mechanism for the prism is very different to the ‘later’ models (as of when?) Clamped at the back and sides instead of the customary overslung bracket and springs, over a plastic moulding protecting the prism. (See below, both are SR-2s – the one on the right has the film transport partially dismantled)
The yellow arrows show the screws on the brackets to remove them, the red outlines the brackets somewhat…
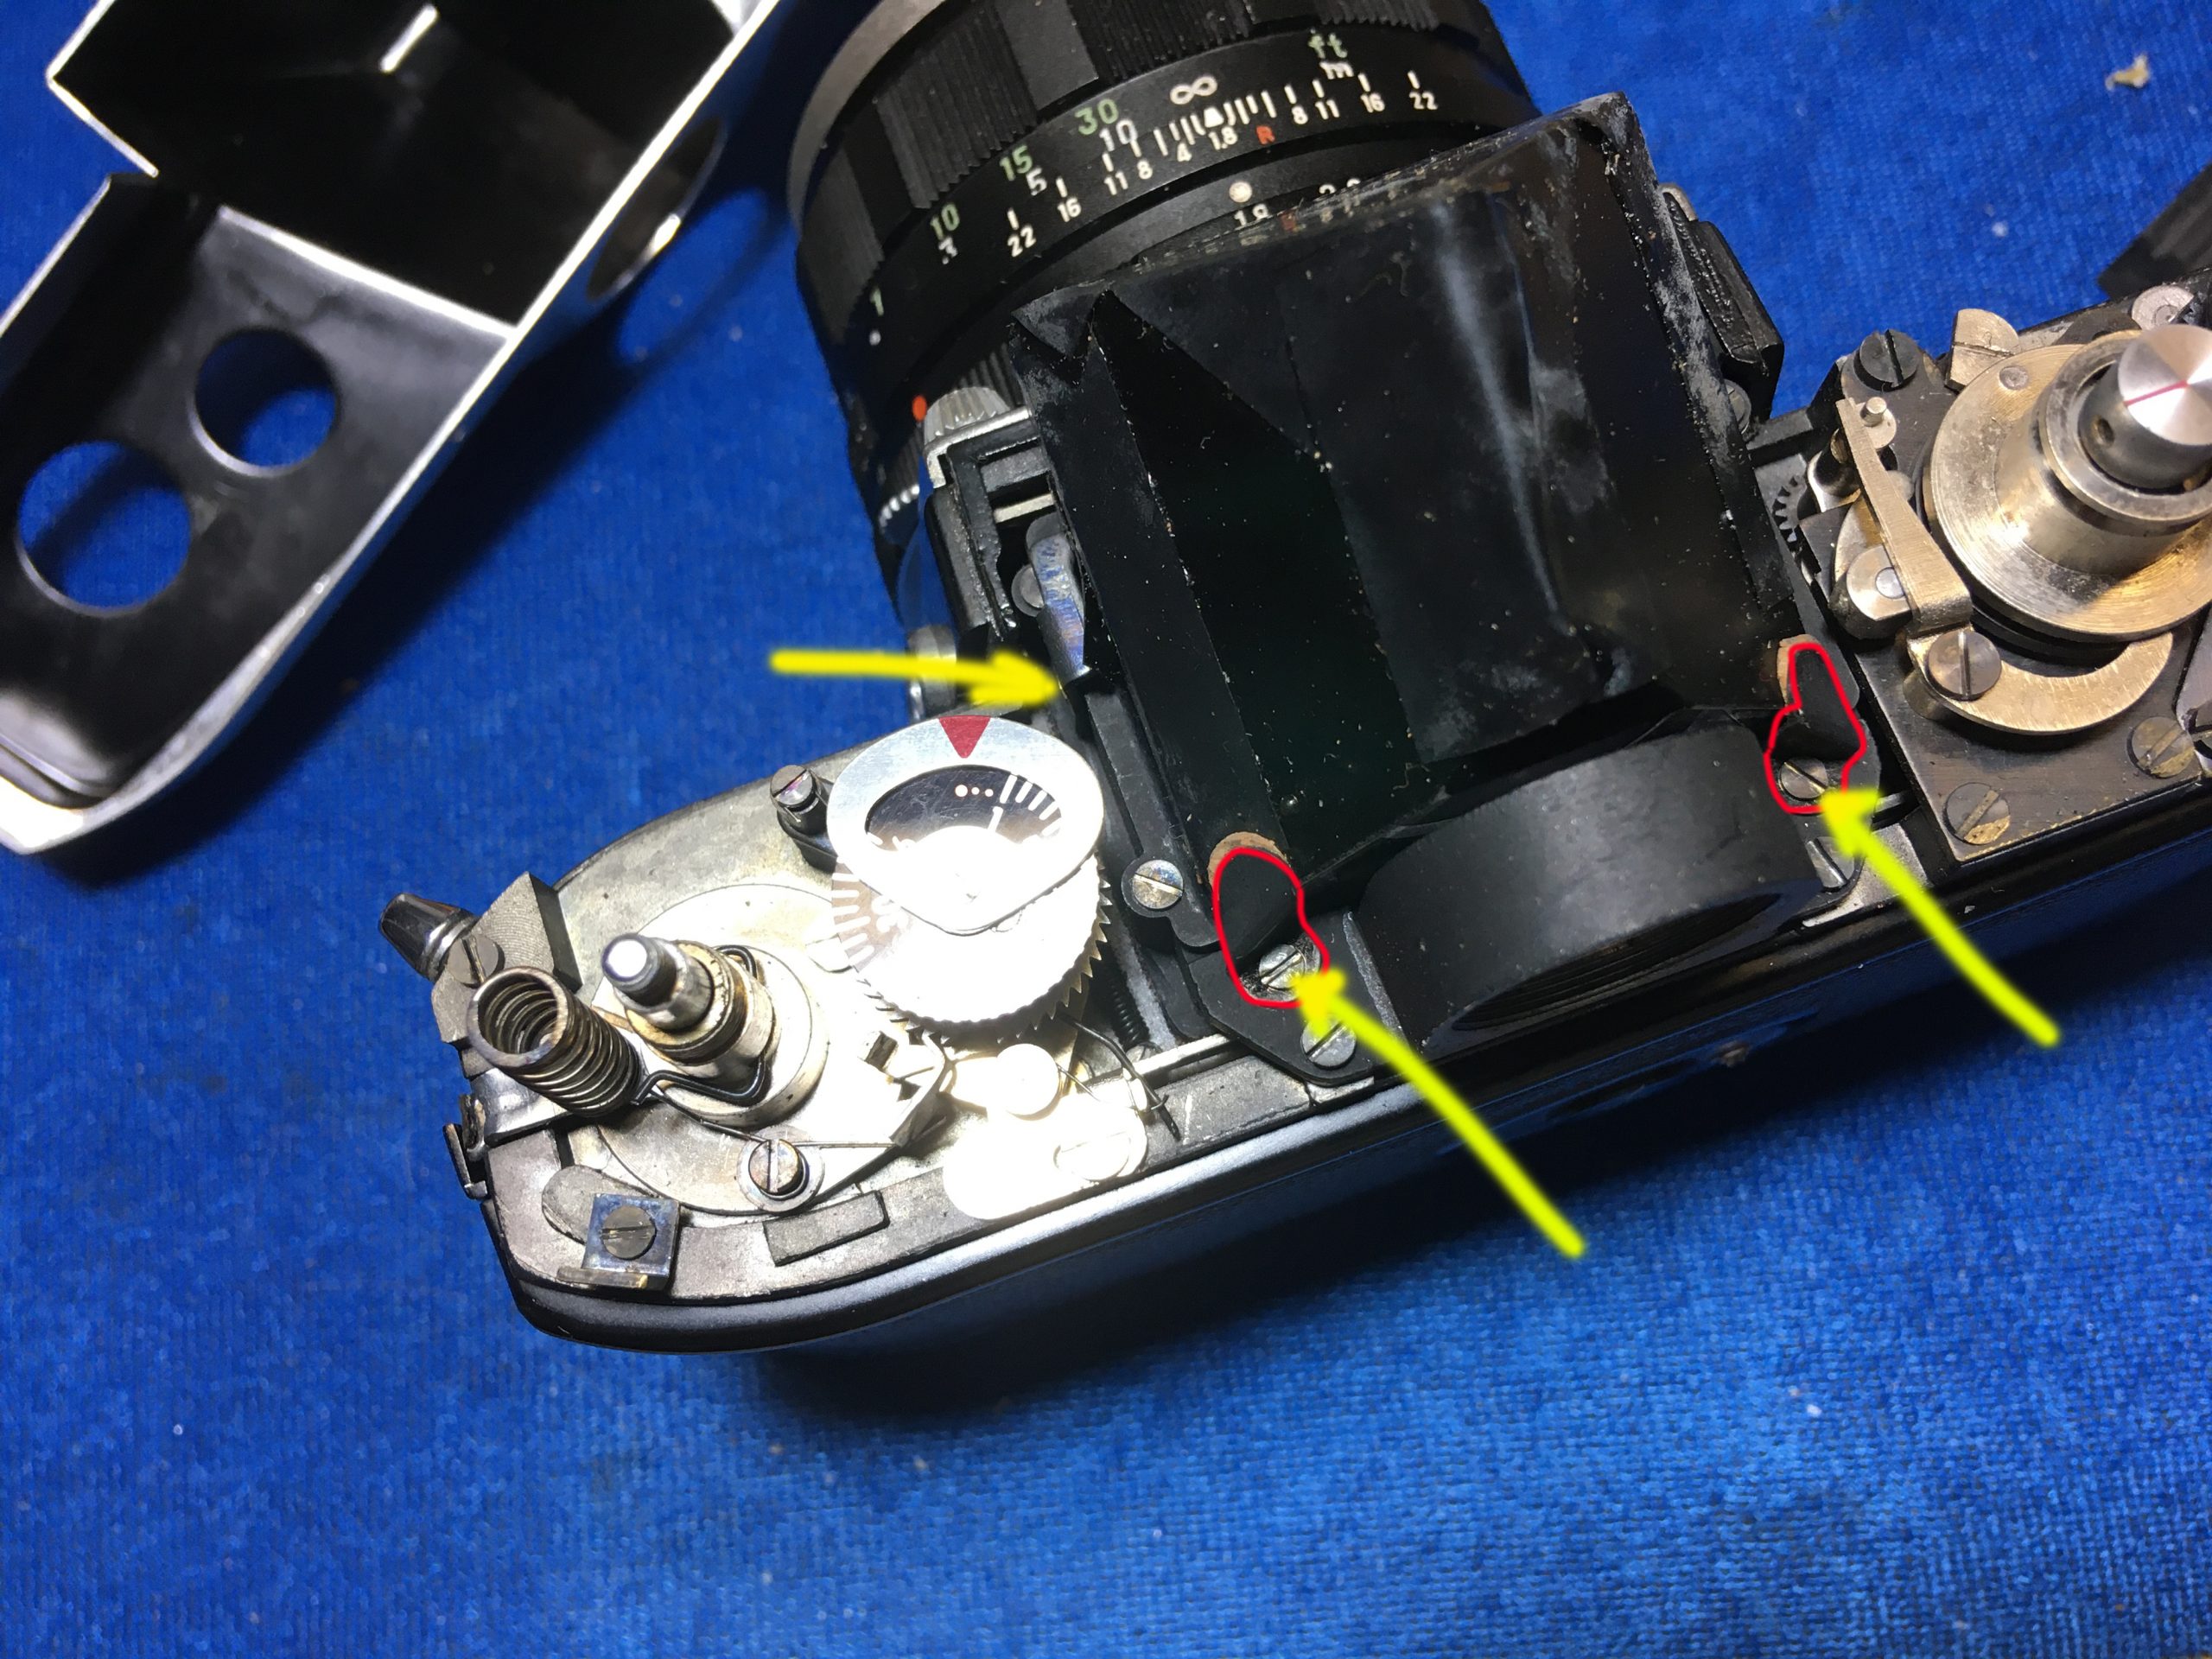
This is the one that is accessible on the left – the one on the other side is not! This one only needs to be loosened.
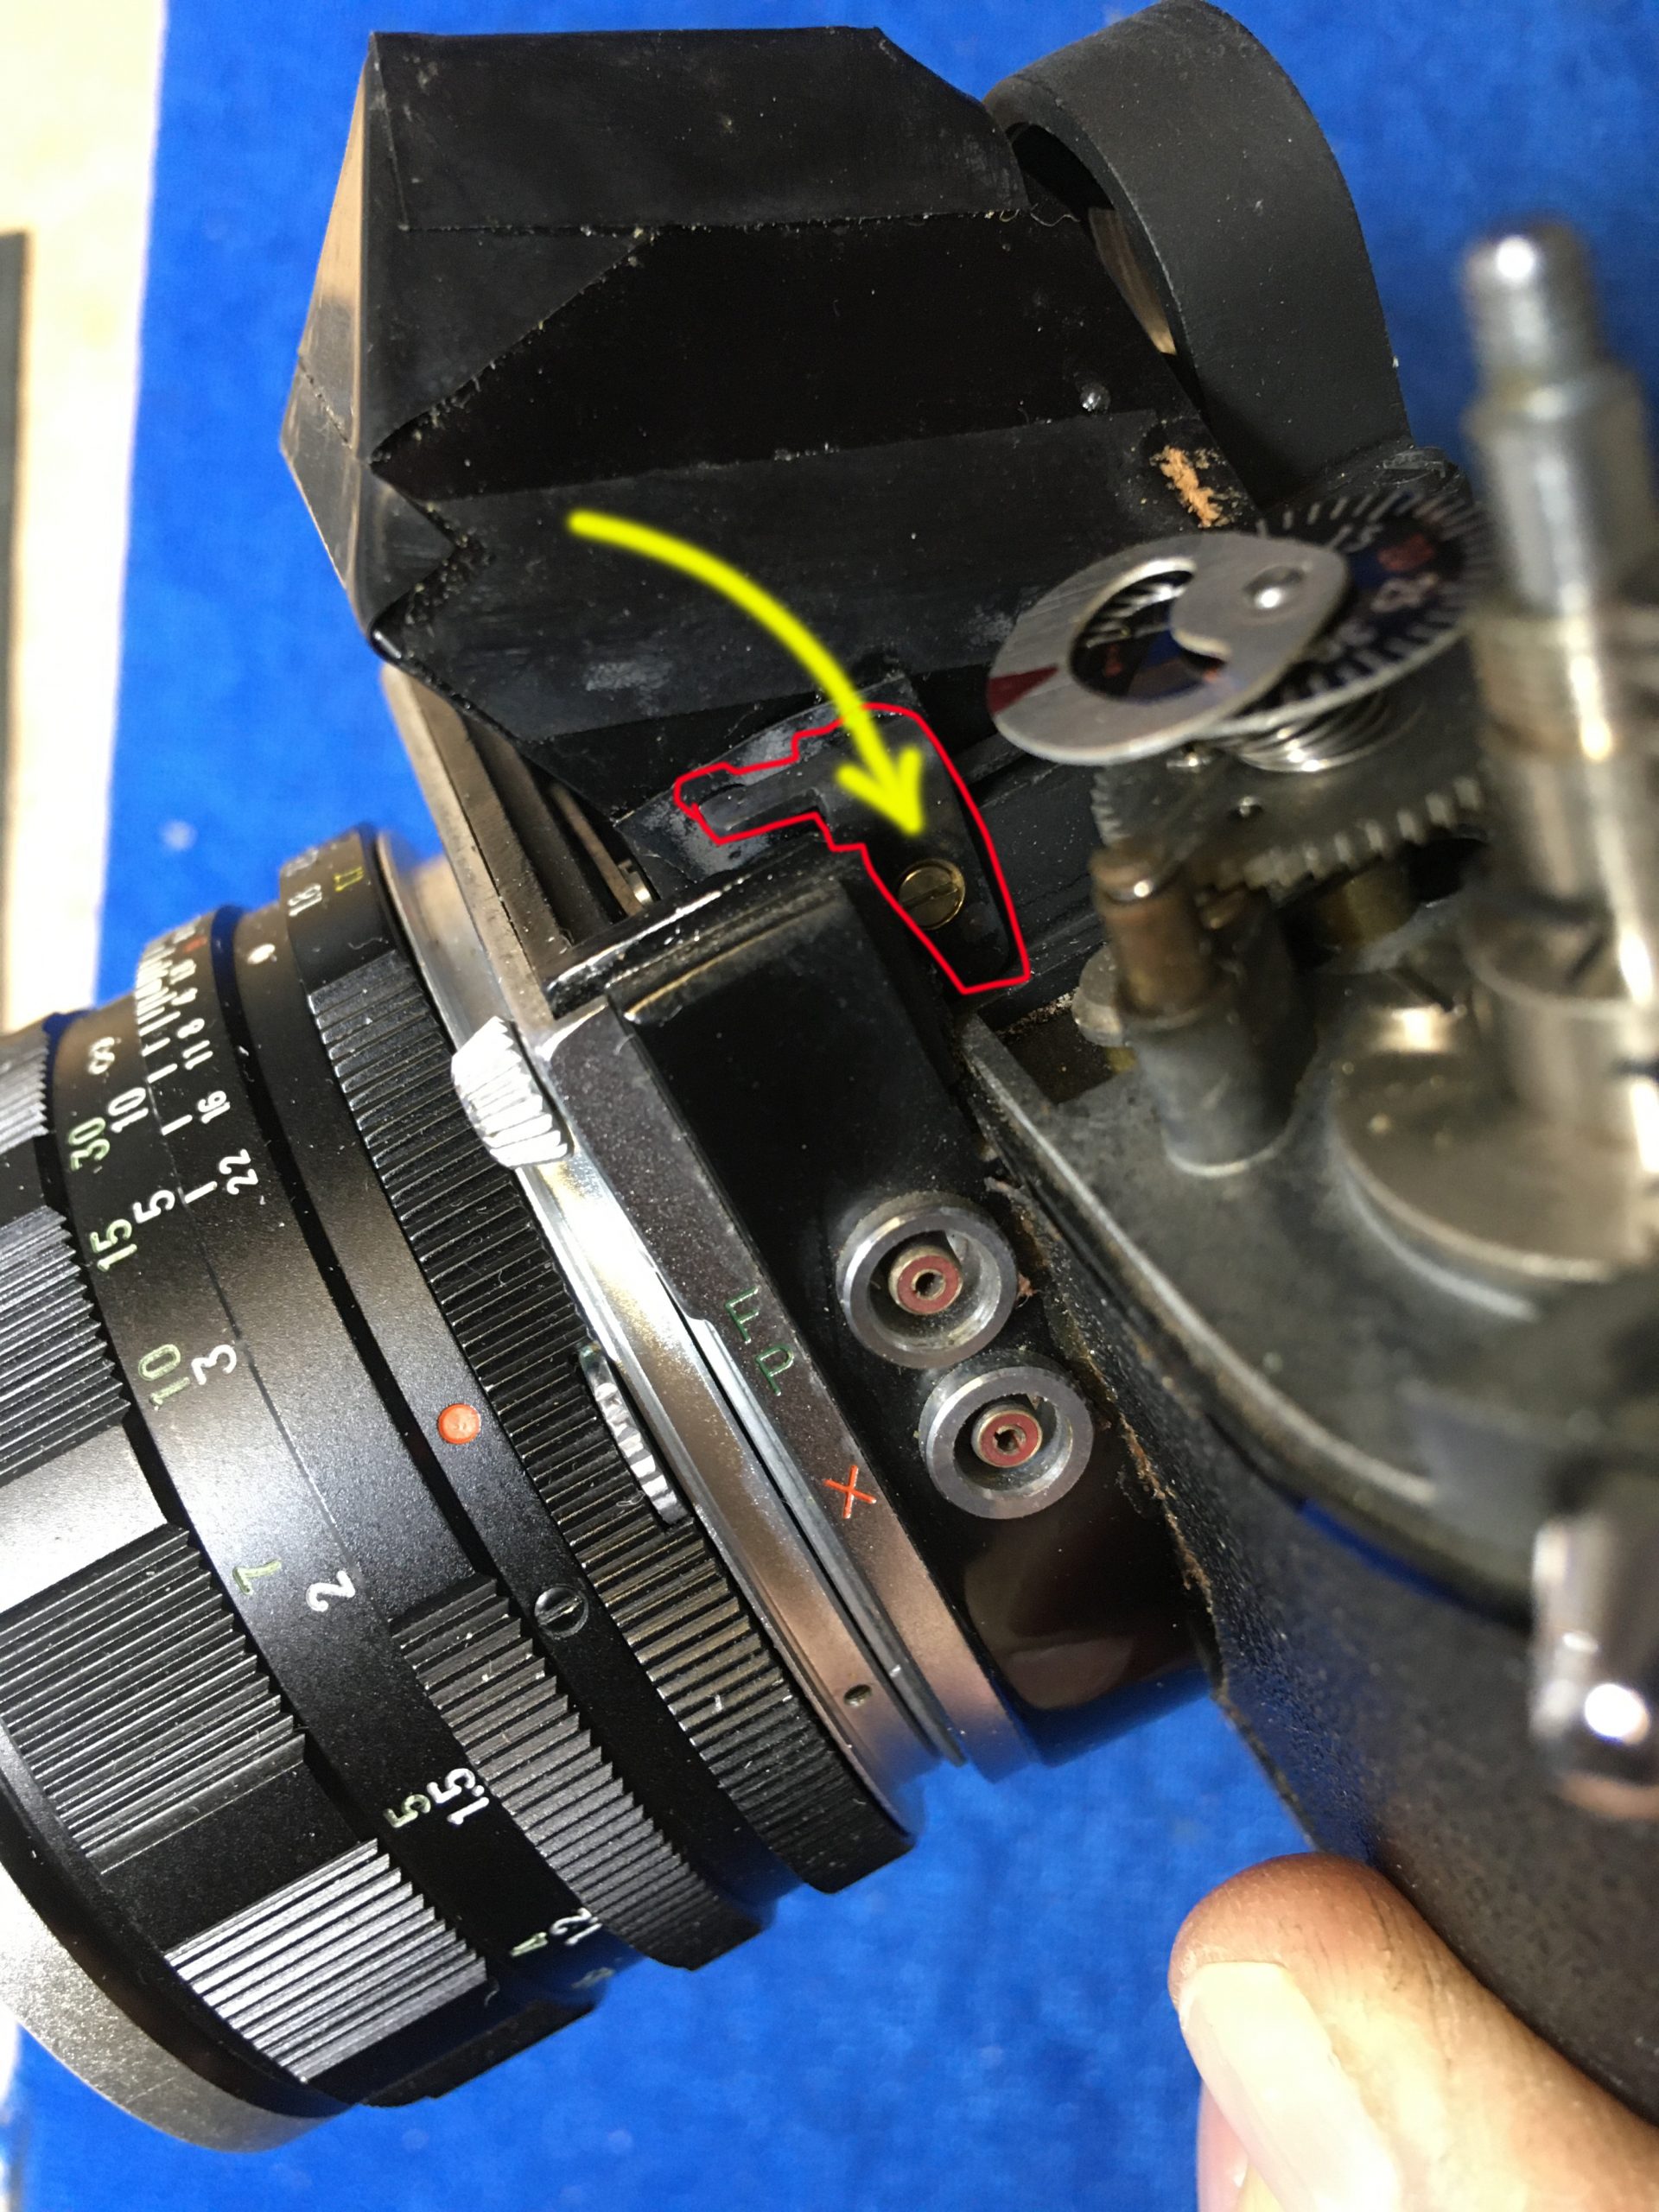

Once having removed the screws and brackets, the prism has to be lifted about ⅛” or 3mm upwards to release it. Here is mine and, though not really very visible here, the specs that you can see are fungus ‘spiders’ settled and spreading on the prism… easily removed with a 3%-10% peroxide solution applied with a soft artists’ paintbrush and a quick wipe-off – no costly coatings to worry about here, anyway! 🙂
