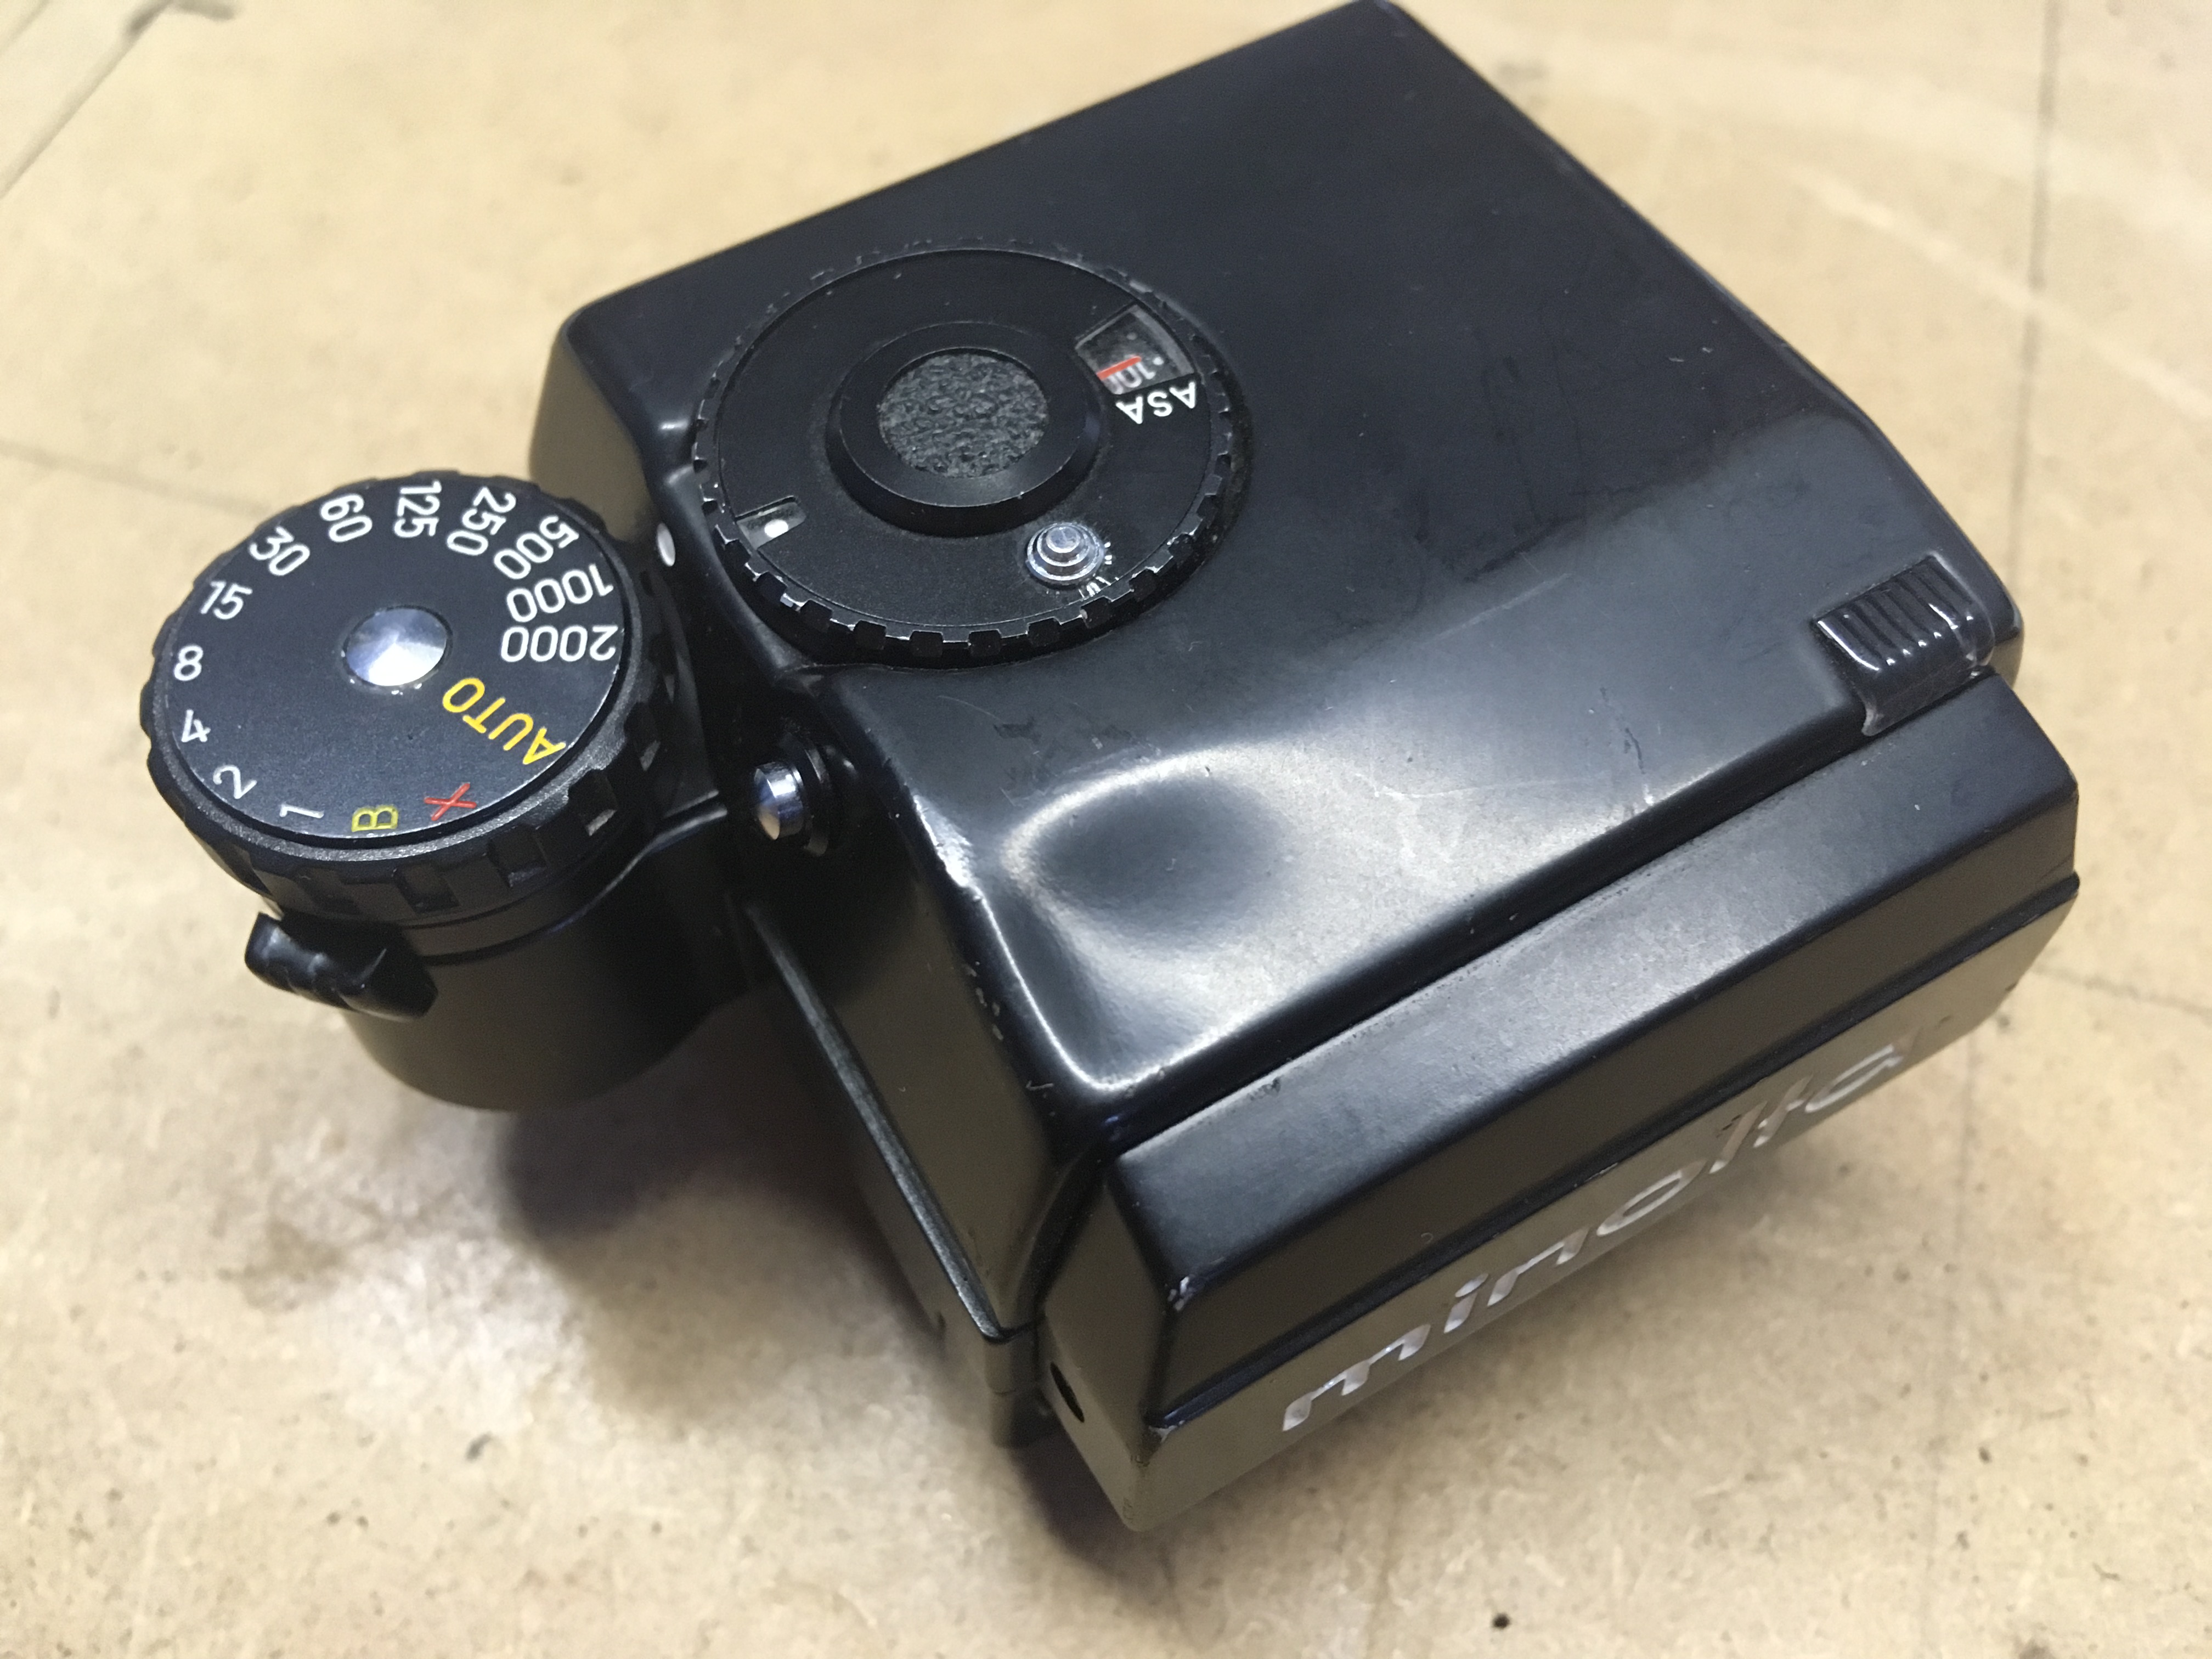
A Minolta AES viewfinder, rather desirable if not so dented! If it were only the dent, that would not be so bad, but usually other things have also suffered as a result of the bash that caused the dent in the first place. Let’s have a closer look ‘under the bonnet’…
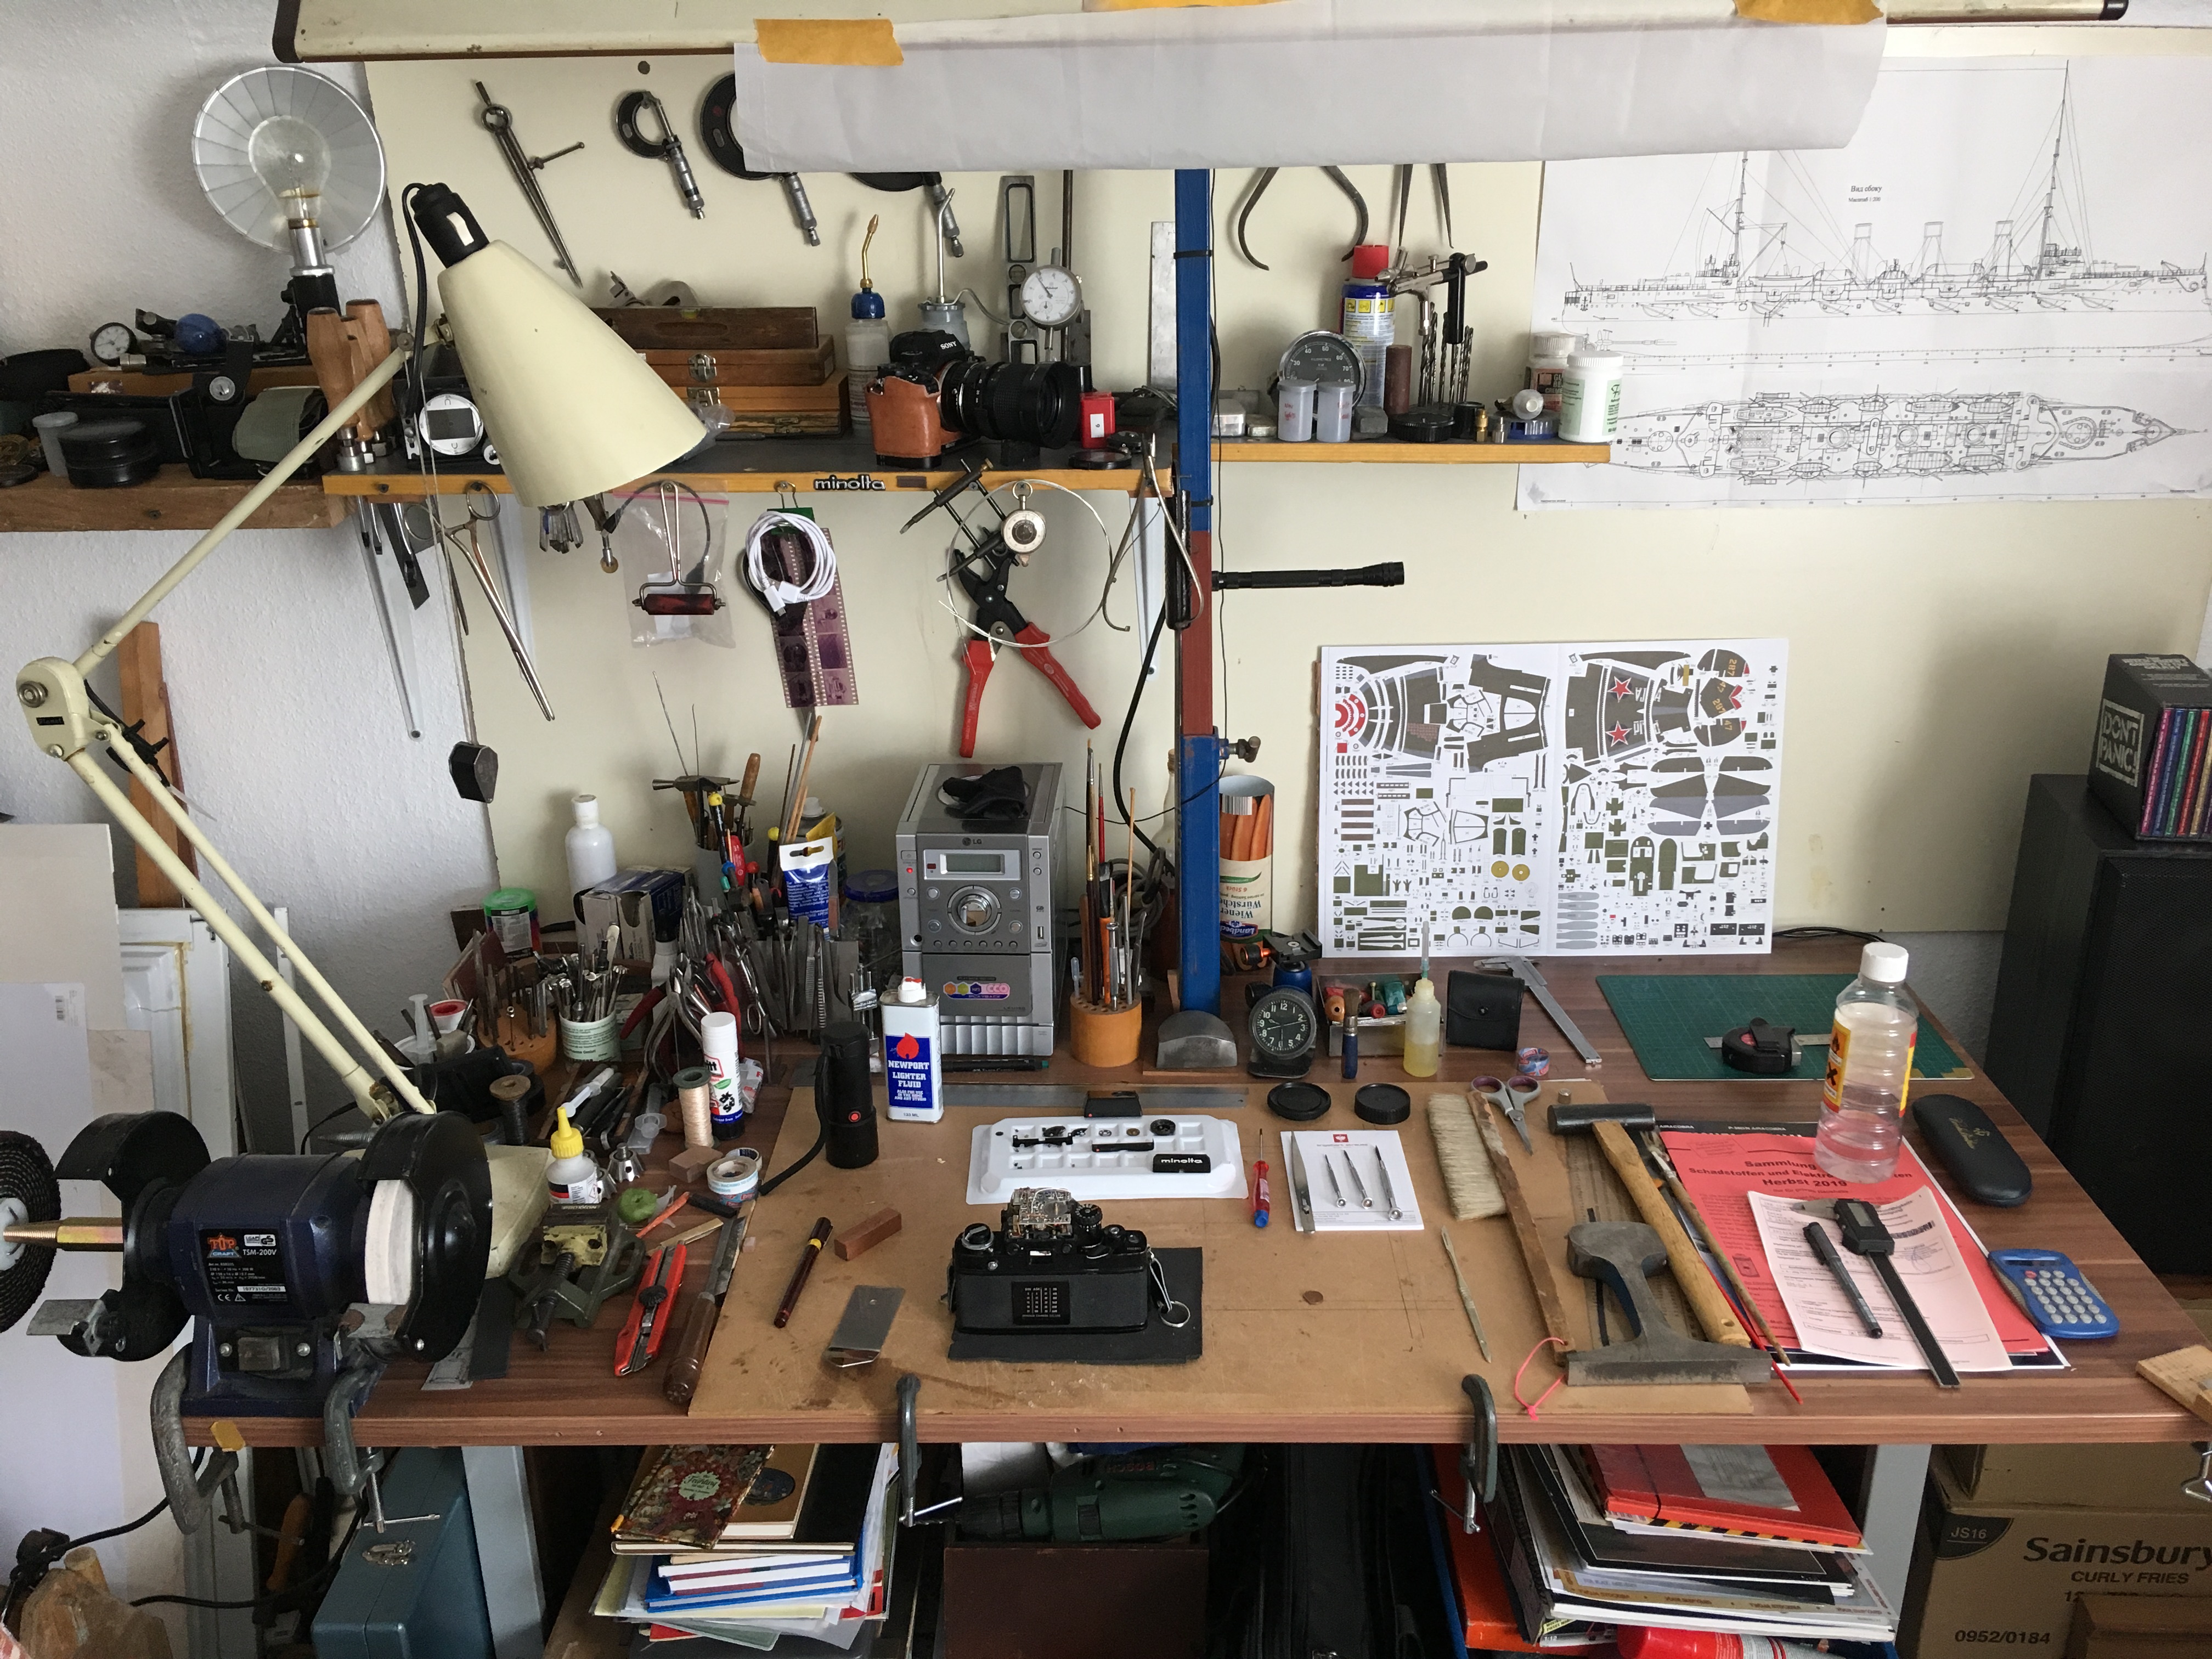
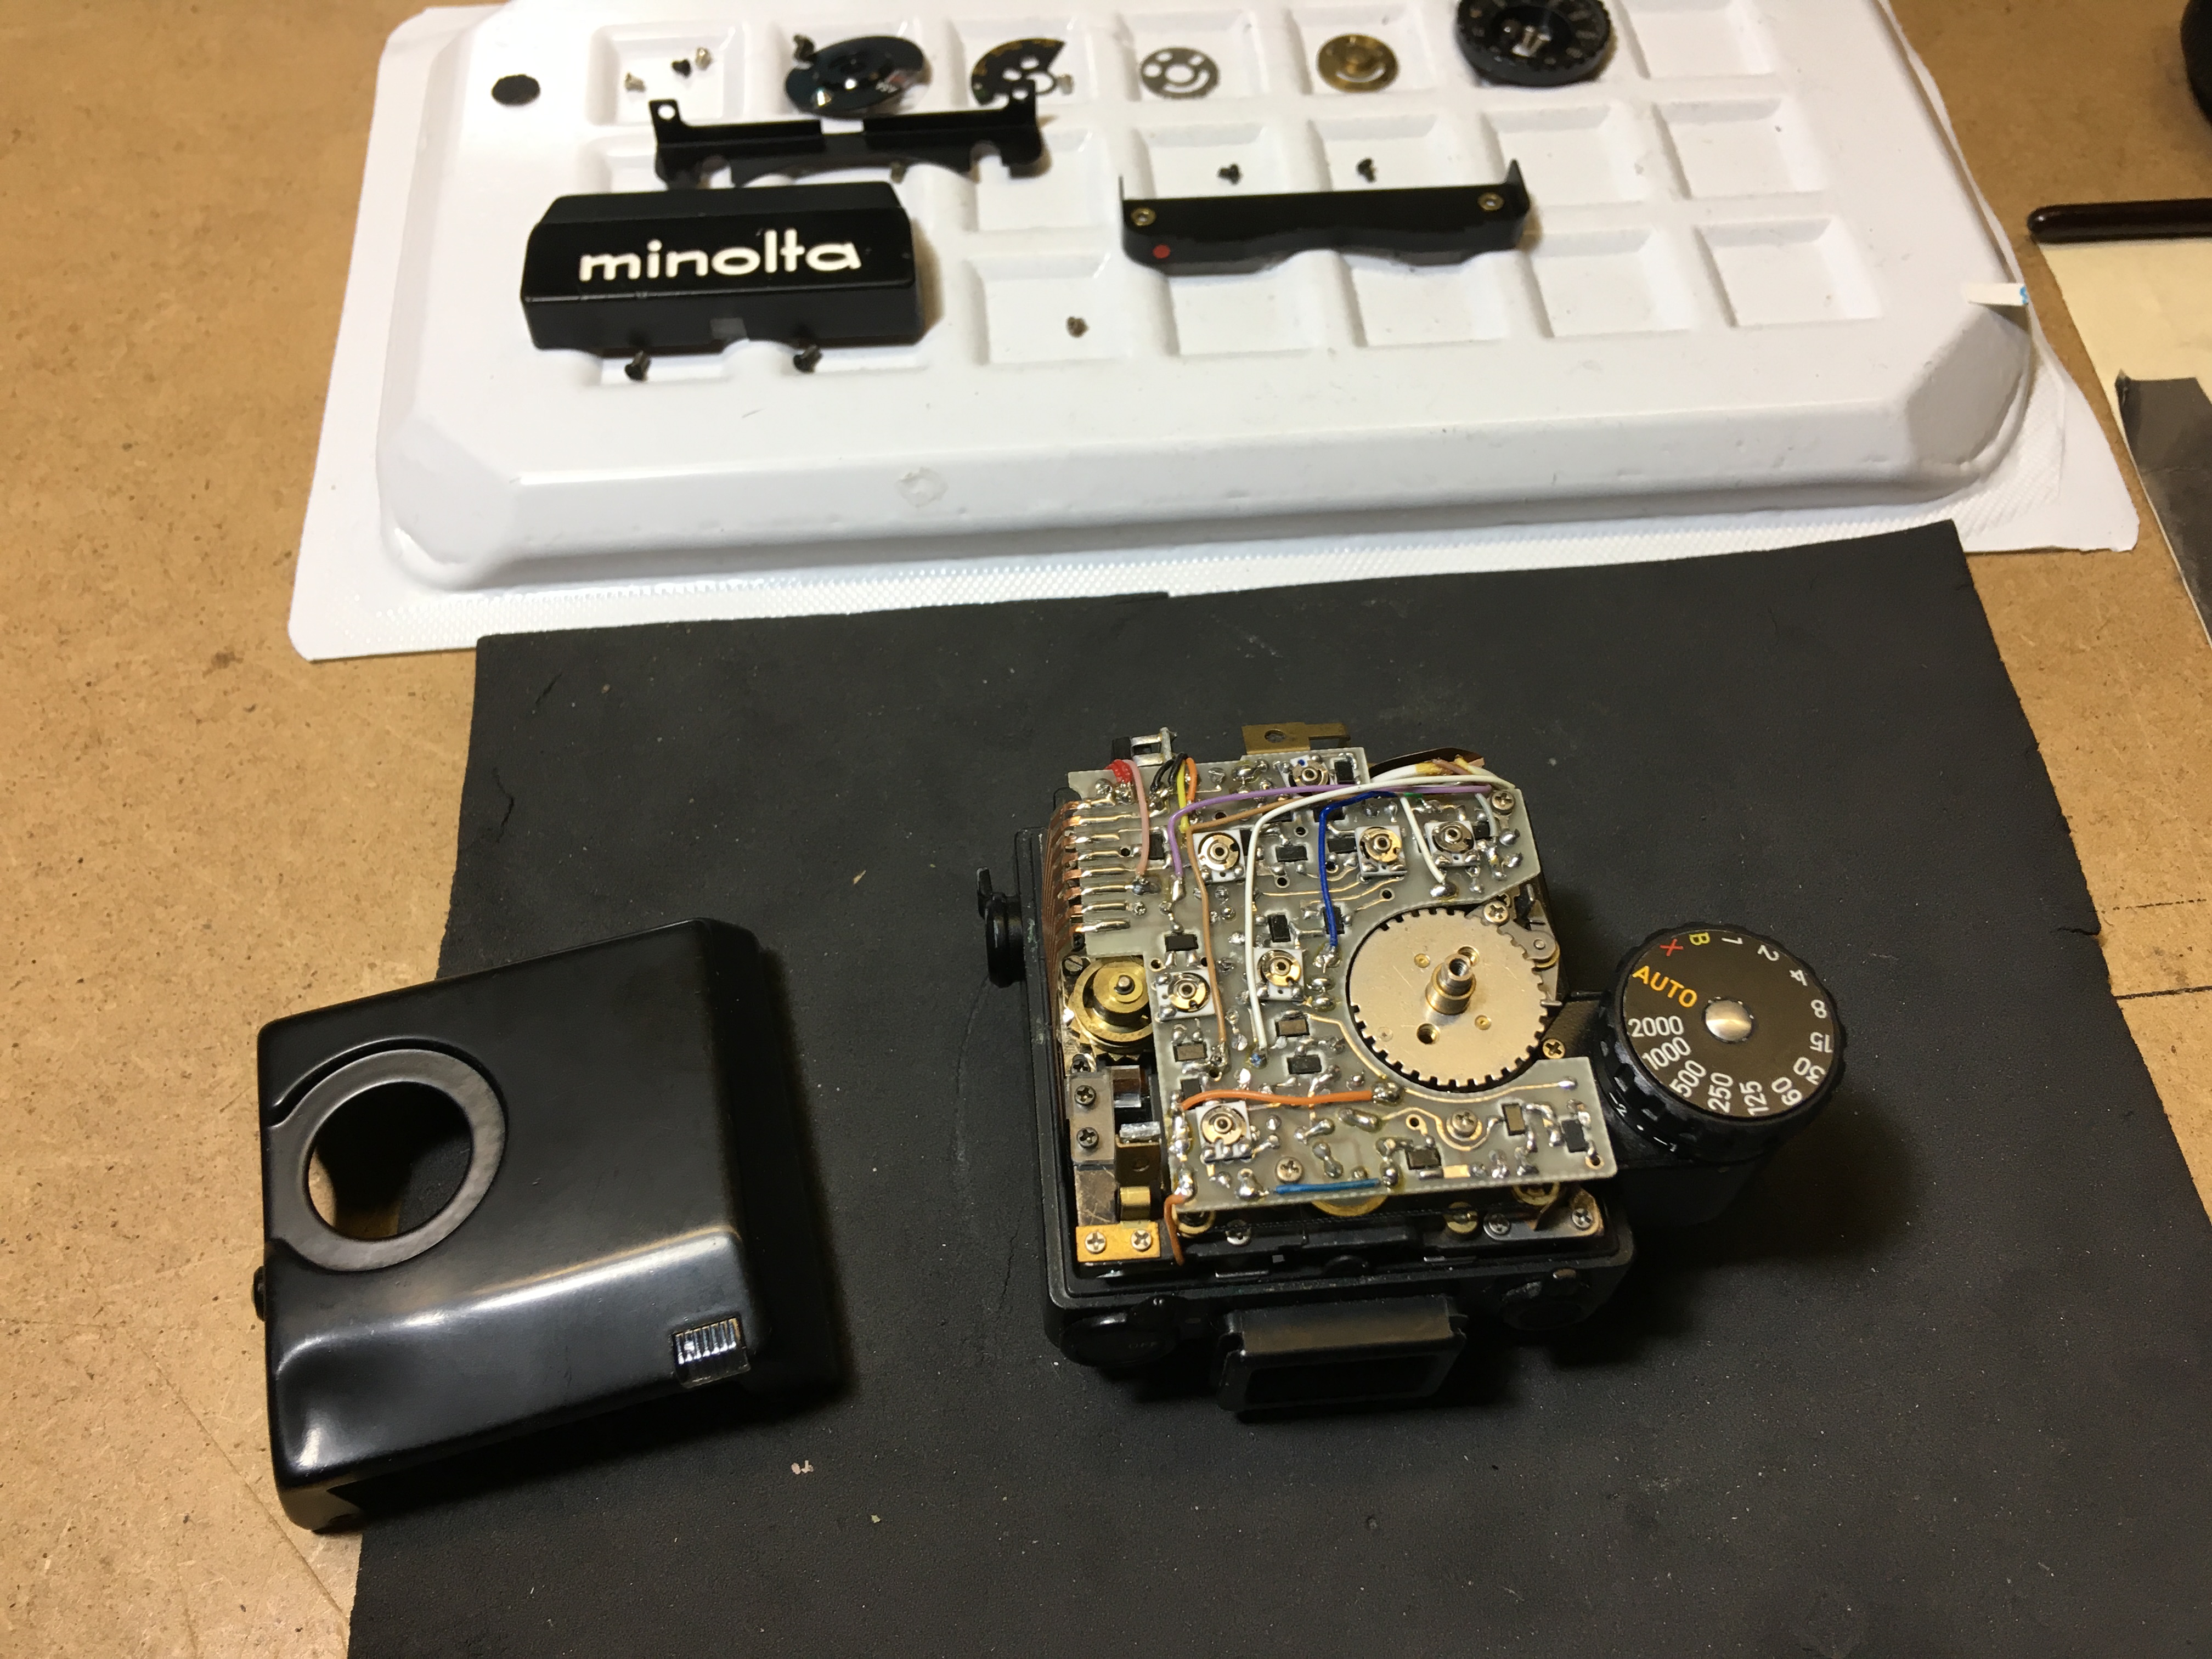
OK, this kind of space is all you need, so there is no excuse for not having a go yourself! Yes, I could have cleaned up before the photo, but it just goes to show the general arrangement. There are tools and materials for all sorts of tinkering and yes, while I’m actually working, there is more space around the working area as such.
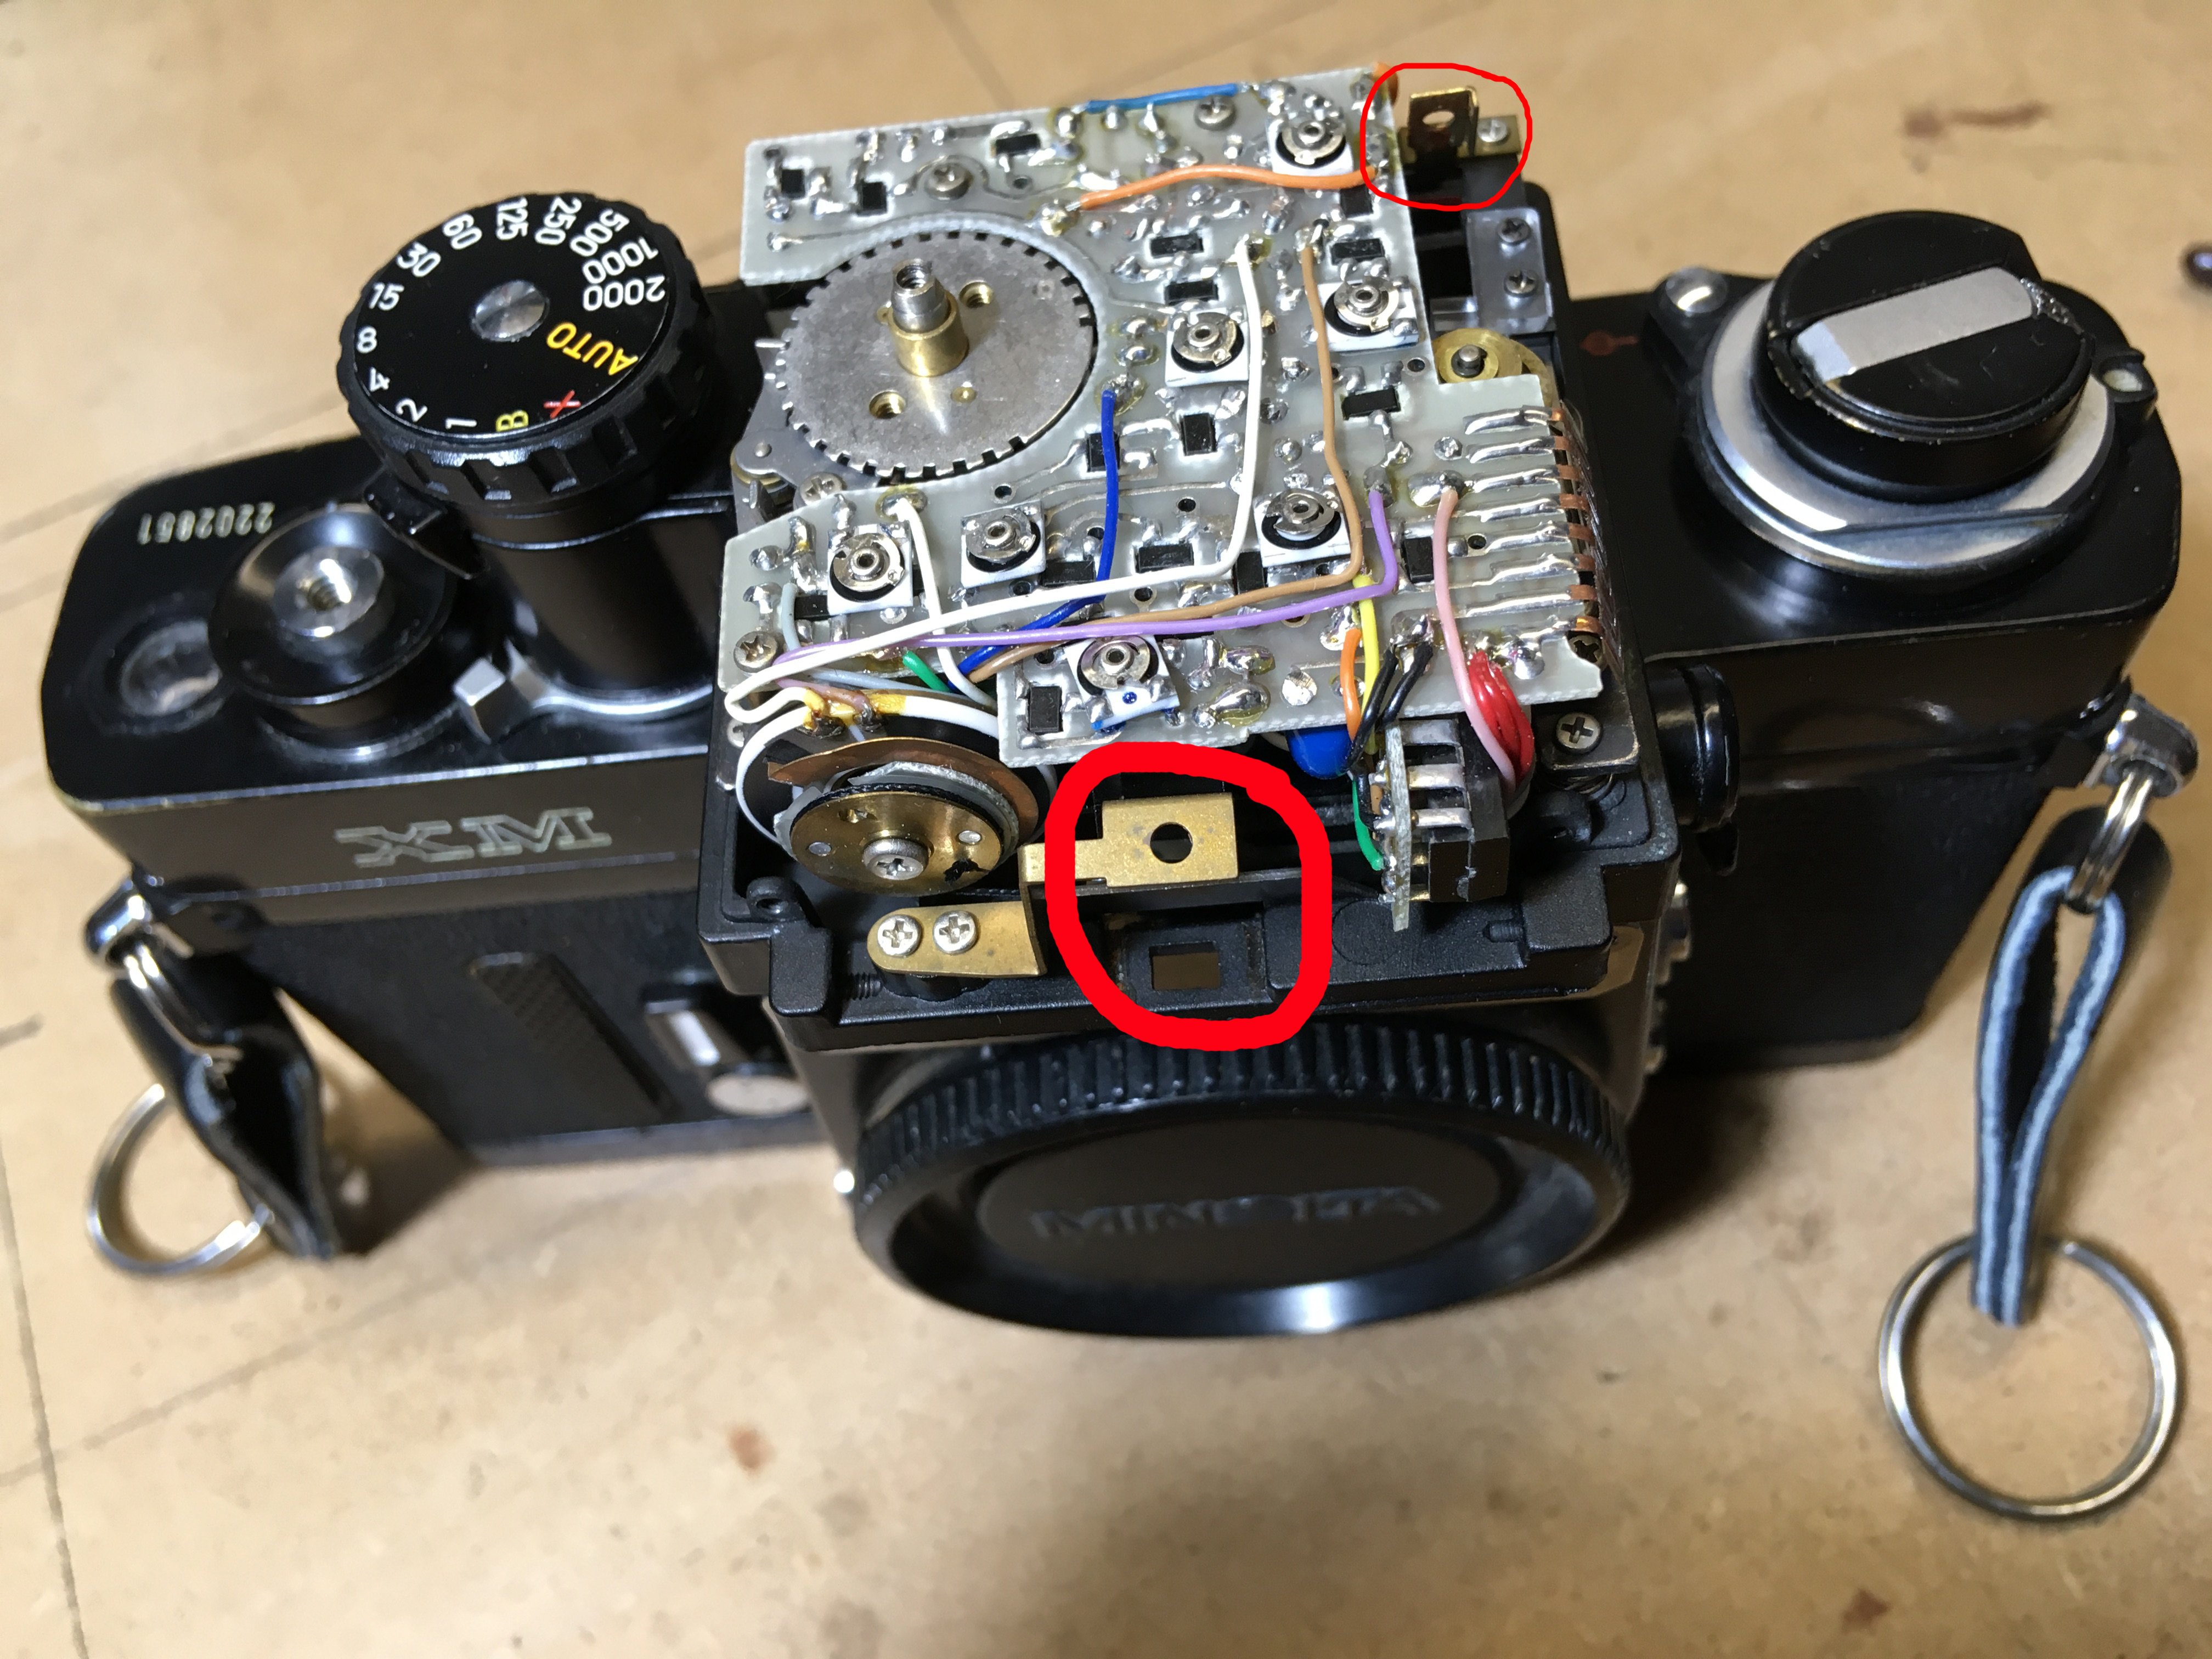
So, having taken the top off (easily enough done on this) it can be seen that the dent wasn’t all that was wrong: the mirror and lens which allow the numbers on the aperture-ring to show in the finder are gone! The thin red outline shows the aperture-link in the ‘normal’ position without a lens in place – more of that in a minute.
Here a clearer view from the top and at the back, the long mirror for the shutter-speed display is also missing, but thankfully had dropped inside and could be reduced in its proper place 🙂
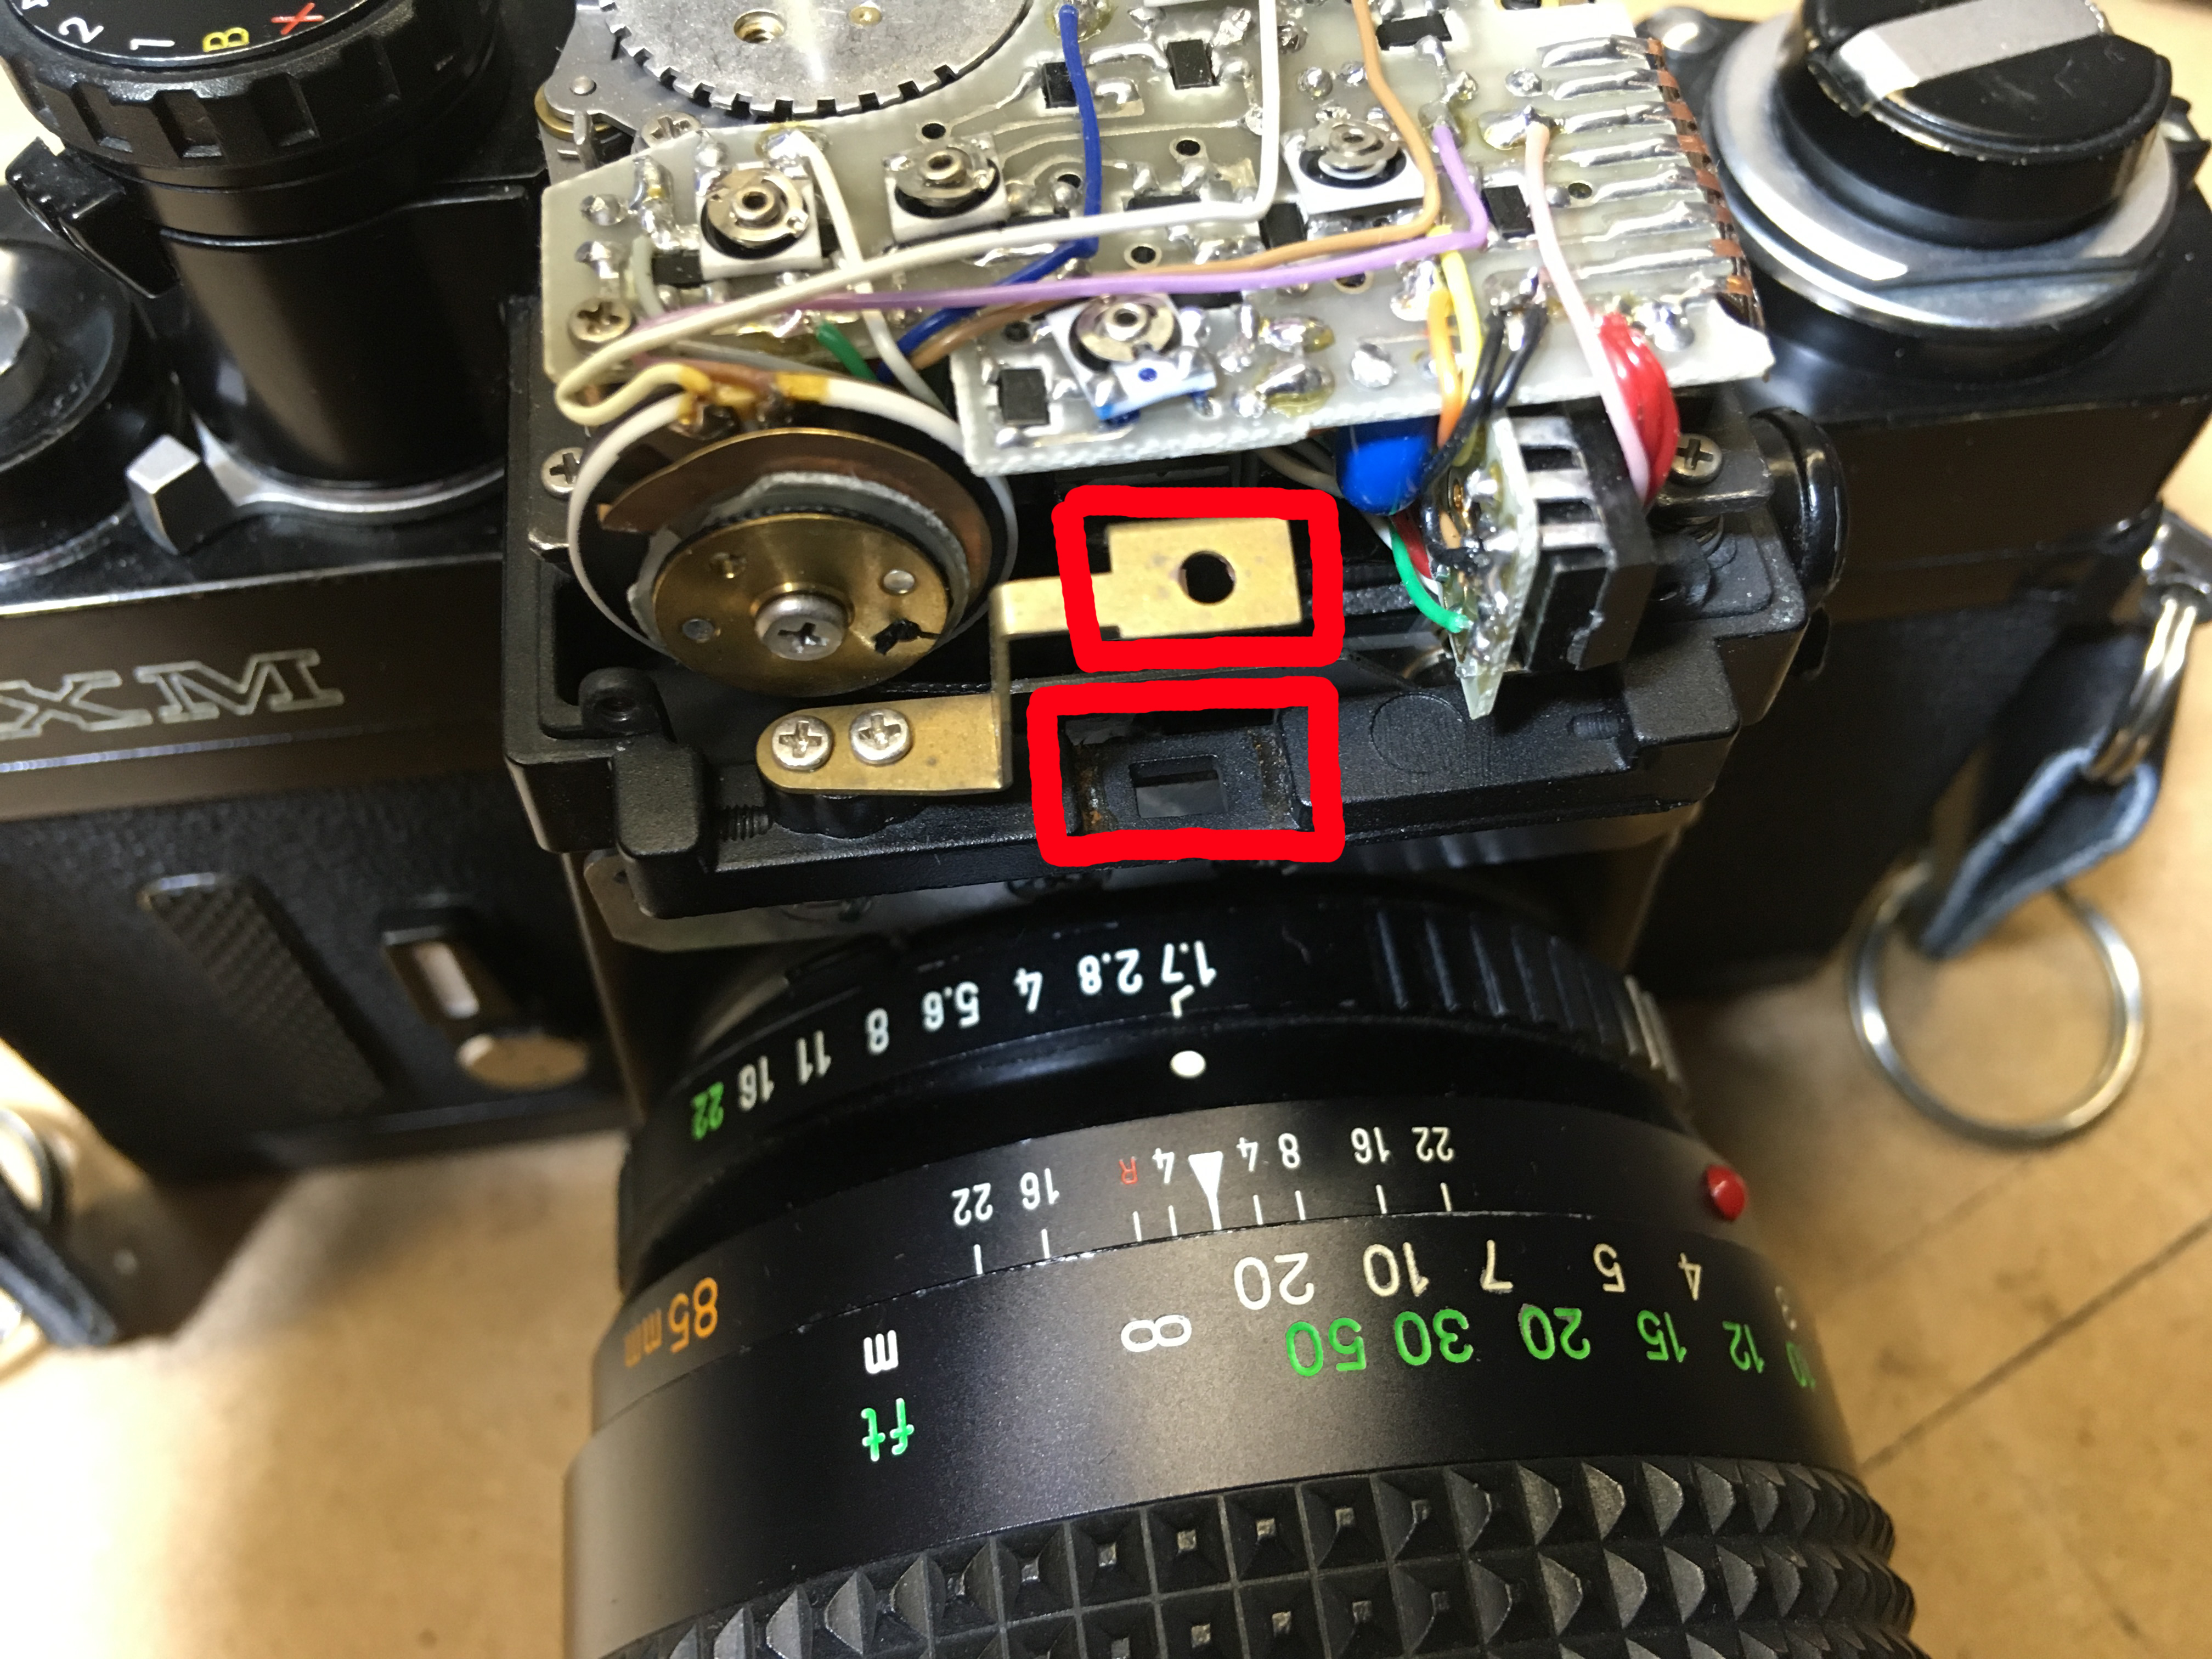
Here even more obvious, the REASON for what it missing and how it lines up with the lens ring. All I needed was to find a mirror and lens in my goodies-box and the case was solved. If I’m honest, a piece of 1mm thick polished Stainless would replace any missing mirror if you don’t have an original handy (the mirroring on these is on the FRONT surface, not on the back like a household mirror). For the lens, any one cut out of another Minolta SLR will do, even if you do have to trim it to size, it will do the same job since the distances of all finders from the lens-ring are very similar.
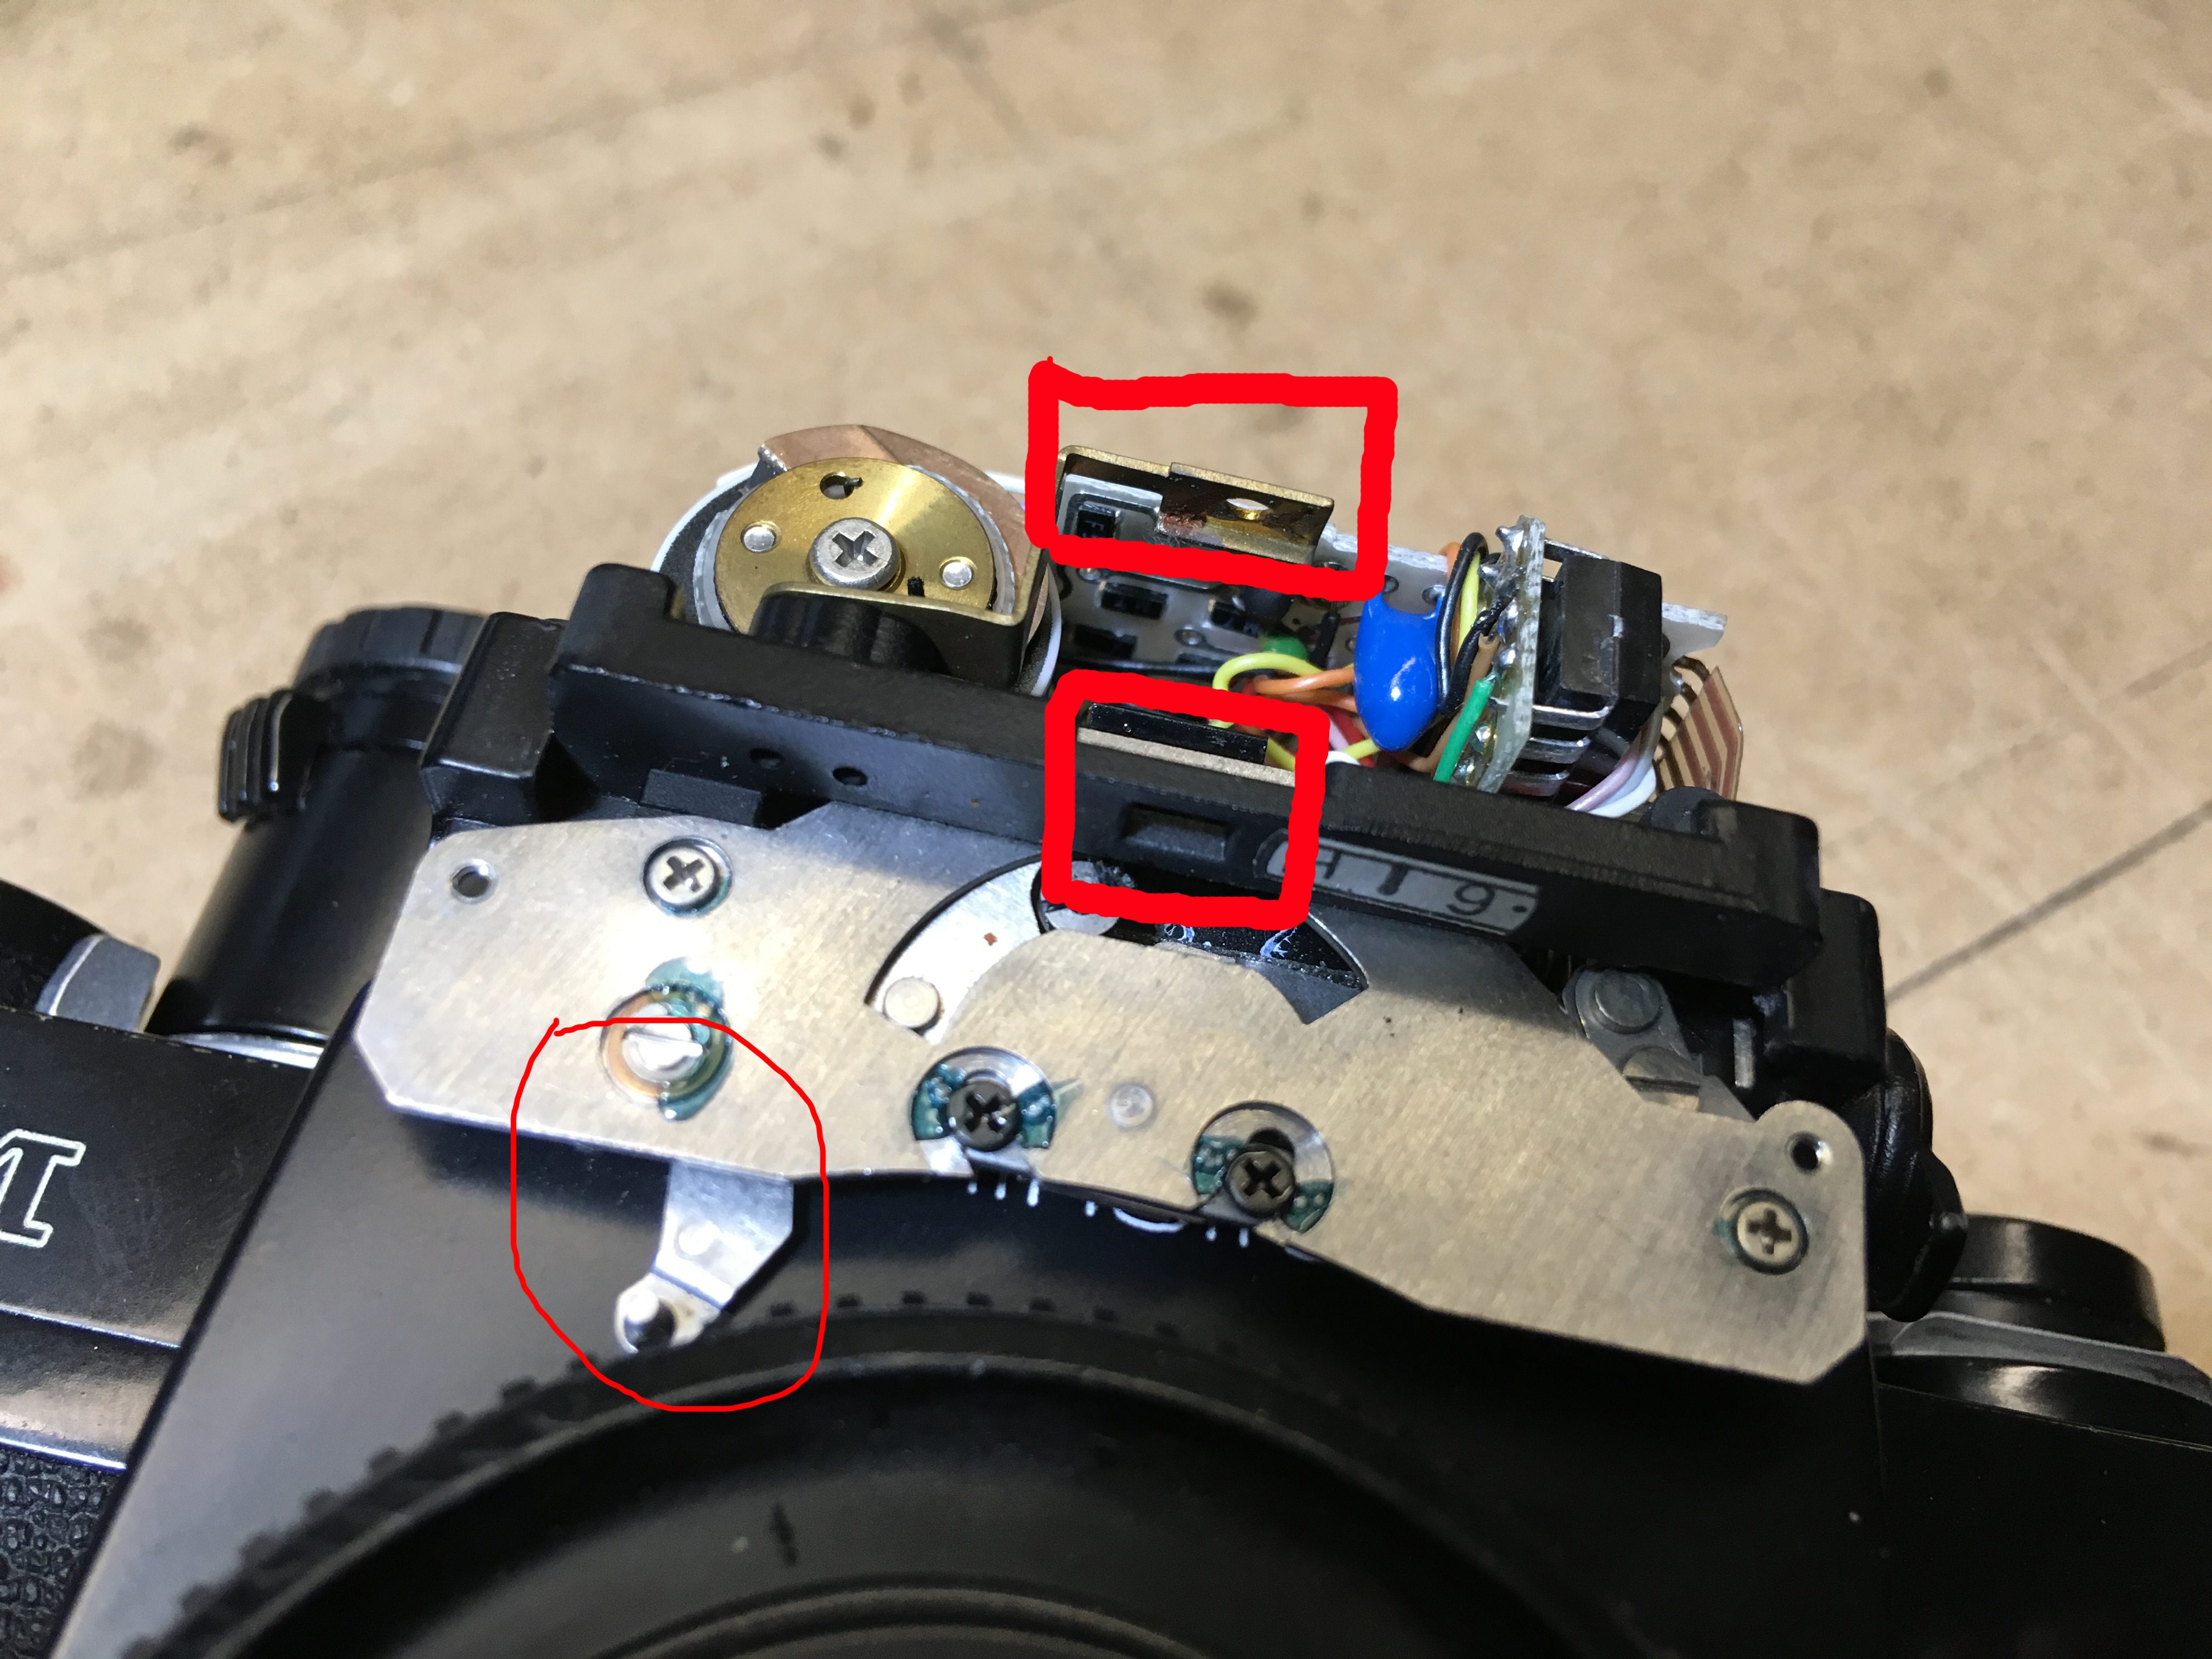
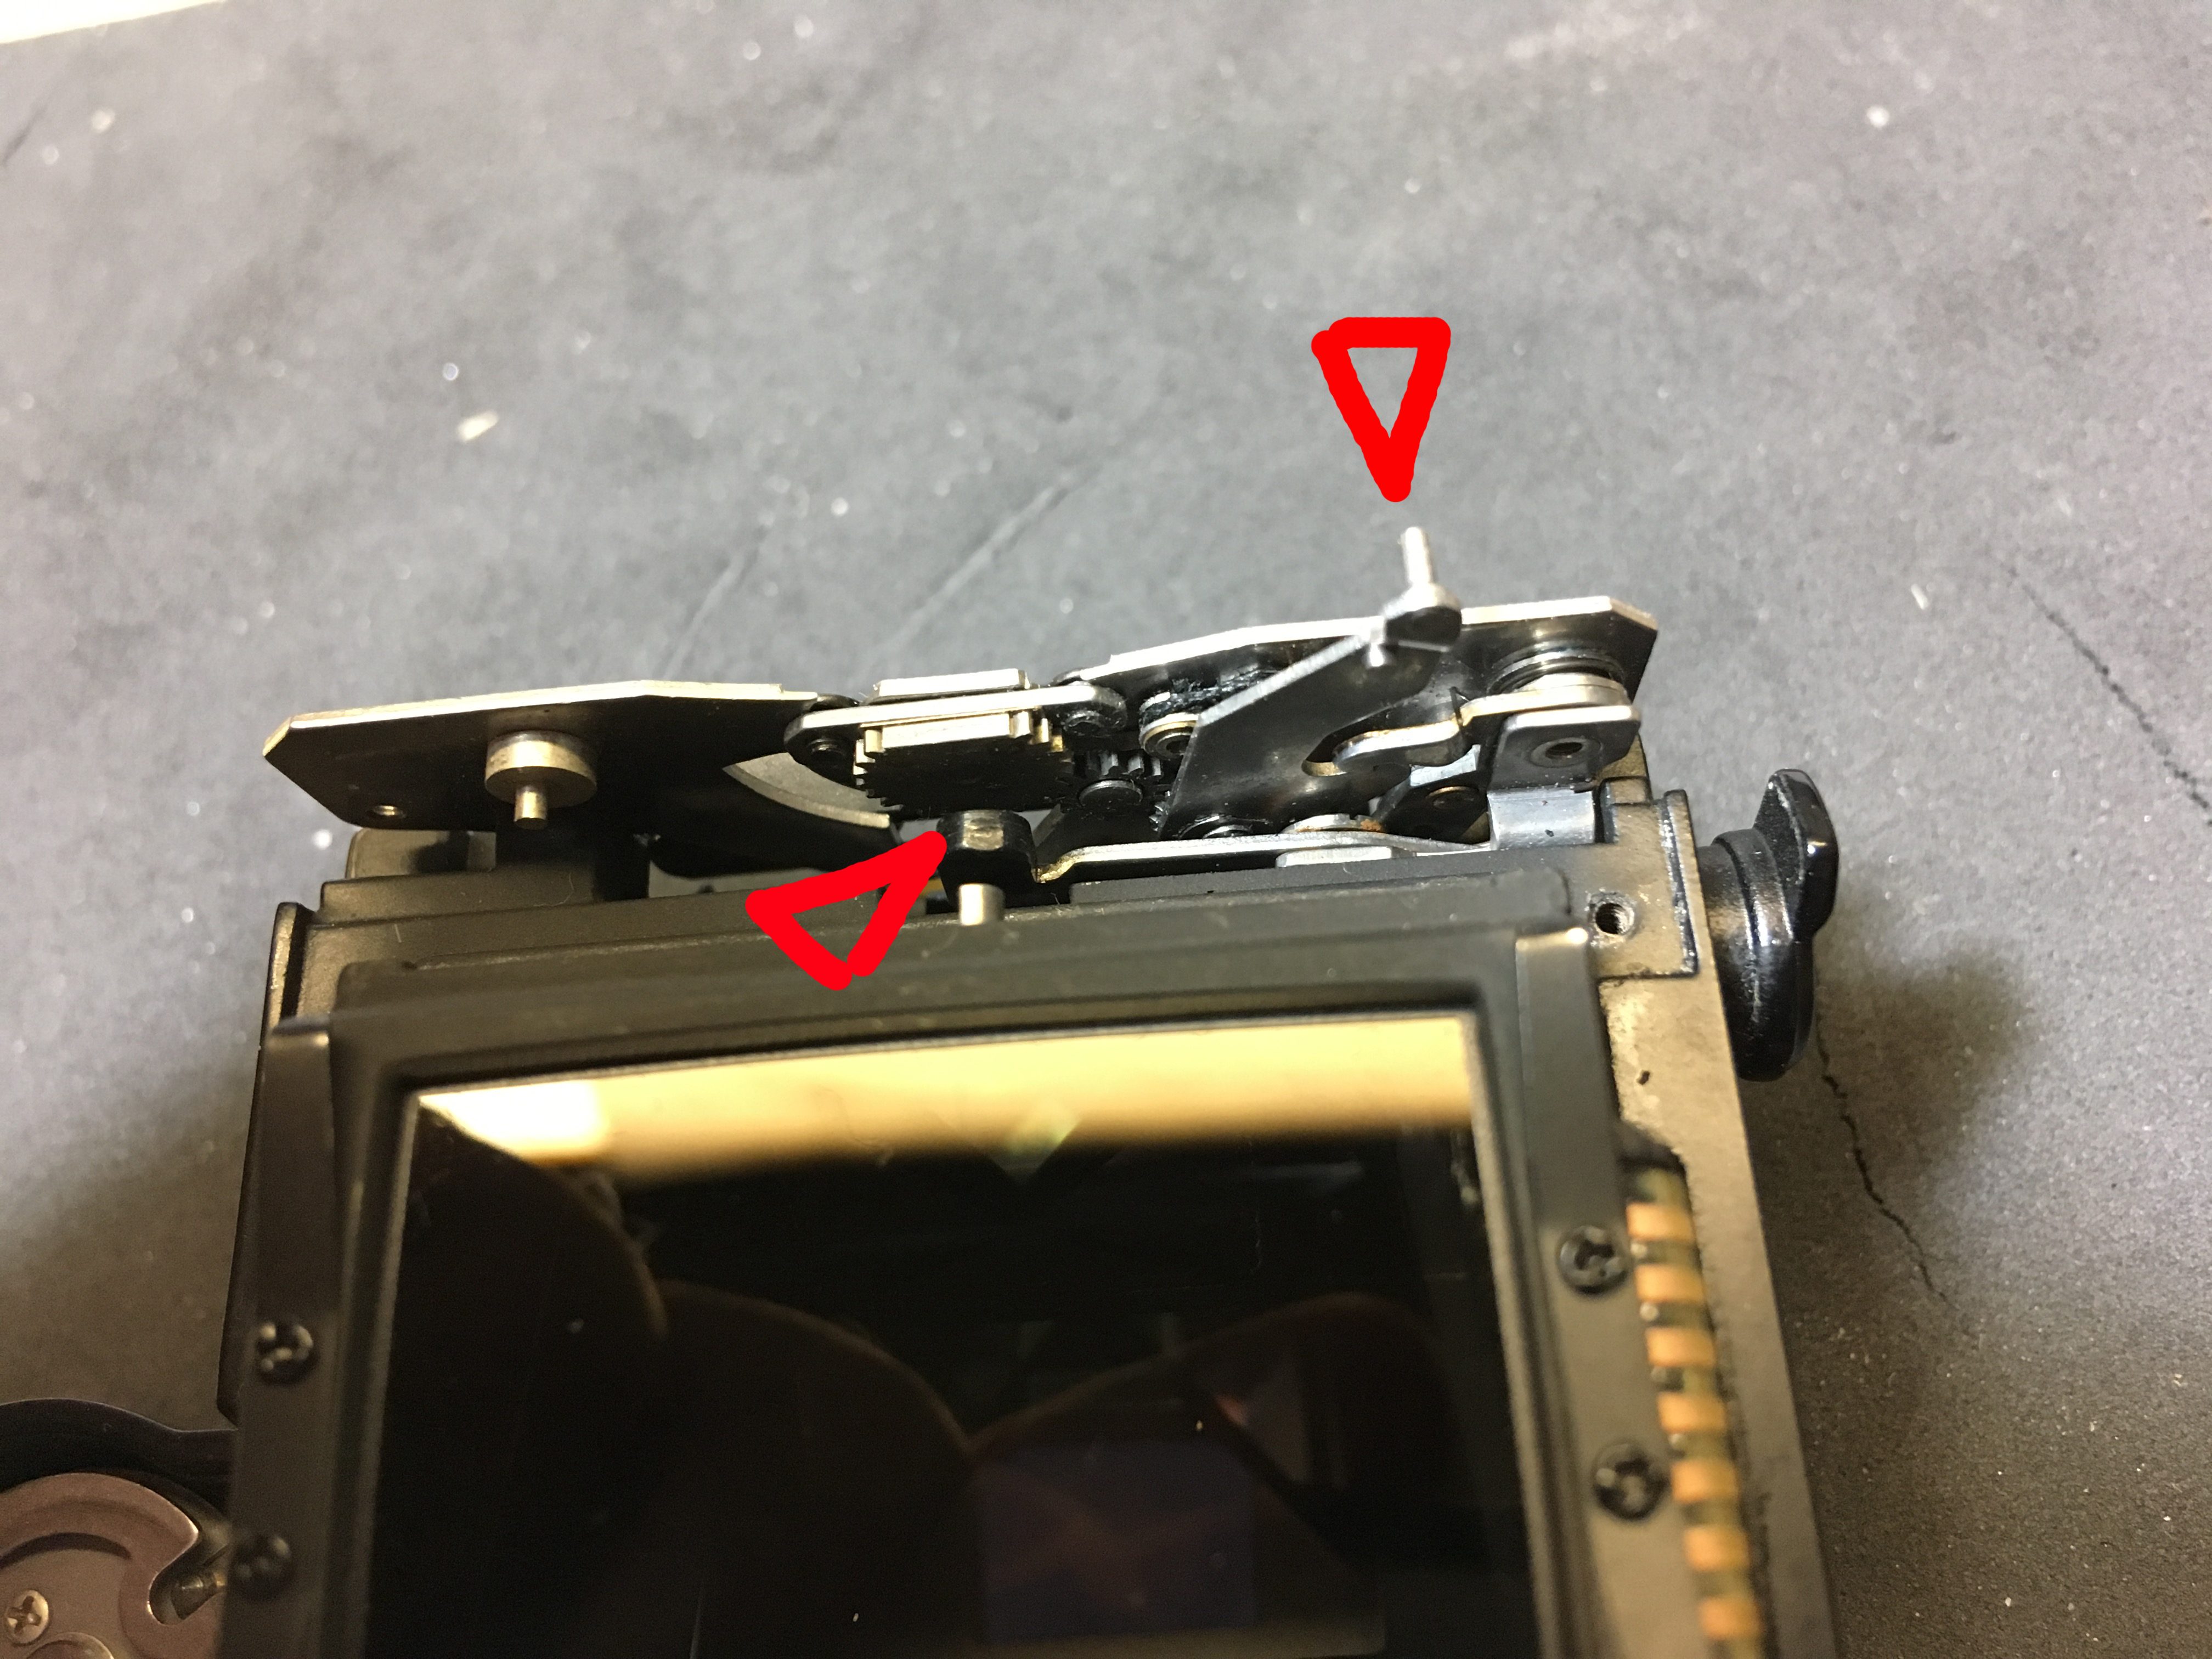
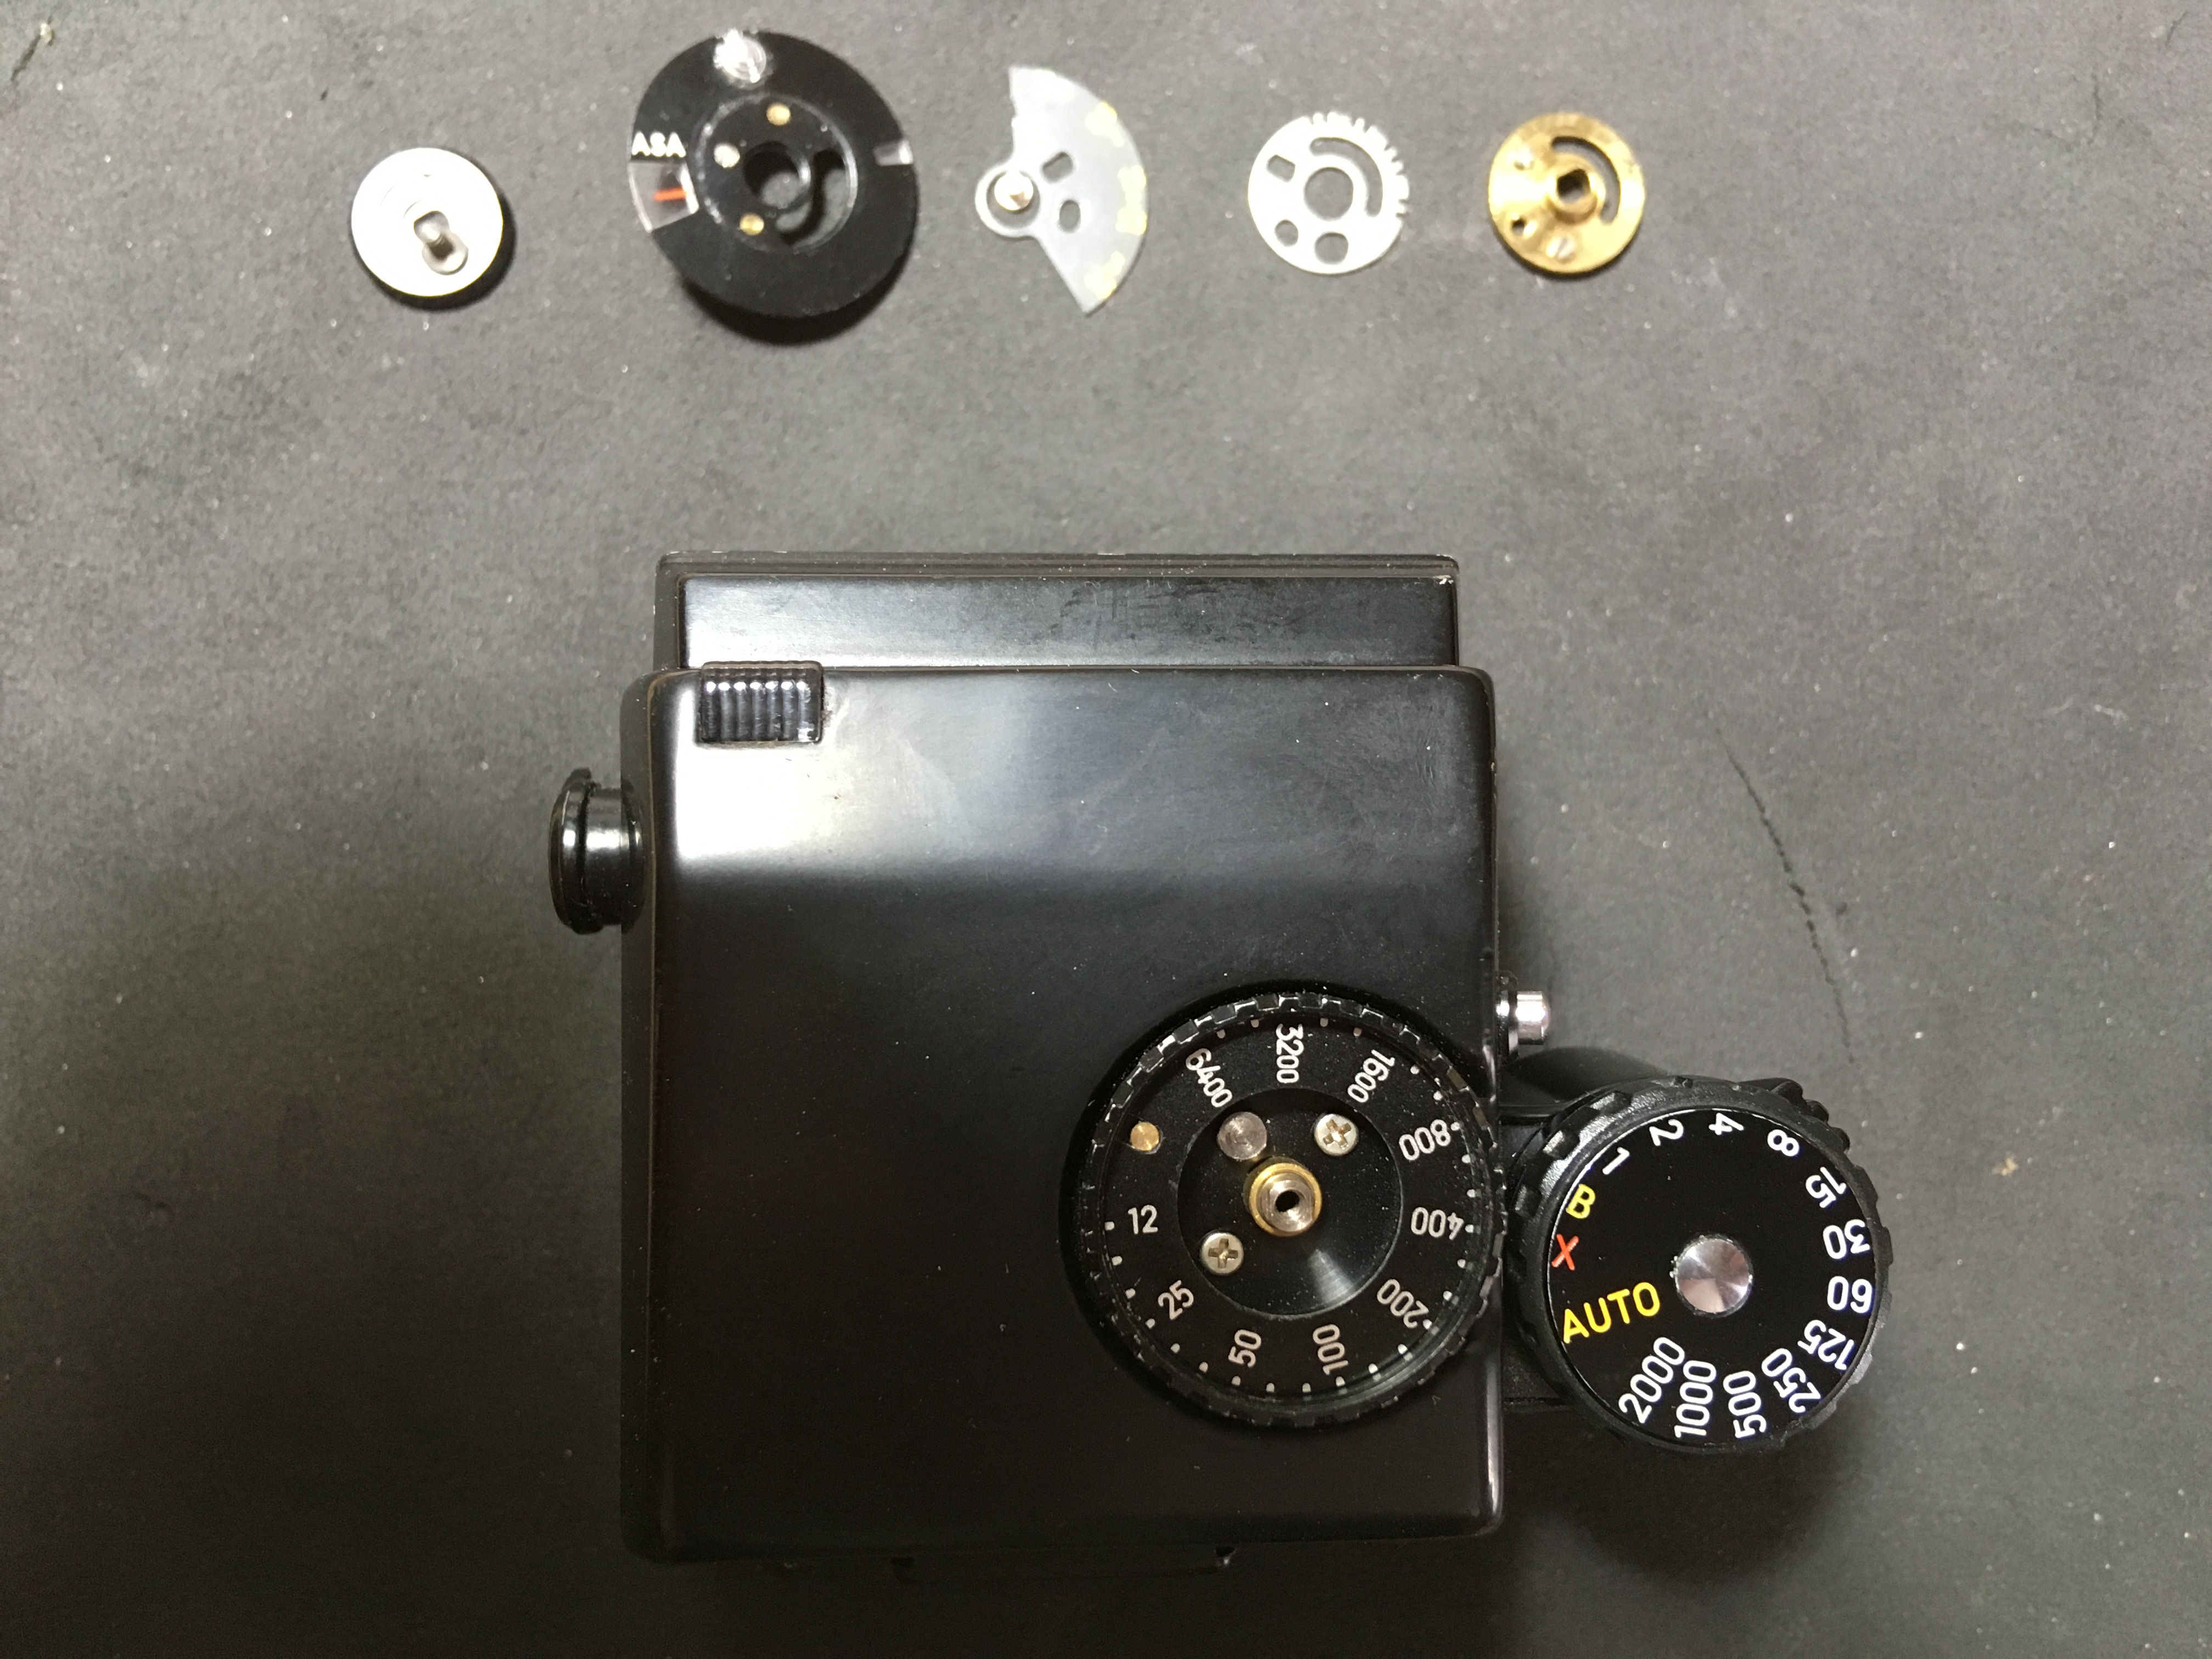
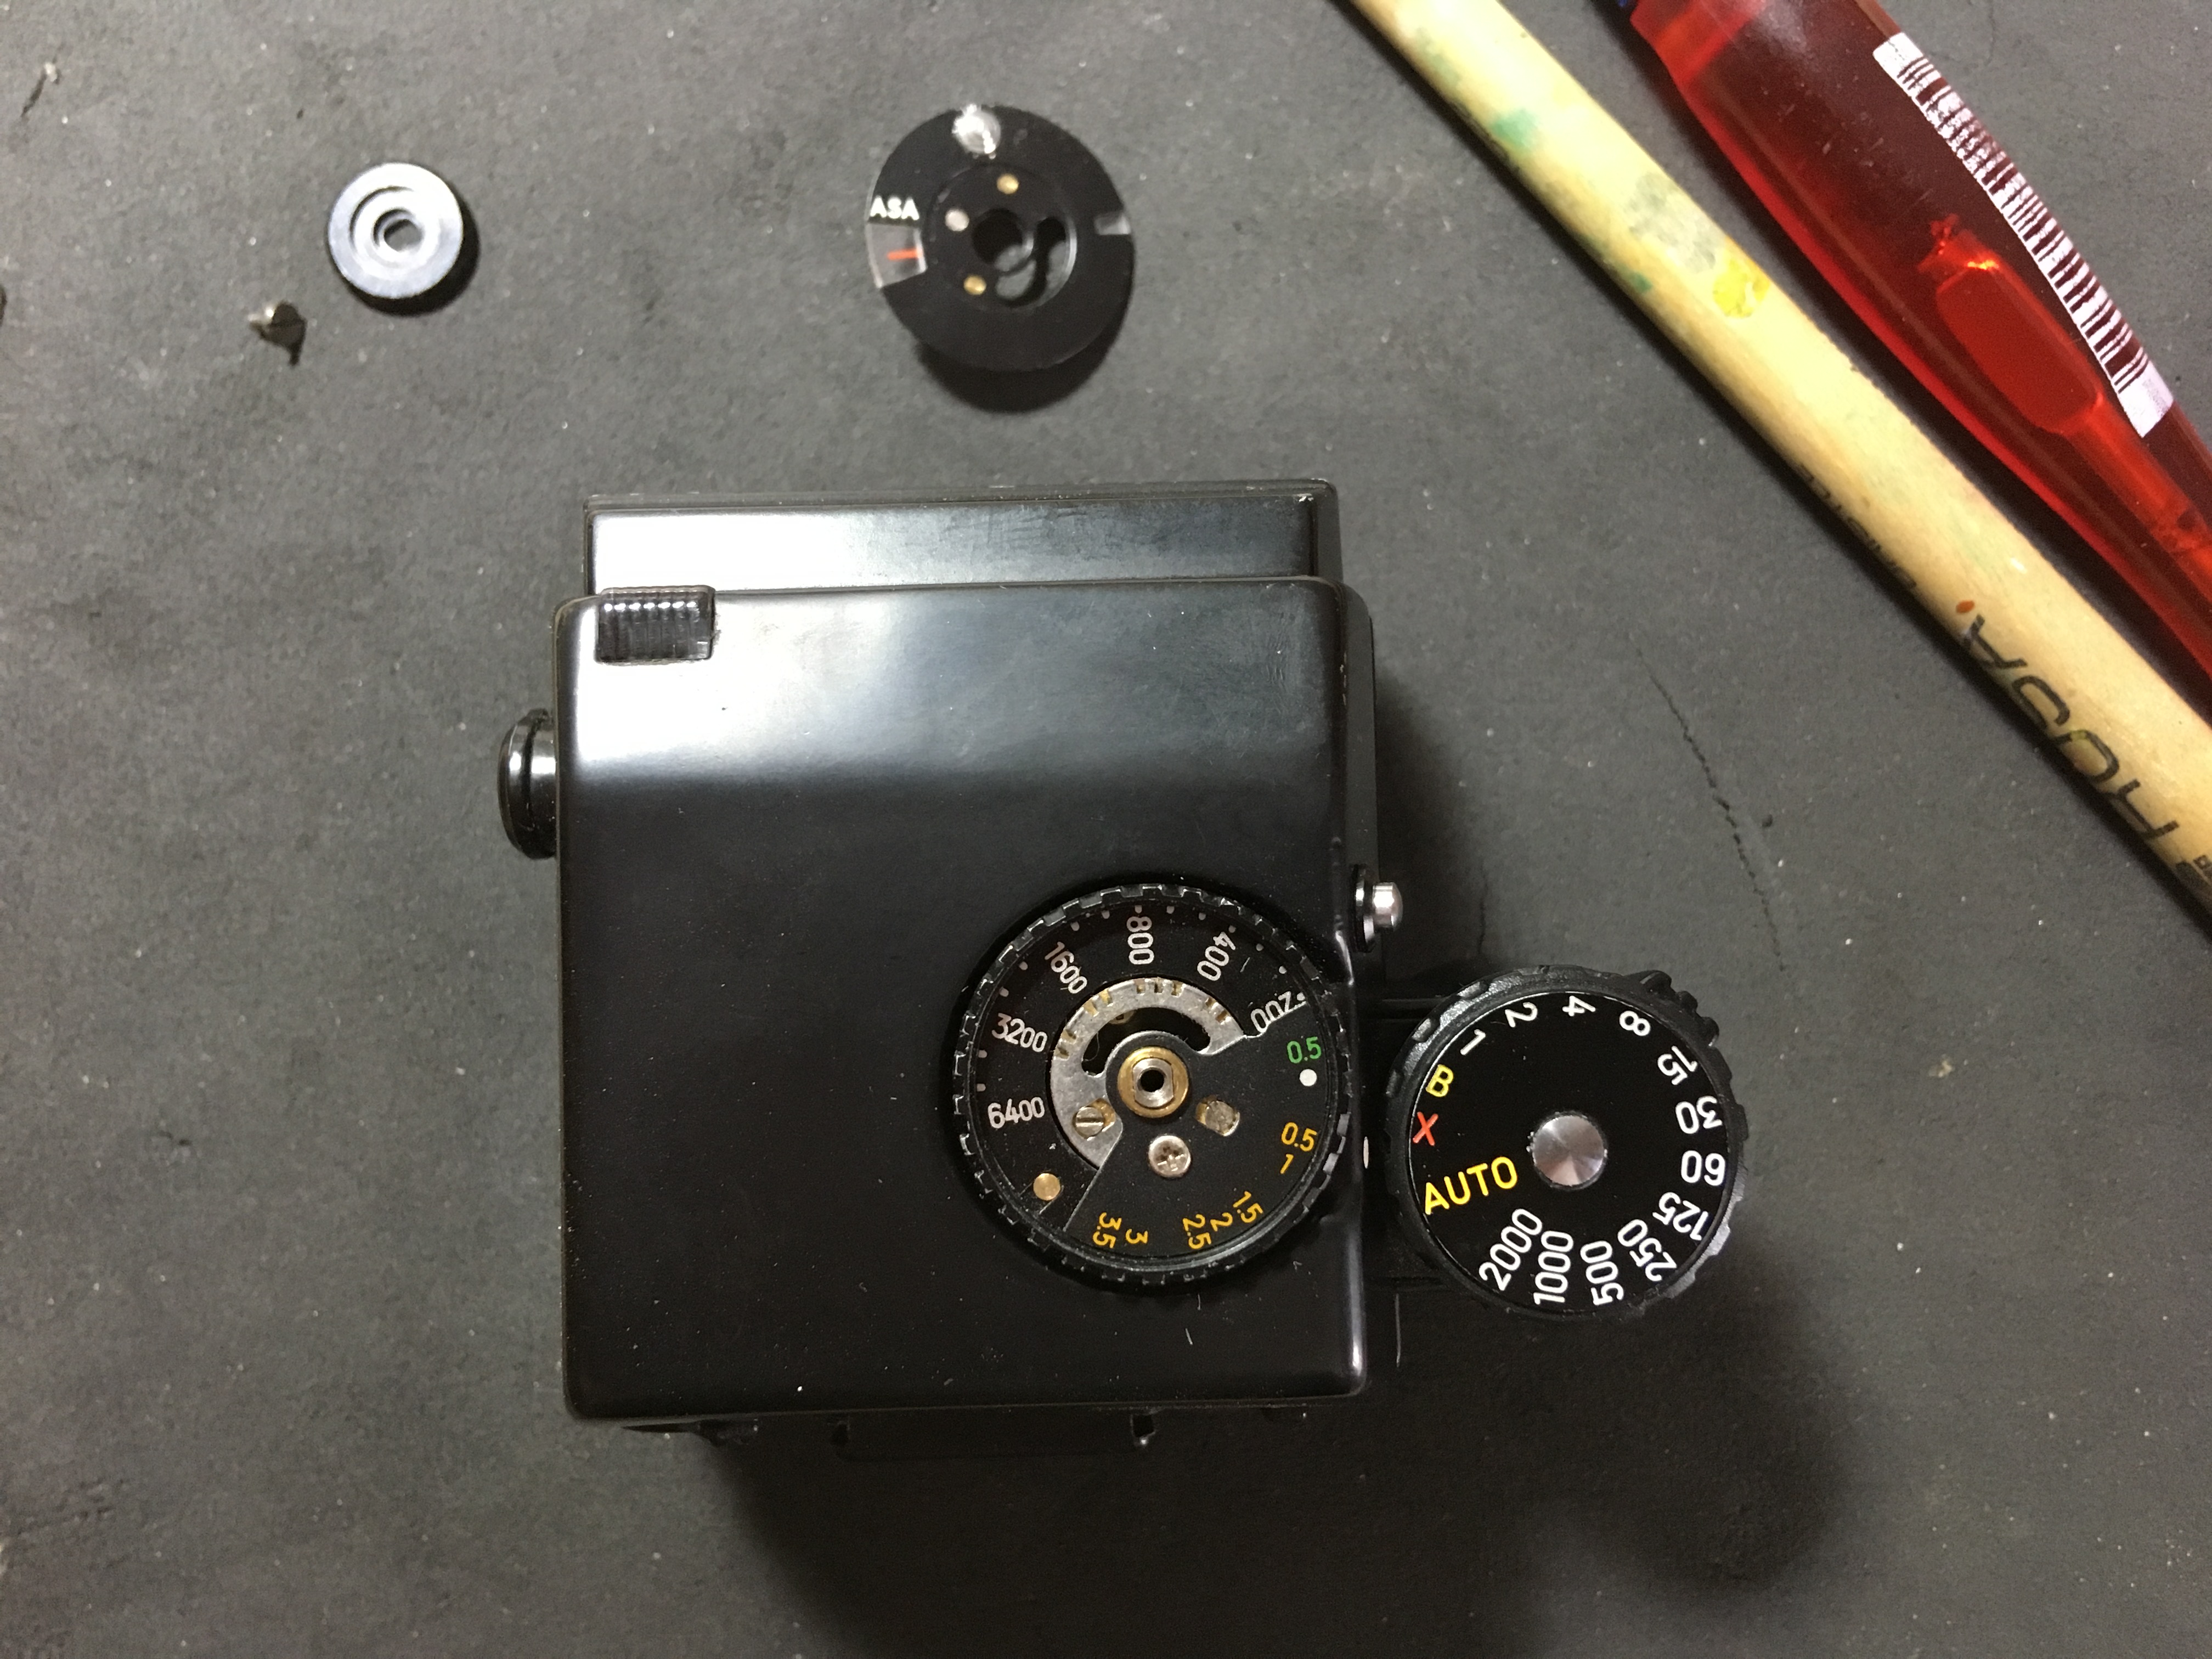
Below is a very different problem which afflicts almost every Minolta AES and AE viewfinder (not the others, since they don’t have metering). When the finder is removed, before replacing it the aperture ring follower has to be ‘cocked’, so that it snaps into the right place, should a lens be on the camera (in use that would be the norm). However, these cameras are a few years old now and have gone through the hands of many people, some salespersons, some of them photographers, some of them collectors and some of them without any knowledge of the workings of such things, from any of the above. This design was intended to save the camera being damaged by replacing the viewfinder with force and perhaps bending the linkages in the process. If you try to replace it ‘just like that’, you will notice that it doesn’t sit quite right at the front. Unfortunately, the uninitiated will just press harder until it clicks in place – the result of which can be seen below! The arrow on the right shows the follower correctly cocked on the right hand side and in the middle the release lever to reset it.
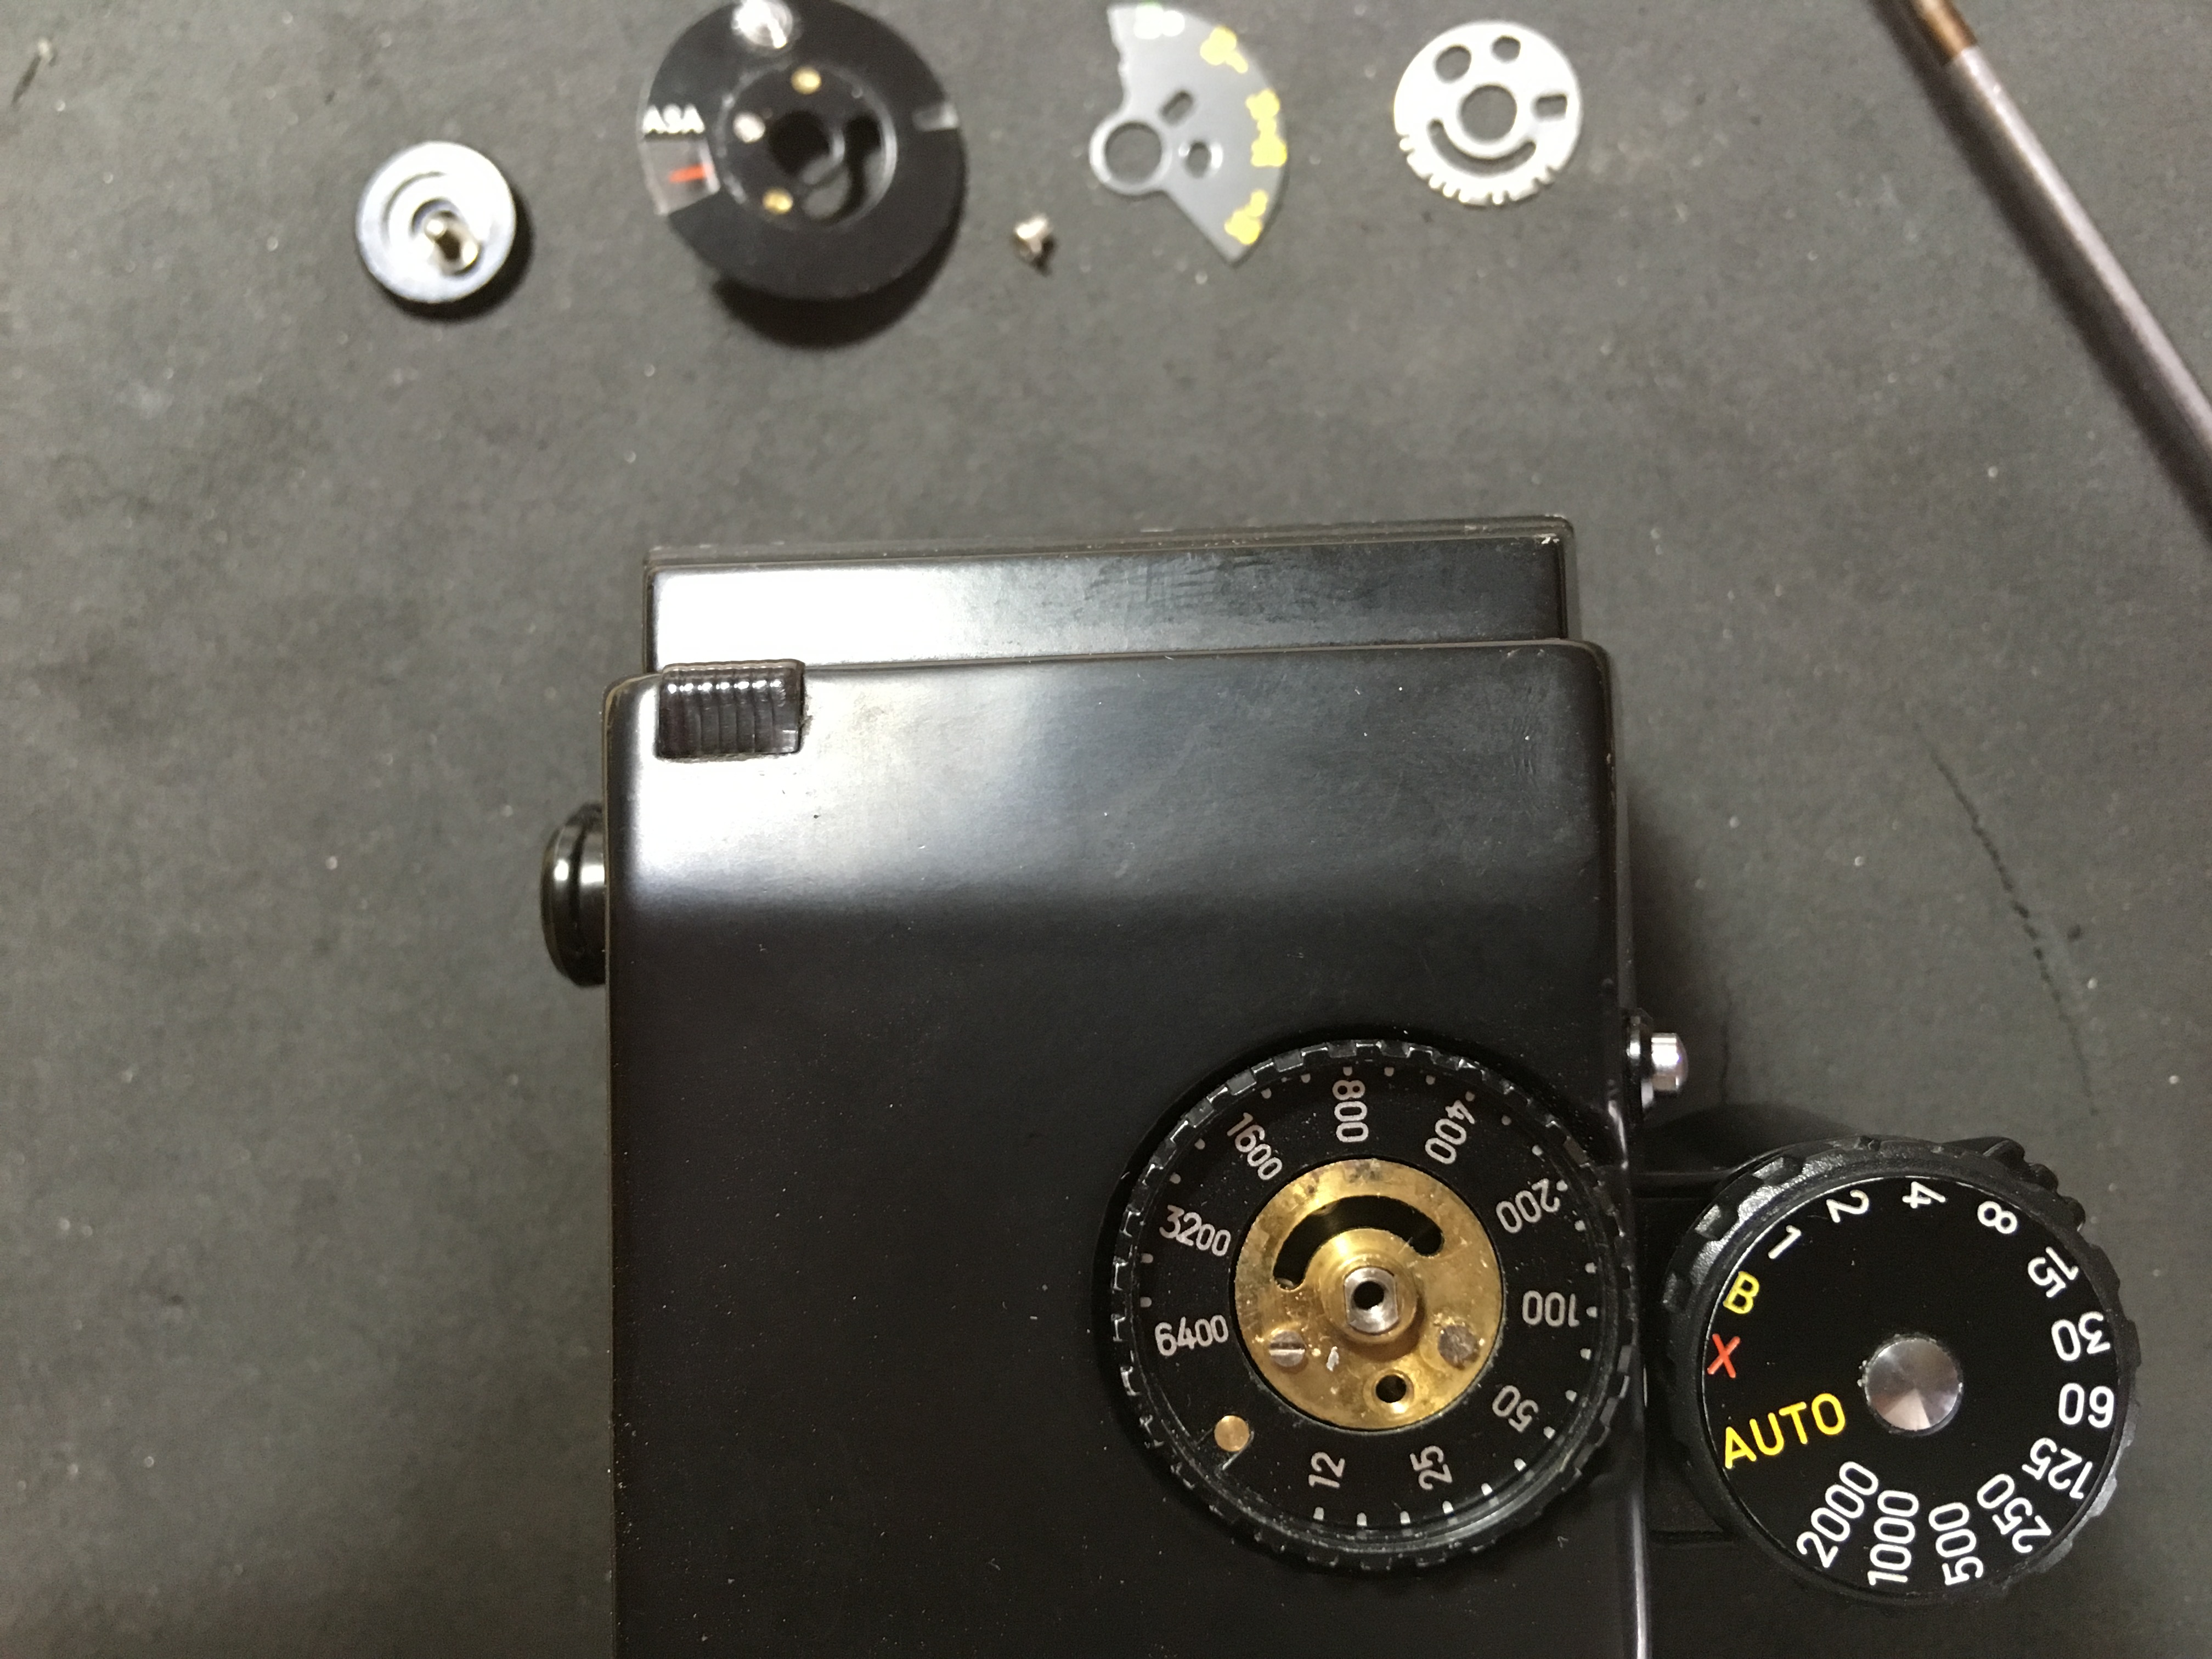
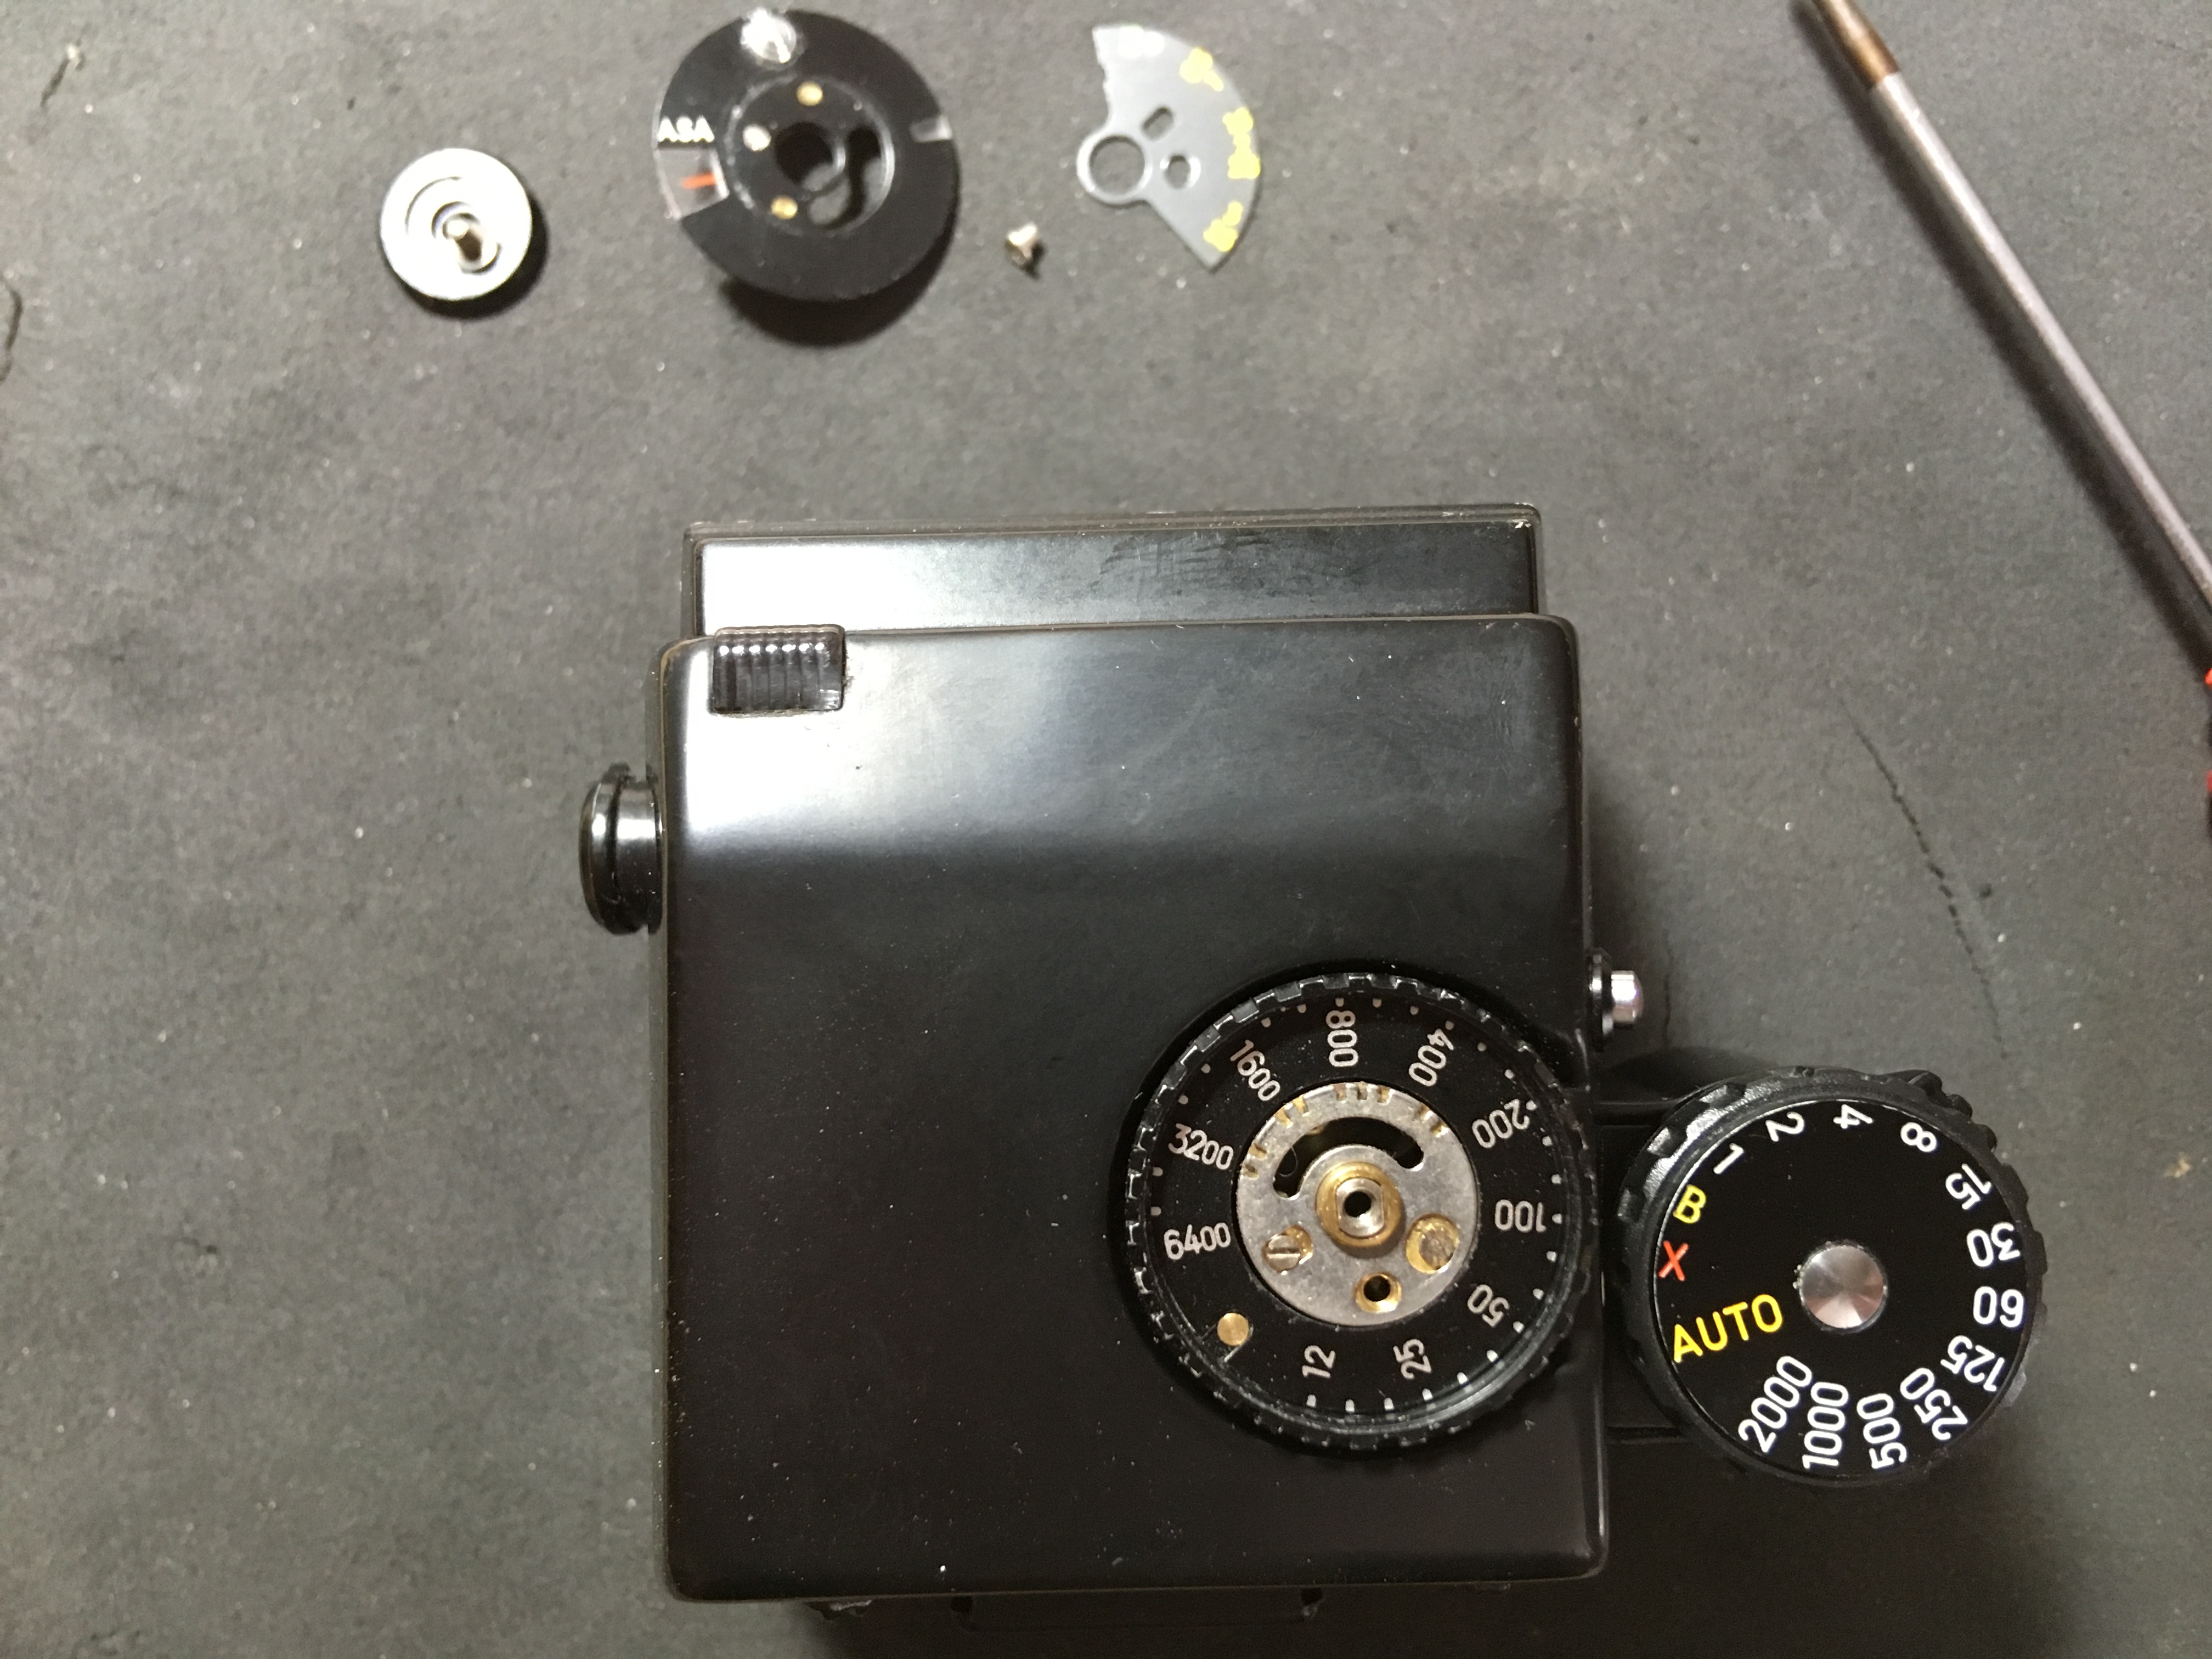
See the flat on the release lever? That comes from pushing the viewfinder down at the front until it clicks into place, as this lever, when the follower is not cocked, protrudes a bit as a reminder… of cocked properly, it retracts out of the way, of course.
So, who cares if it has a flat on it? Well, the user, actually, because having read the handbook and having cocked the lever properly, when the viewfinder goes back on, the follower doesn’t return to it’s proper place again and the metering is all haywire as a result!
The cure is to build up the front of the camera-frame, where the lever ‘lands’ with a strip of tape or whatever you have handy that it just thick enough to ‘trip’ the lever and something that does not permanently fix to the camera or damage it. Here I took a strip of cardboard and some insulating tape to fix it. It’s cheap and easy, works fine and doesn’t do any damage. Win-win! Don’t worry about light-leaks up here, the well is deep enough to shield any light that might come in – don’t forget, the eyepiece lets a lot more light into the prism.
Just a reminder of how the top looked like before. Suffice to say, I did a bit of persuasion with an appropriate piece of wood and repaired the dent without needing any touching up of the paint, which sticks like shit to an army blanket (ask anyone who has ever been a soldier).
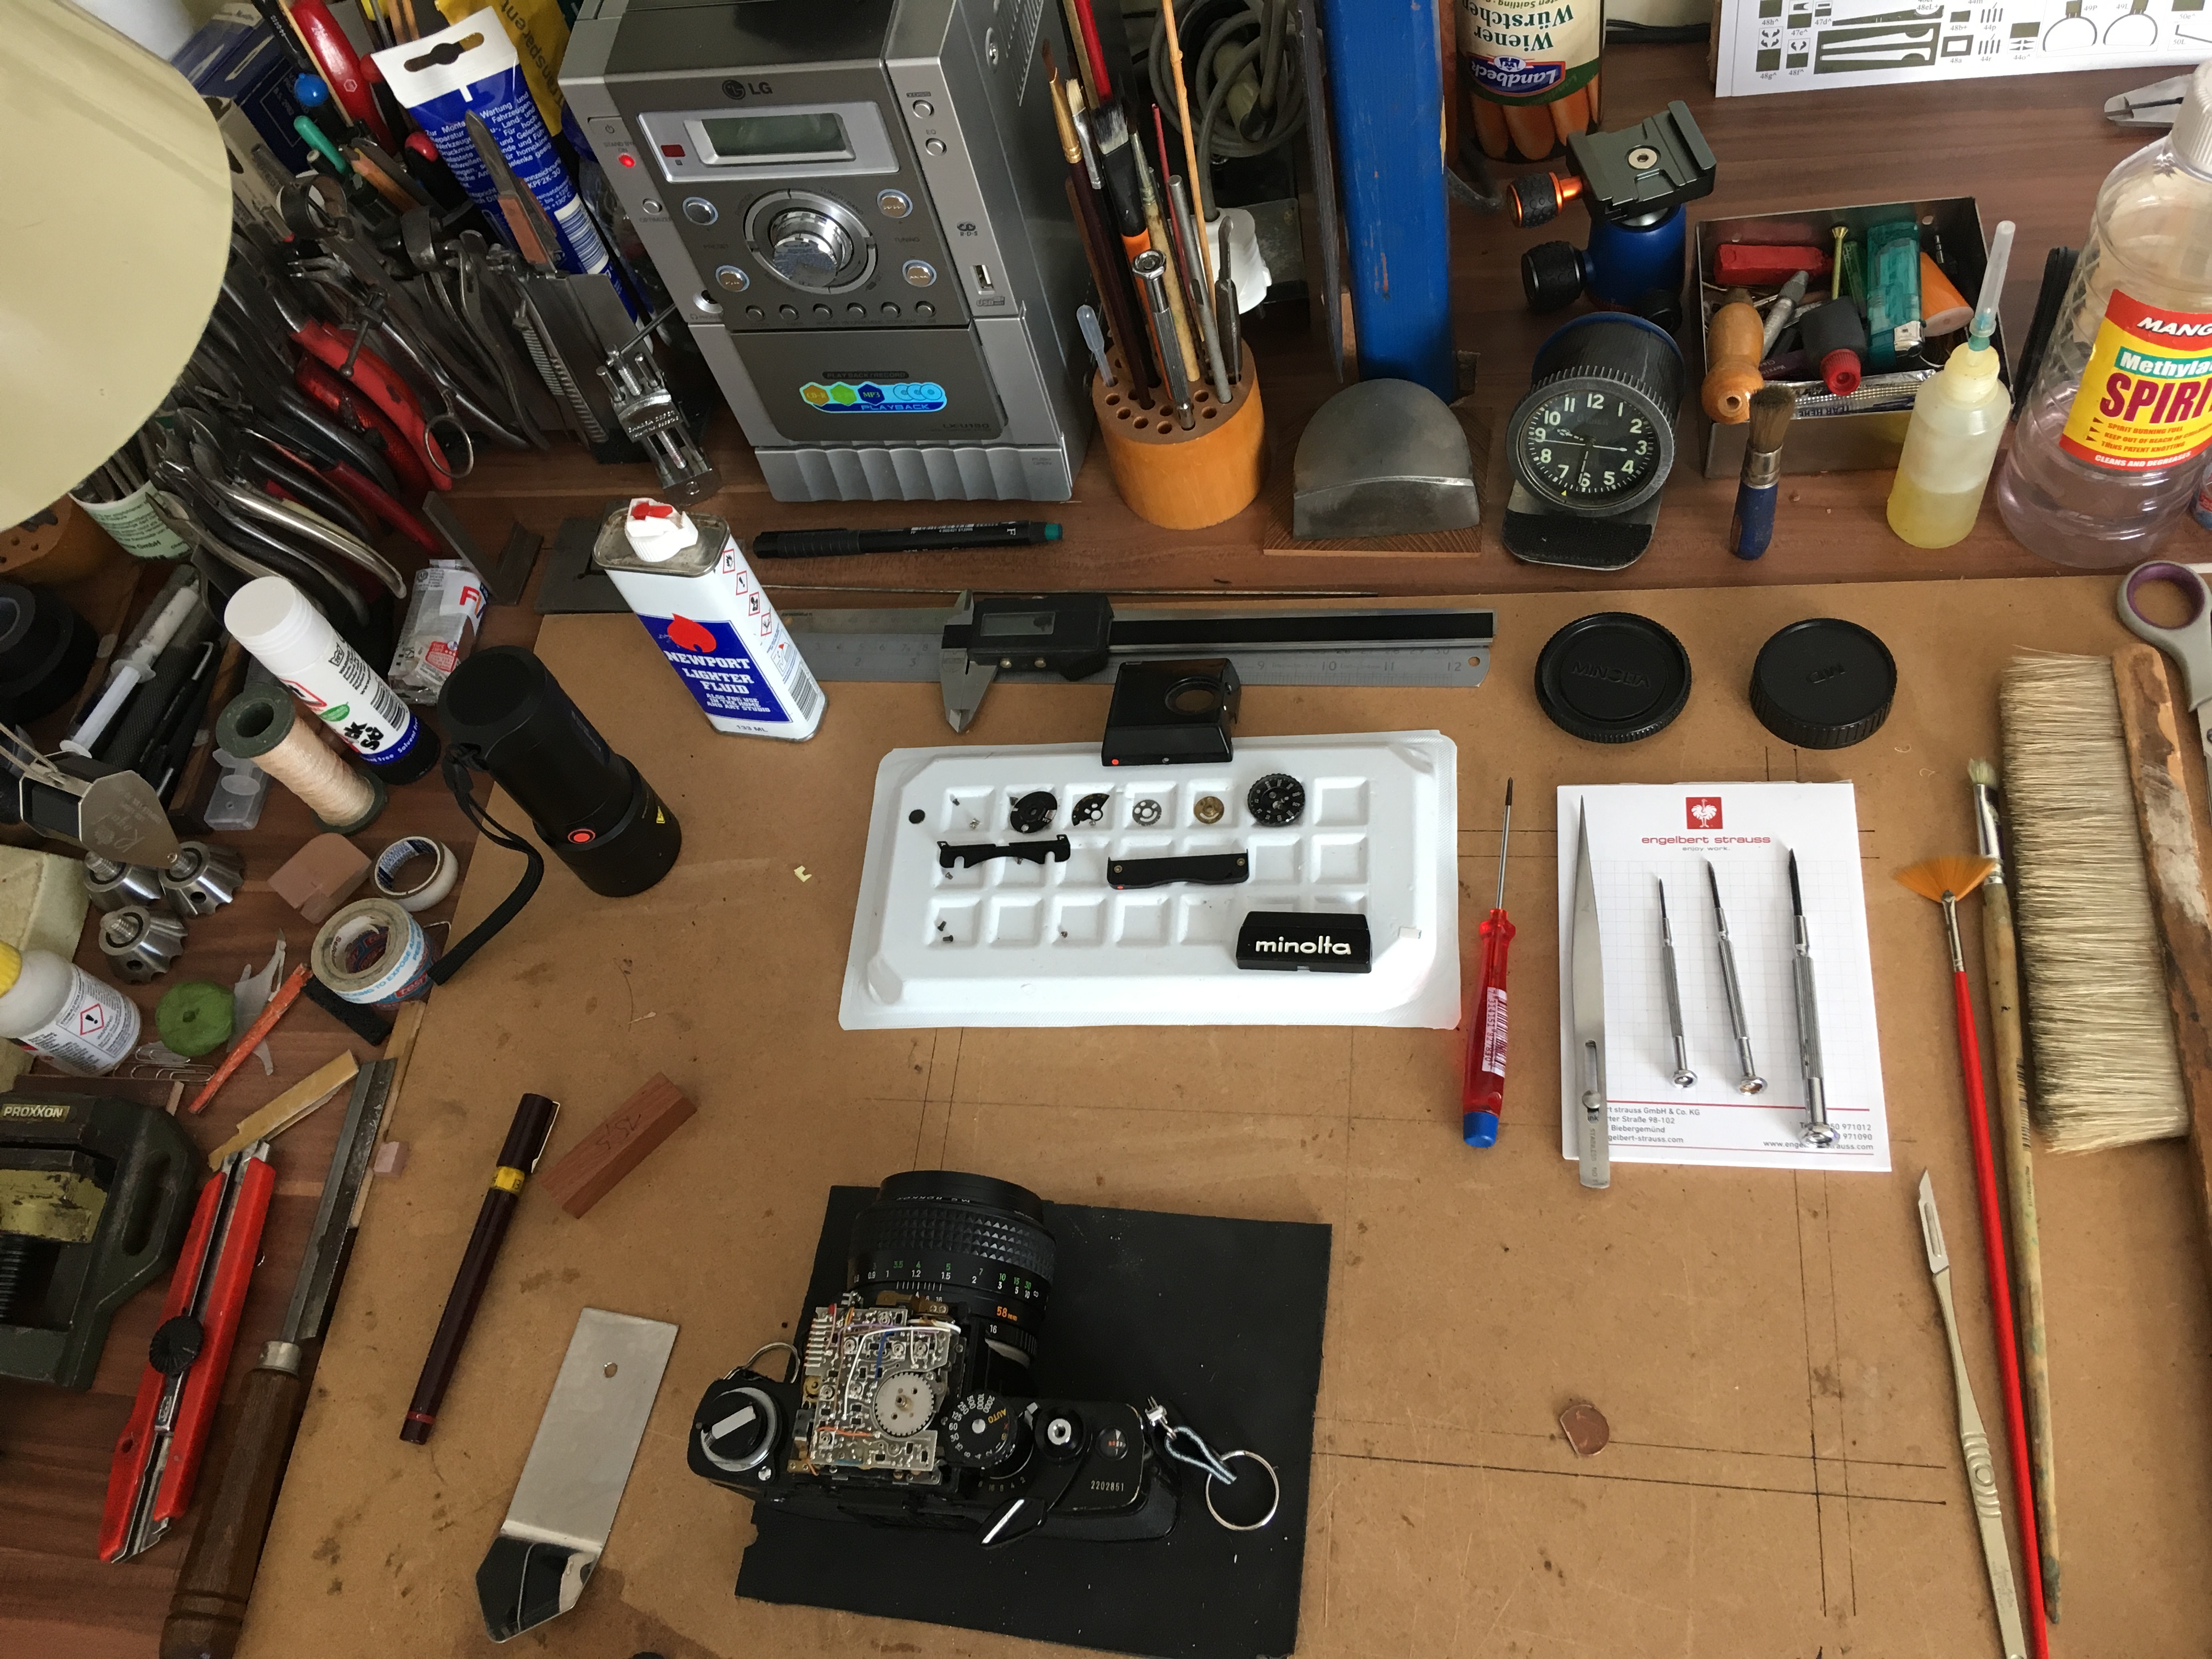
You can’t see it here, but once the mirrors etc. have been replaced, the next step is re-assembly, which is pretty straightforward. Working from right to left in reverse order of disassembly.
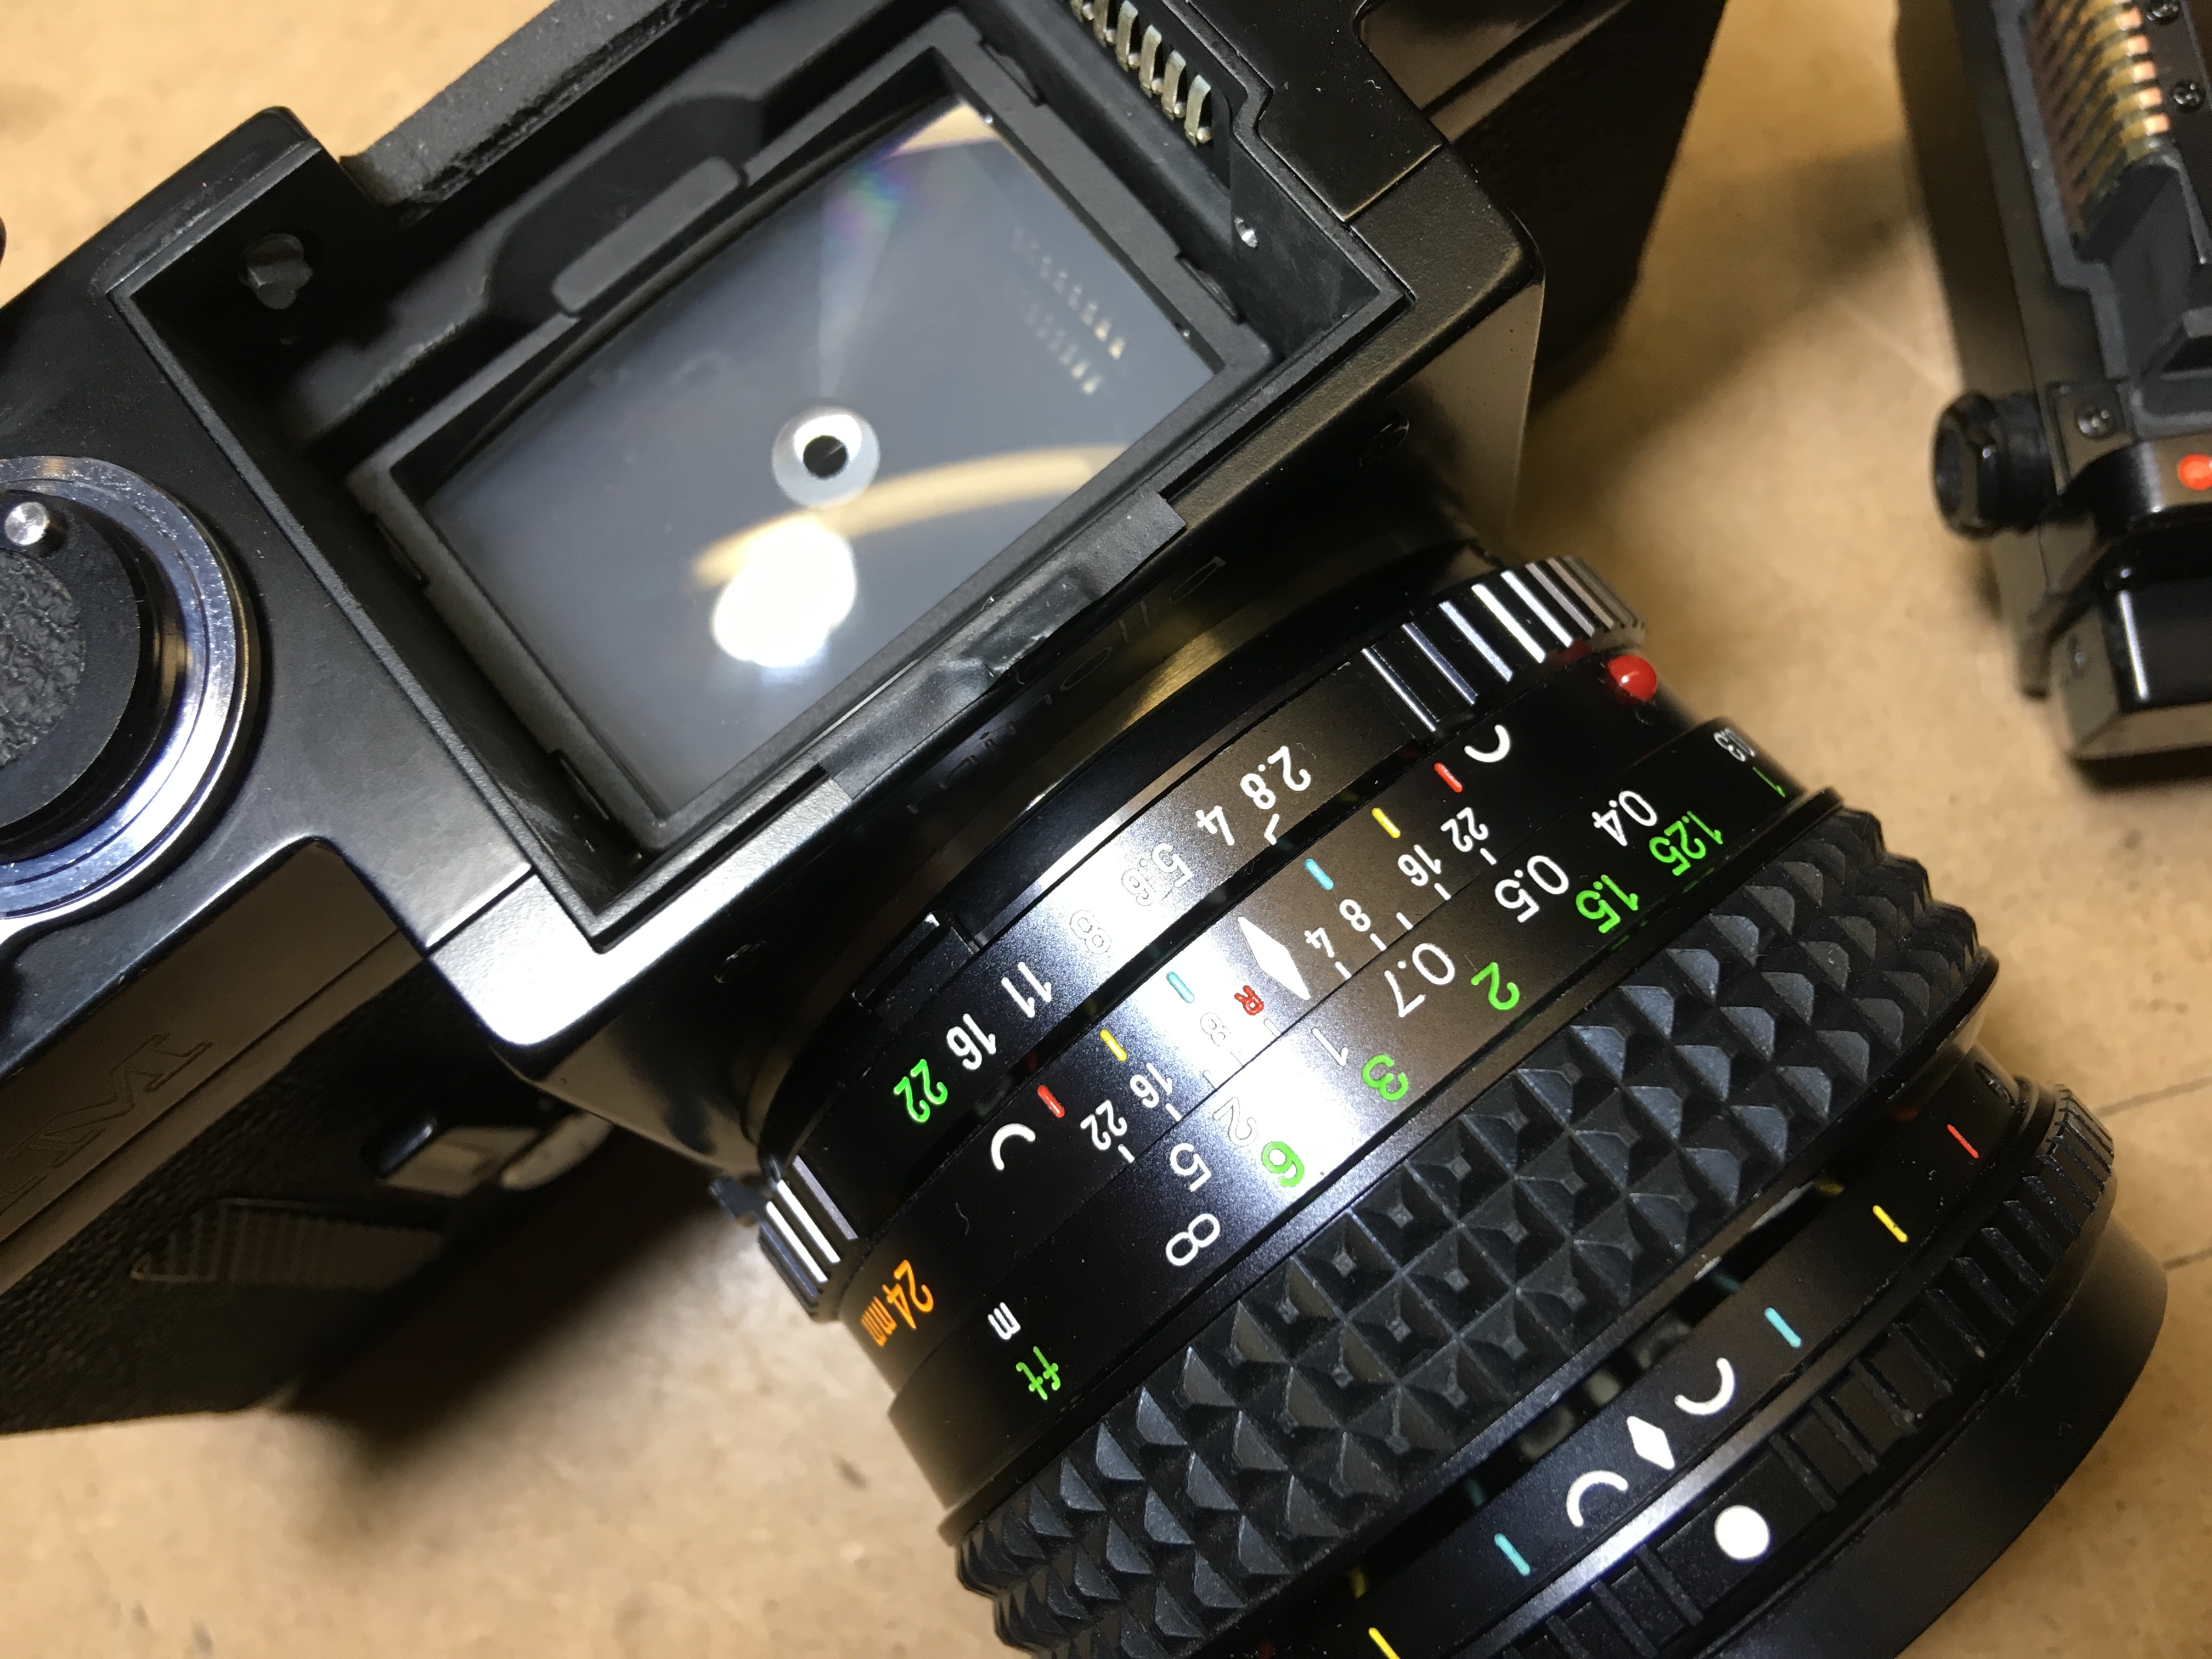
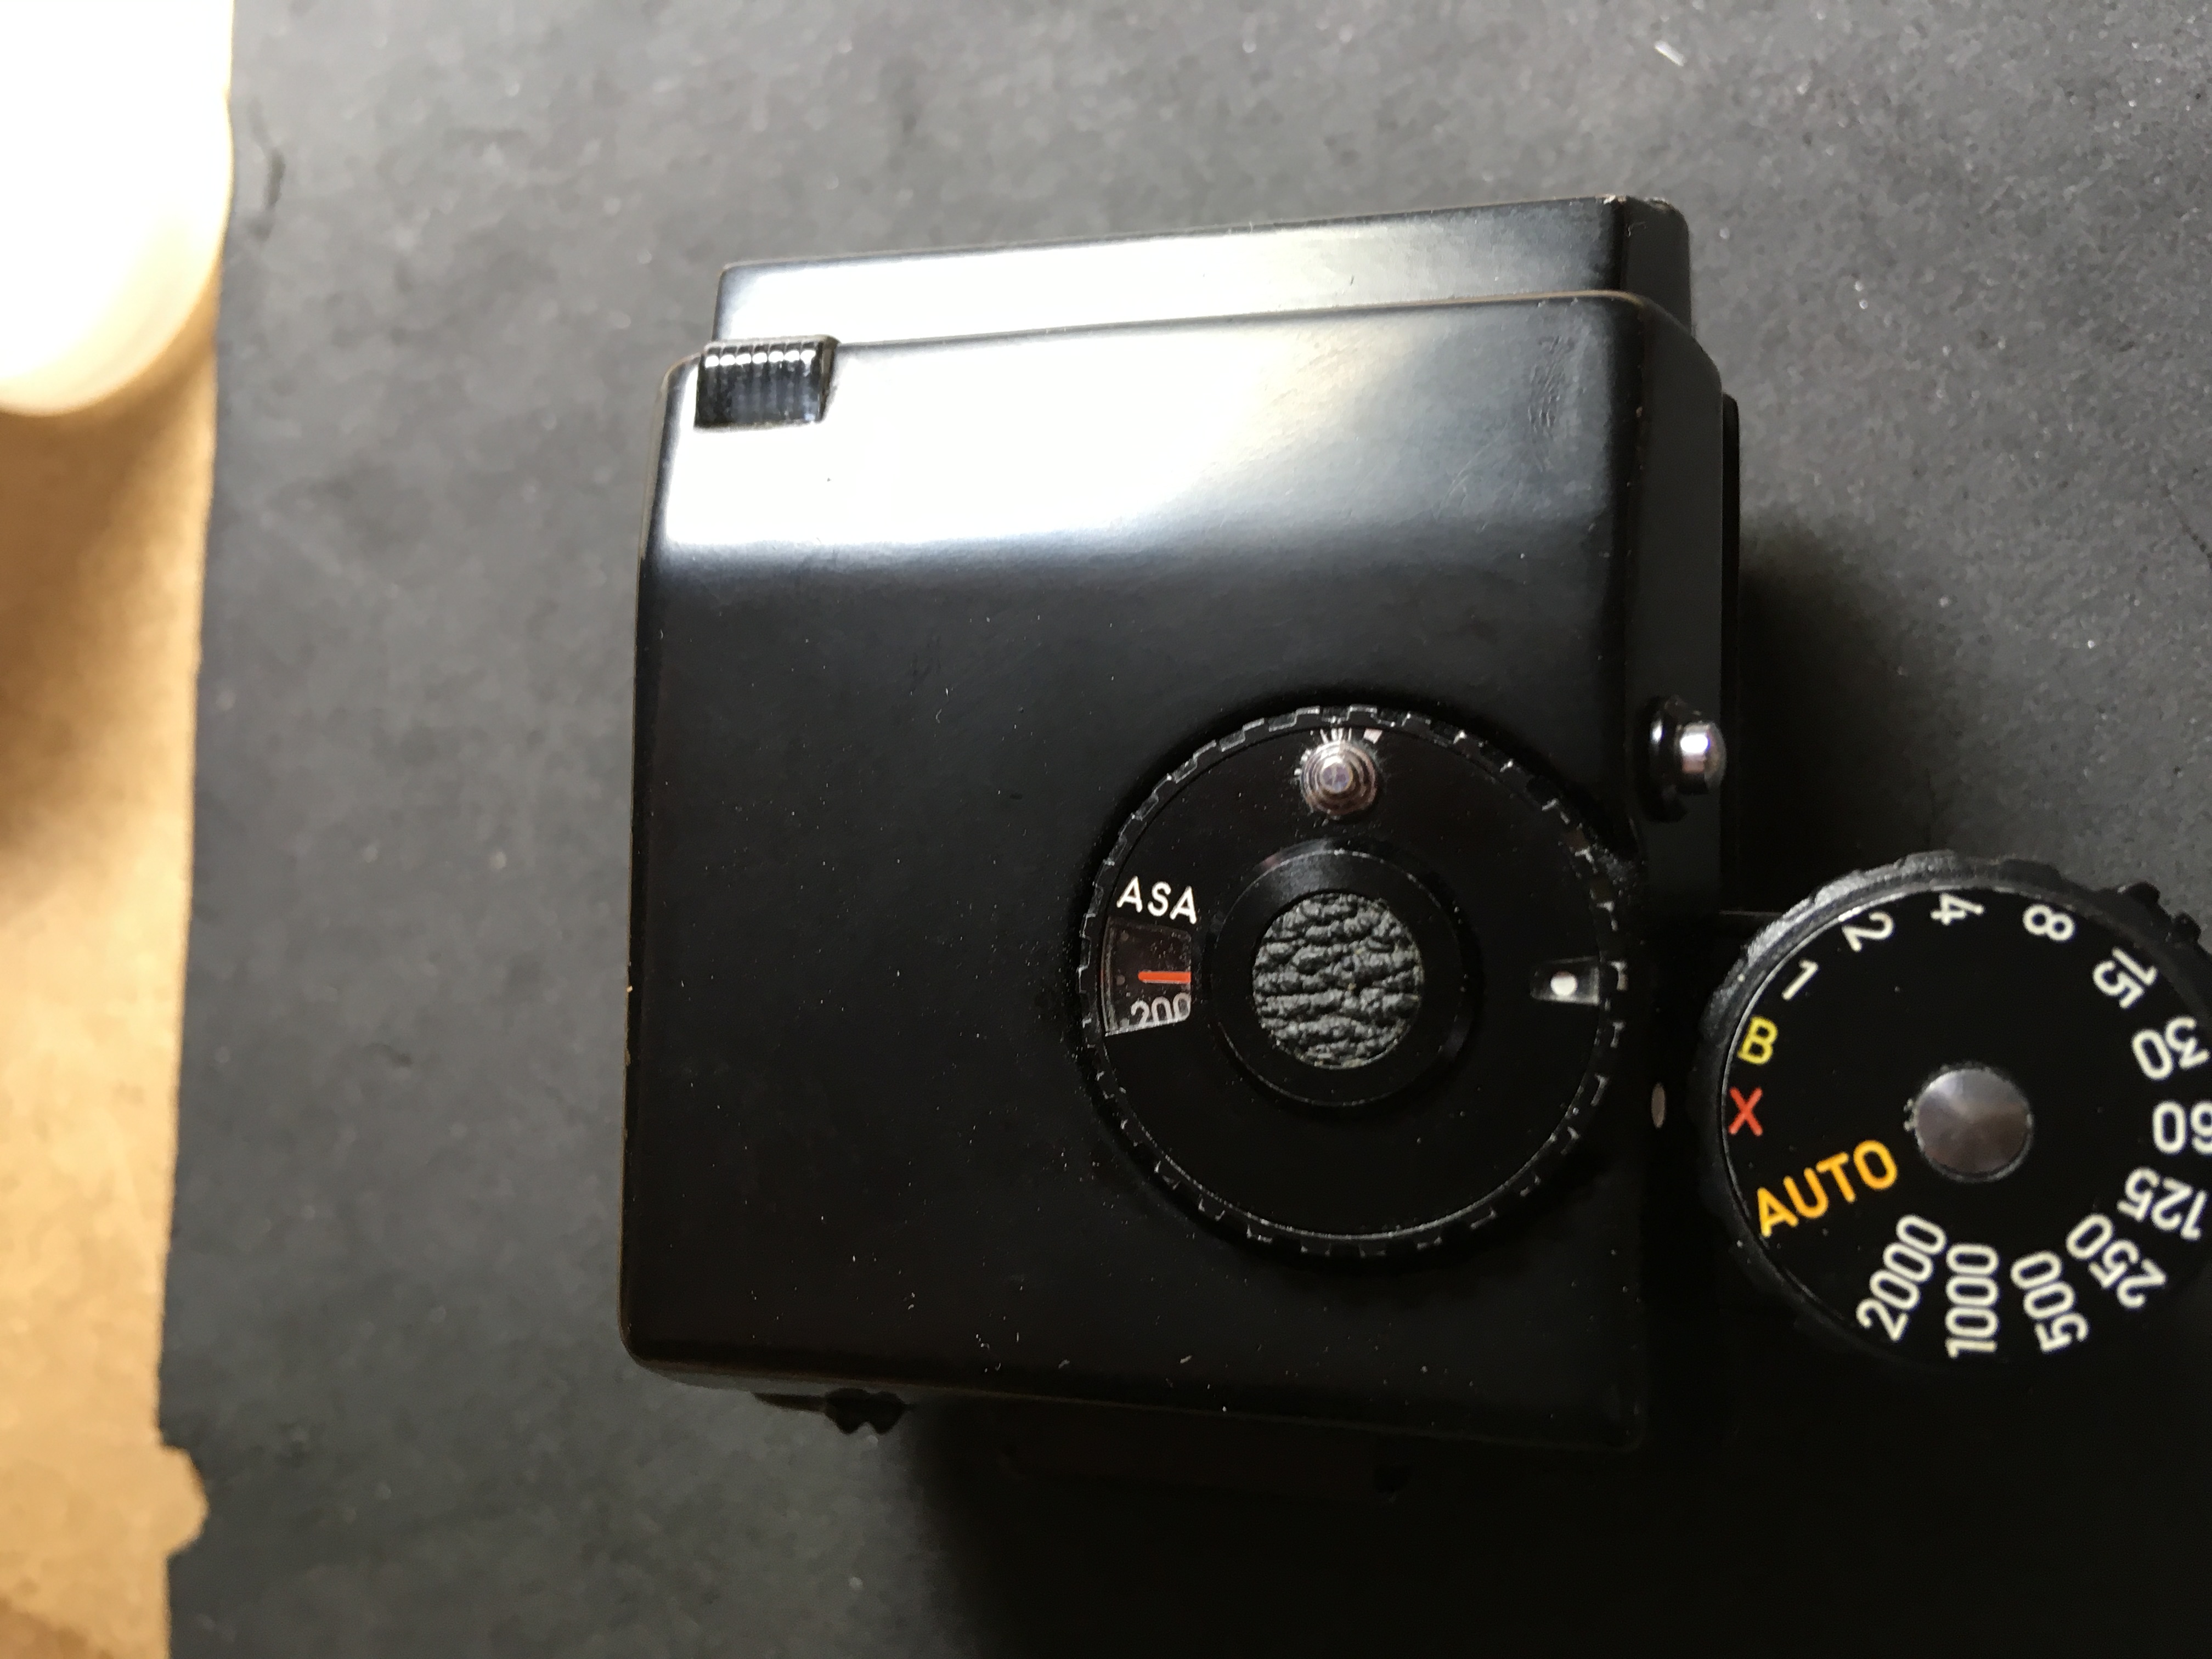
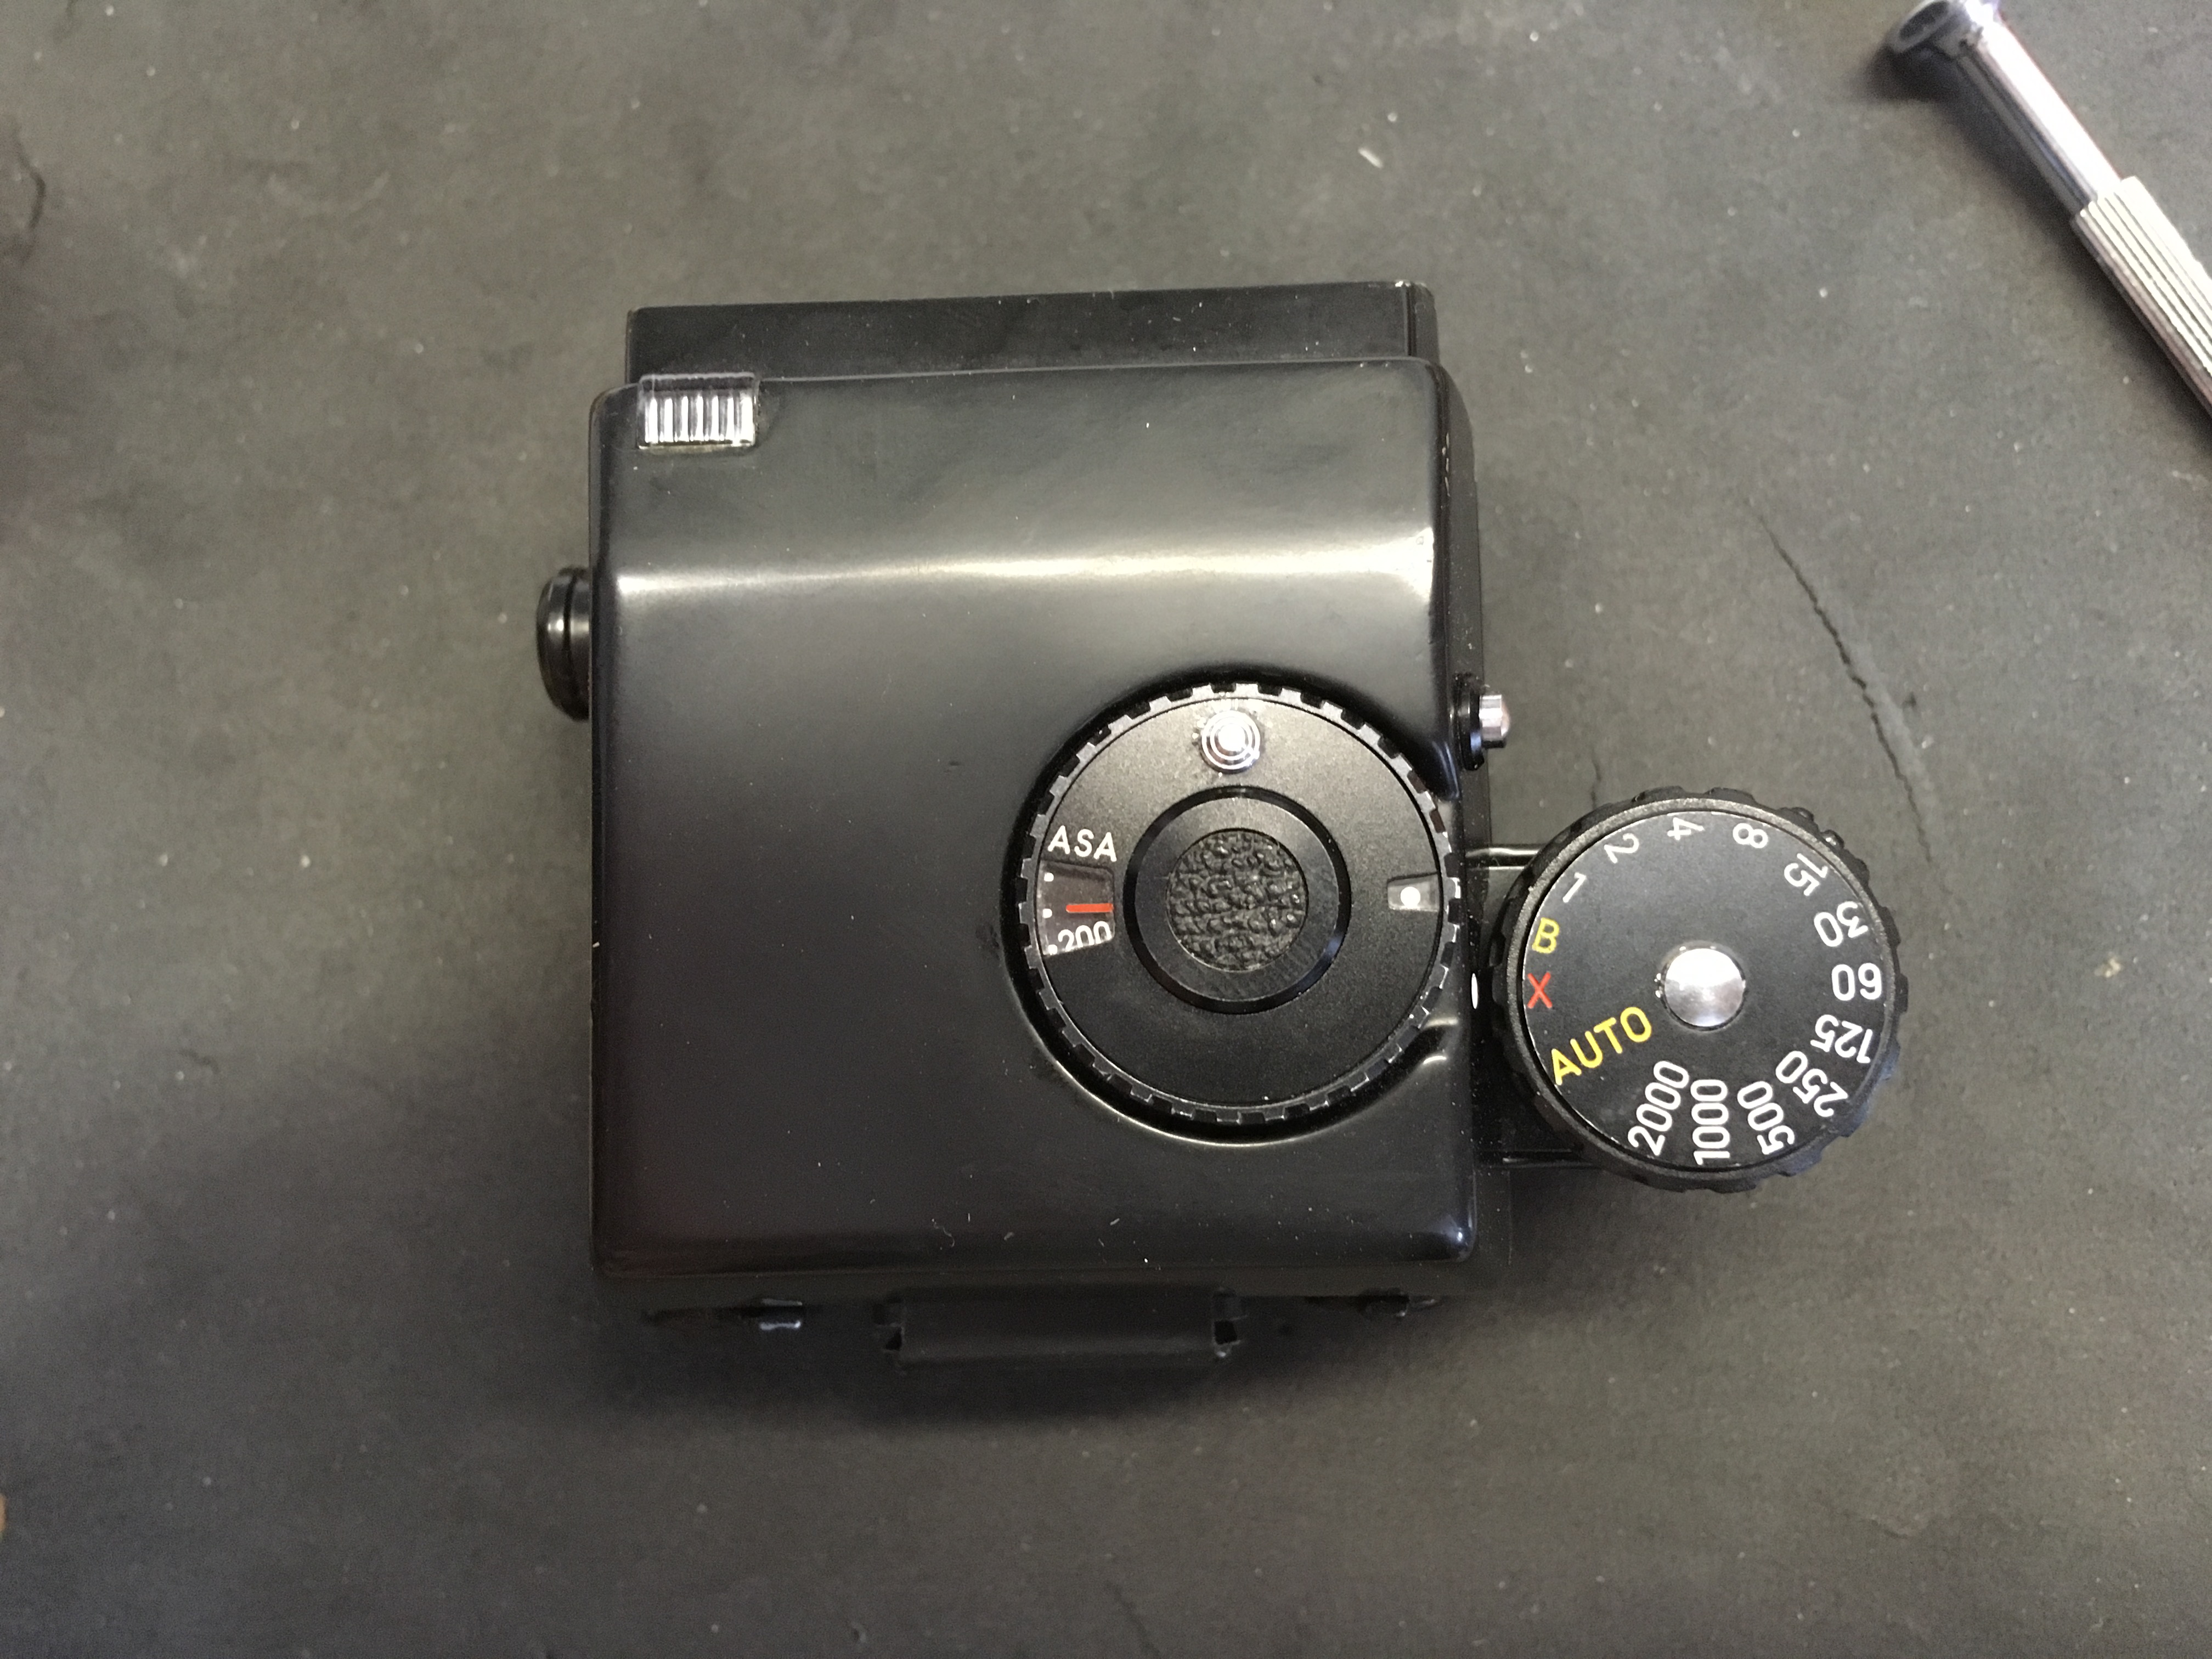
Finally assembled with ISO 160 showing here and ready to go! All adjustments and cross-checks of the mechanics and metering were also done while the lid was off, of course.
The repair to the top is acceptable, I think.
Next up for discussion? The comparison of two very early 100mm F3.5 lenses an AR1 and an AR2 (by the way, one of Minoltas best-kept secrets, an inexplicably underrated razor-sharp lens). Construction, mount, iris, size and weight are different… Though they look very similar, until you have them up close 🙂
I wonder if you could help with my problem. Have the AE finder for XM and needle jumps straight up to max when meter is activated. It does not move away from top at all, no matter what the settings. Clearly power is coming in, linkage to shutter also works fine as the indicator moves in synch with dial. But meter needle is another story with this behaviour.
Hi. The AE is a very different story to the AES, but most of the problems stem from a short-circuit, usually because of a slight misalignment caused by a knock at some time. Have you ever dismantled one before?? I got rid of all my X1/XK/XM stuff ages ago, so cannot help with precise step by step instructions anymore, I’m afraid 🙁 Peter
Hi
I’m having an issue with my own AE-S finder and was wondering if you could help me out with it?
Thanks
Tom
Sorry fr the late reply. How could I help, do you think? A few pics might help and a description of the problem…
Thanks for this! Have me the confidence to look into my AE finder’s non illuminated meter. Turns out the mirror on the underside of the cover was gone. Seems like a simple fix now!
Hope that you could fix it OK! All the best, Peter
Peter, THANK YOU for these troubleshooting instructions. They helped me solve the aperture arm issue on an otherwise excellent XK. I used a bit of matchstick and electrical taped it to the camera body edge and now my aperture control arm flicks back as it should when I mount the finder.
Here’s the thread about my fix:
https://www.photrio.com/forum/threads/minolta-xk-ae-s-finder-troubleshooting.211692/
Cheers