Minolta SR-2 vs SR-1 comparison

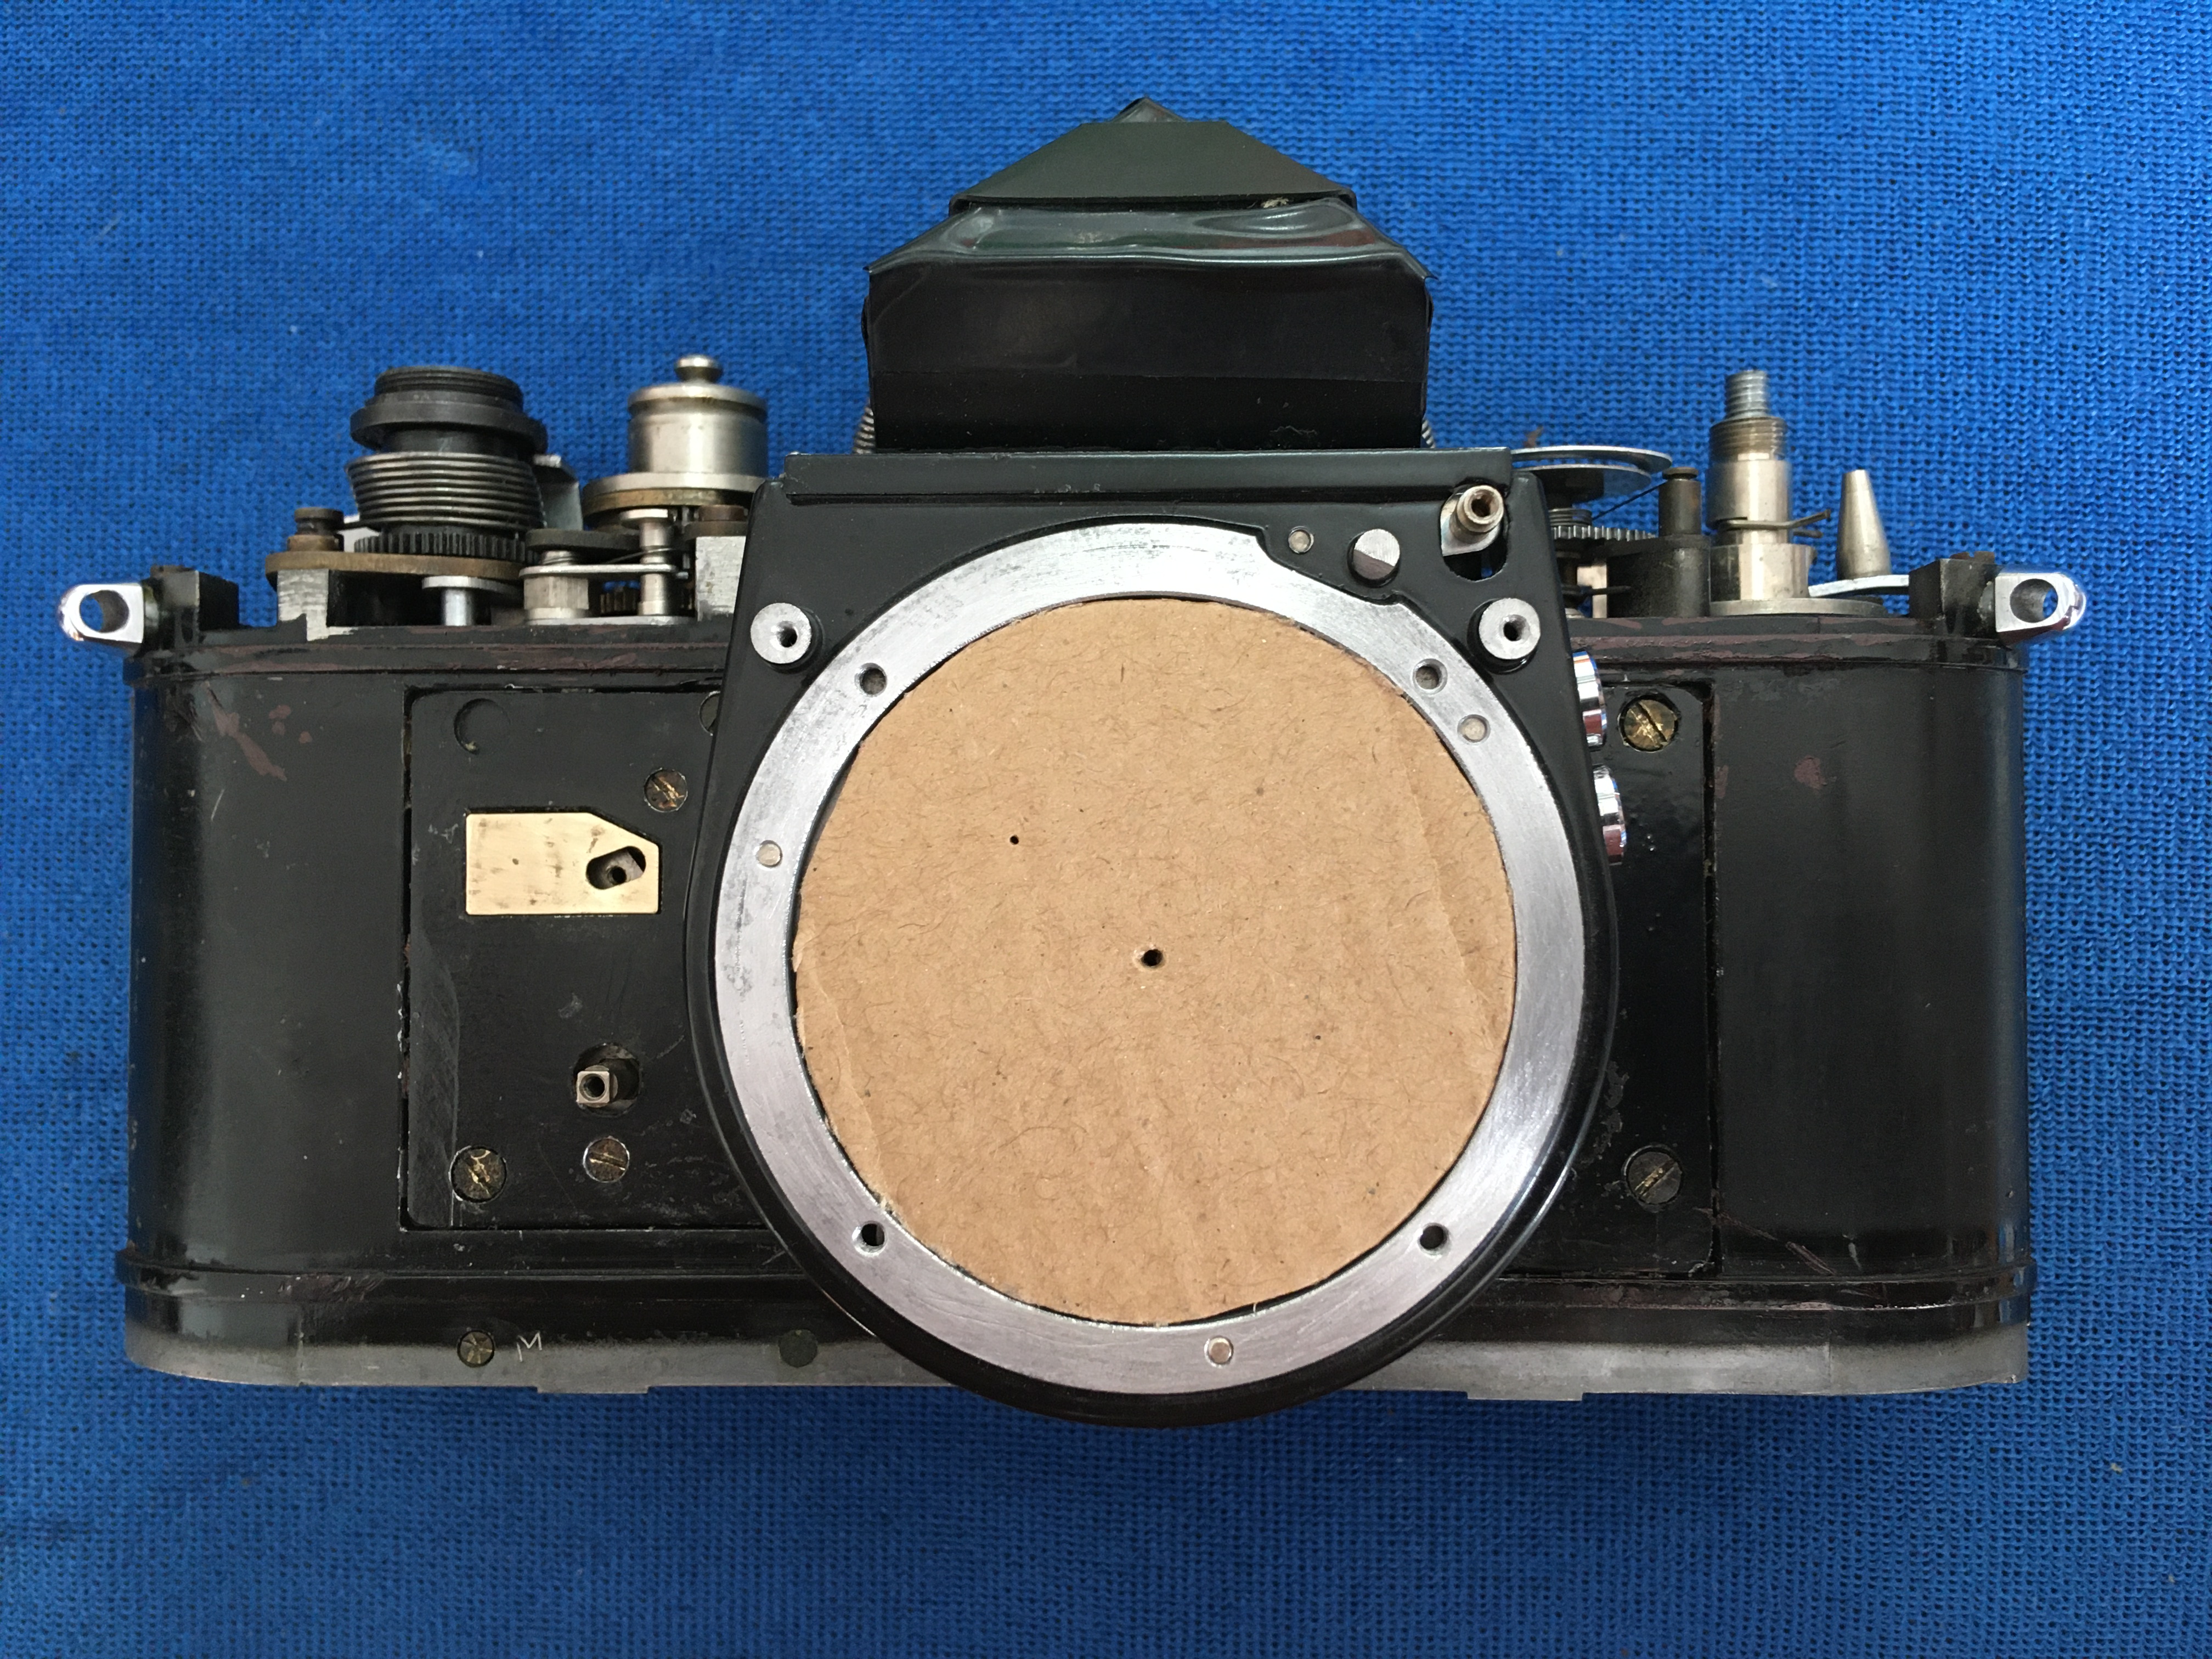
Ever wondered what the real internal differences are between Minolta‘s first SLRs? First pic is of an SR-2 stripped of the ‘leather’, top and bottom plates off and my high-tech protection for the mirror box internals. The front plate with the mount and self-timer has not yet been removed.

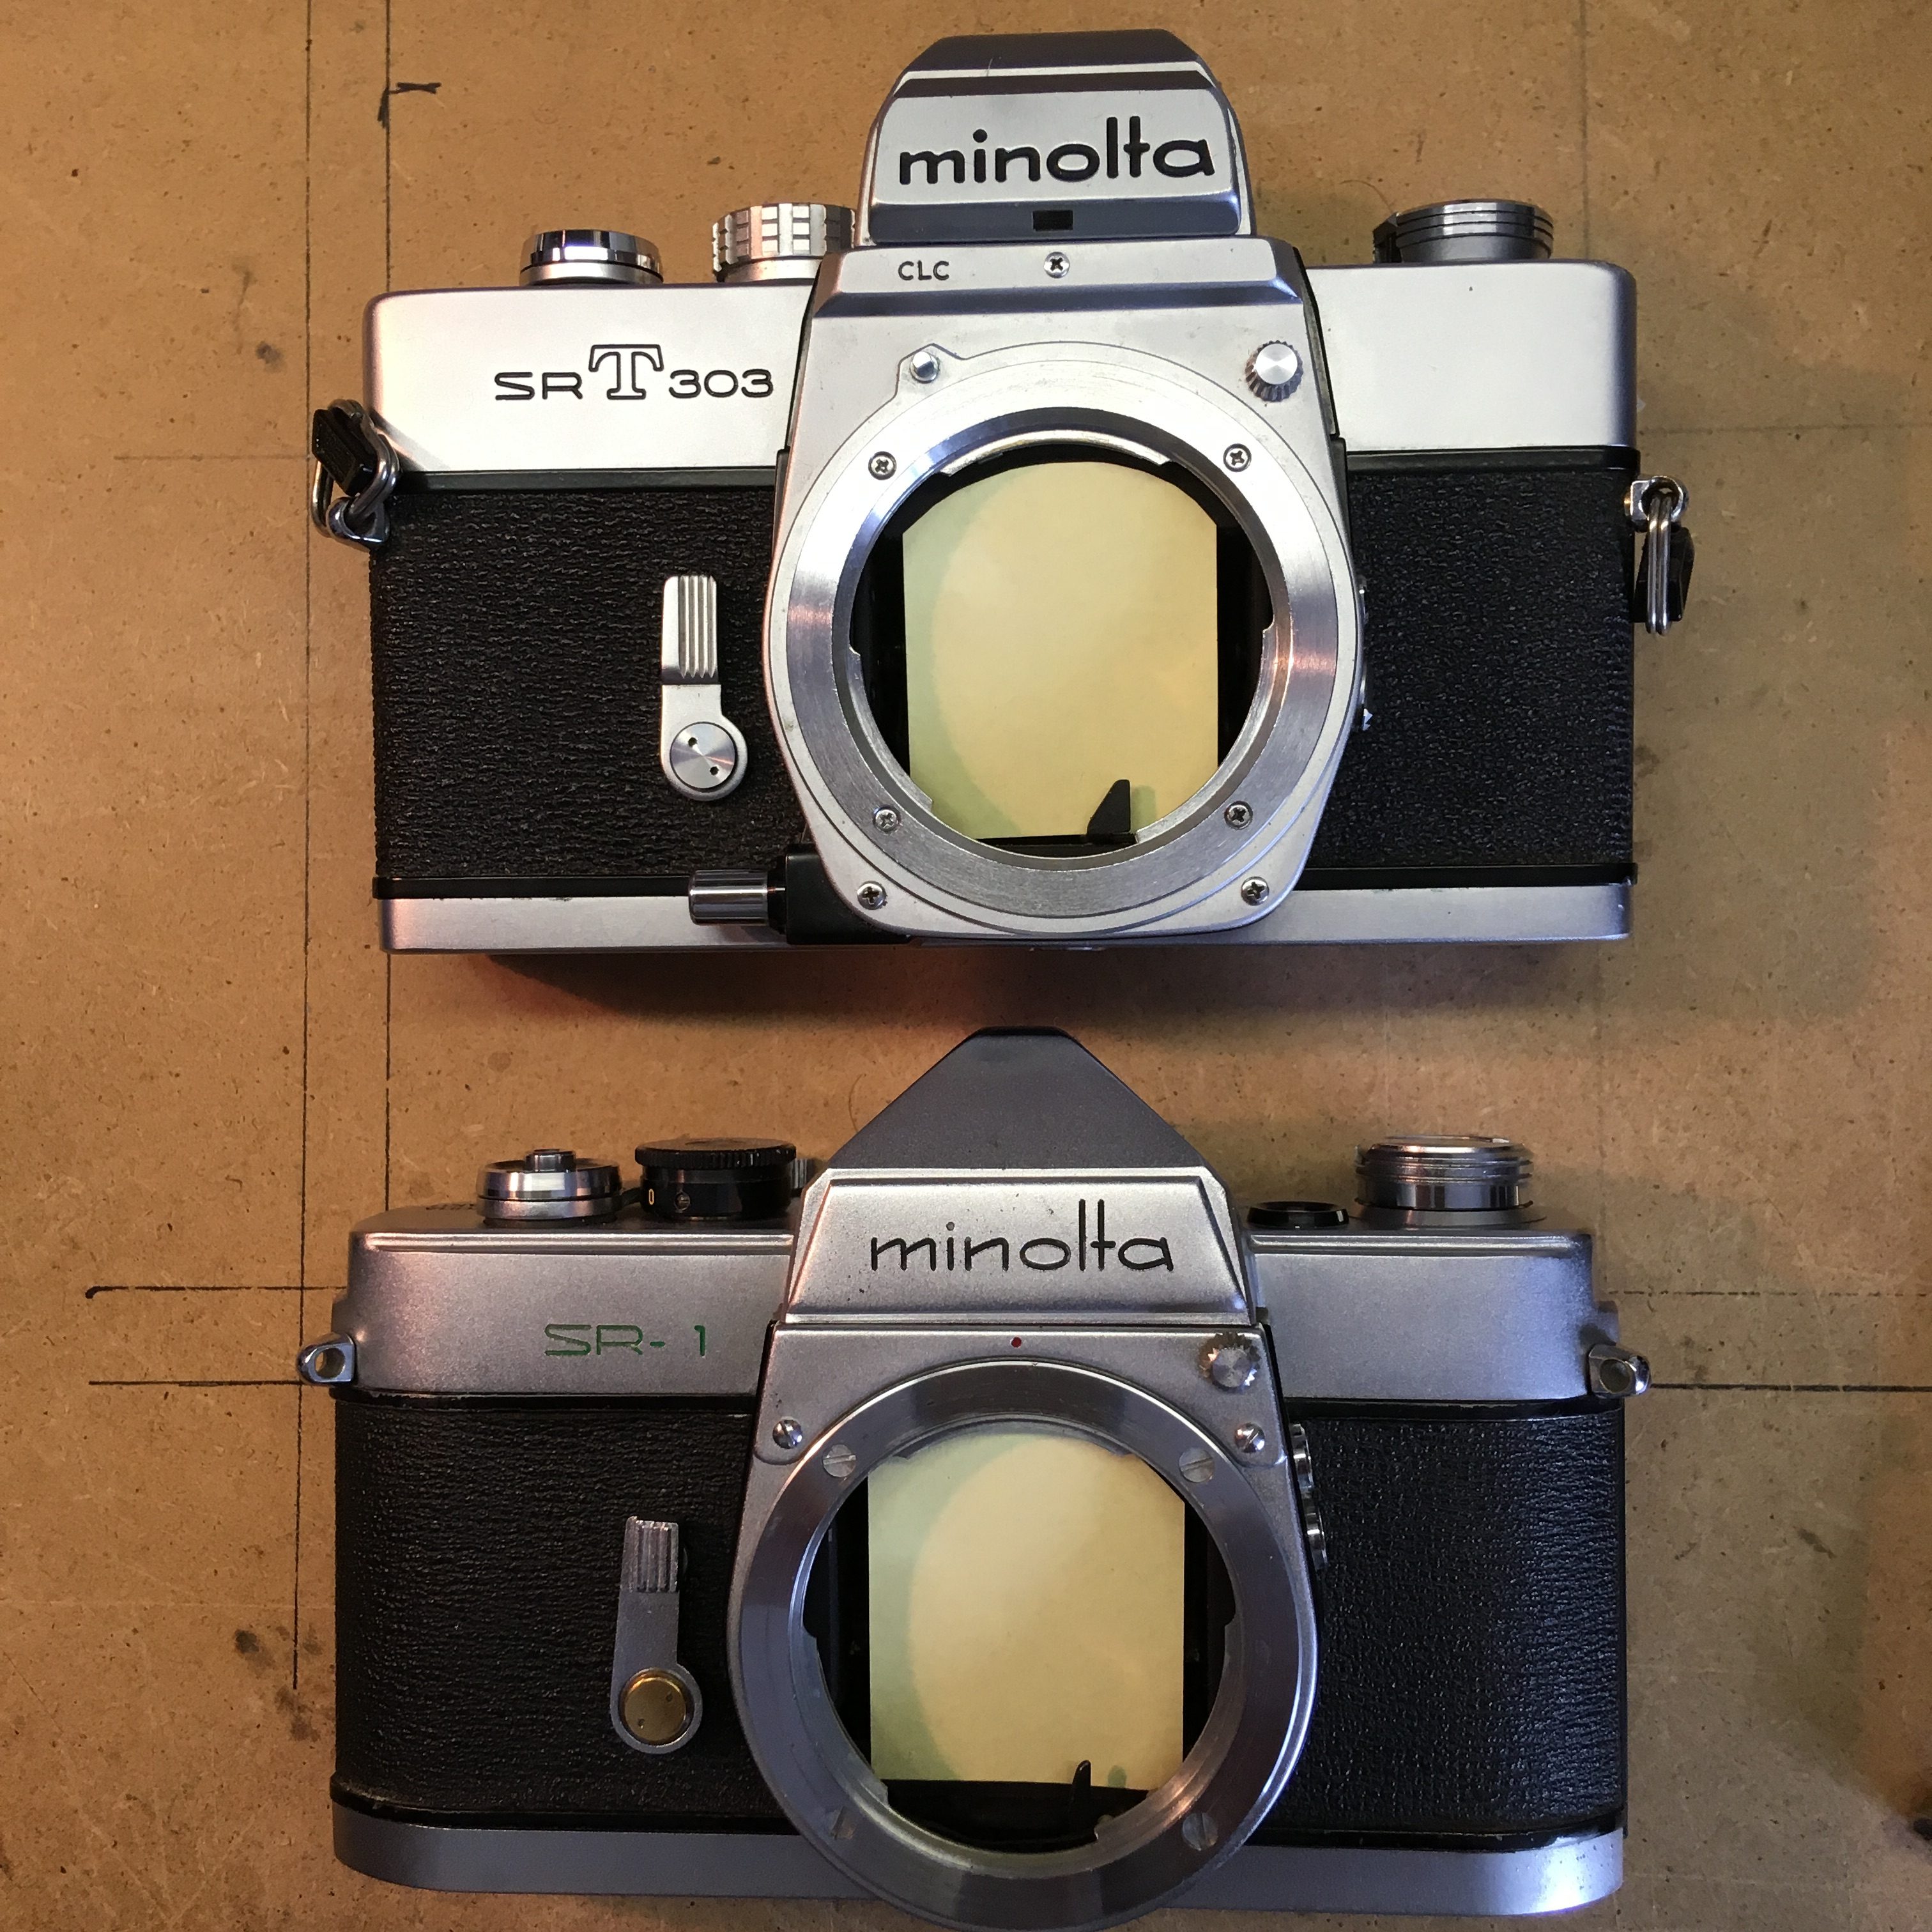
SR-1 partially dismantled, but with the front mount section already off and the self-timer no longer fitted. Notice the difference between the castings and the ‘SRC’ in relief on the front next the mount: on the SR-2 there is not any such marking.

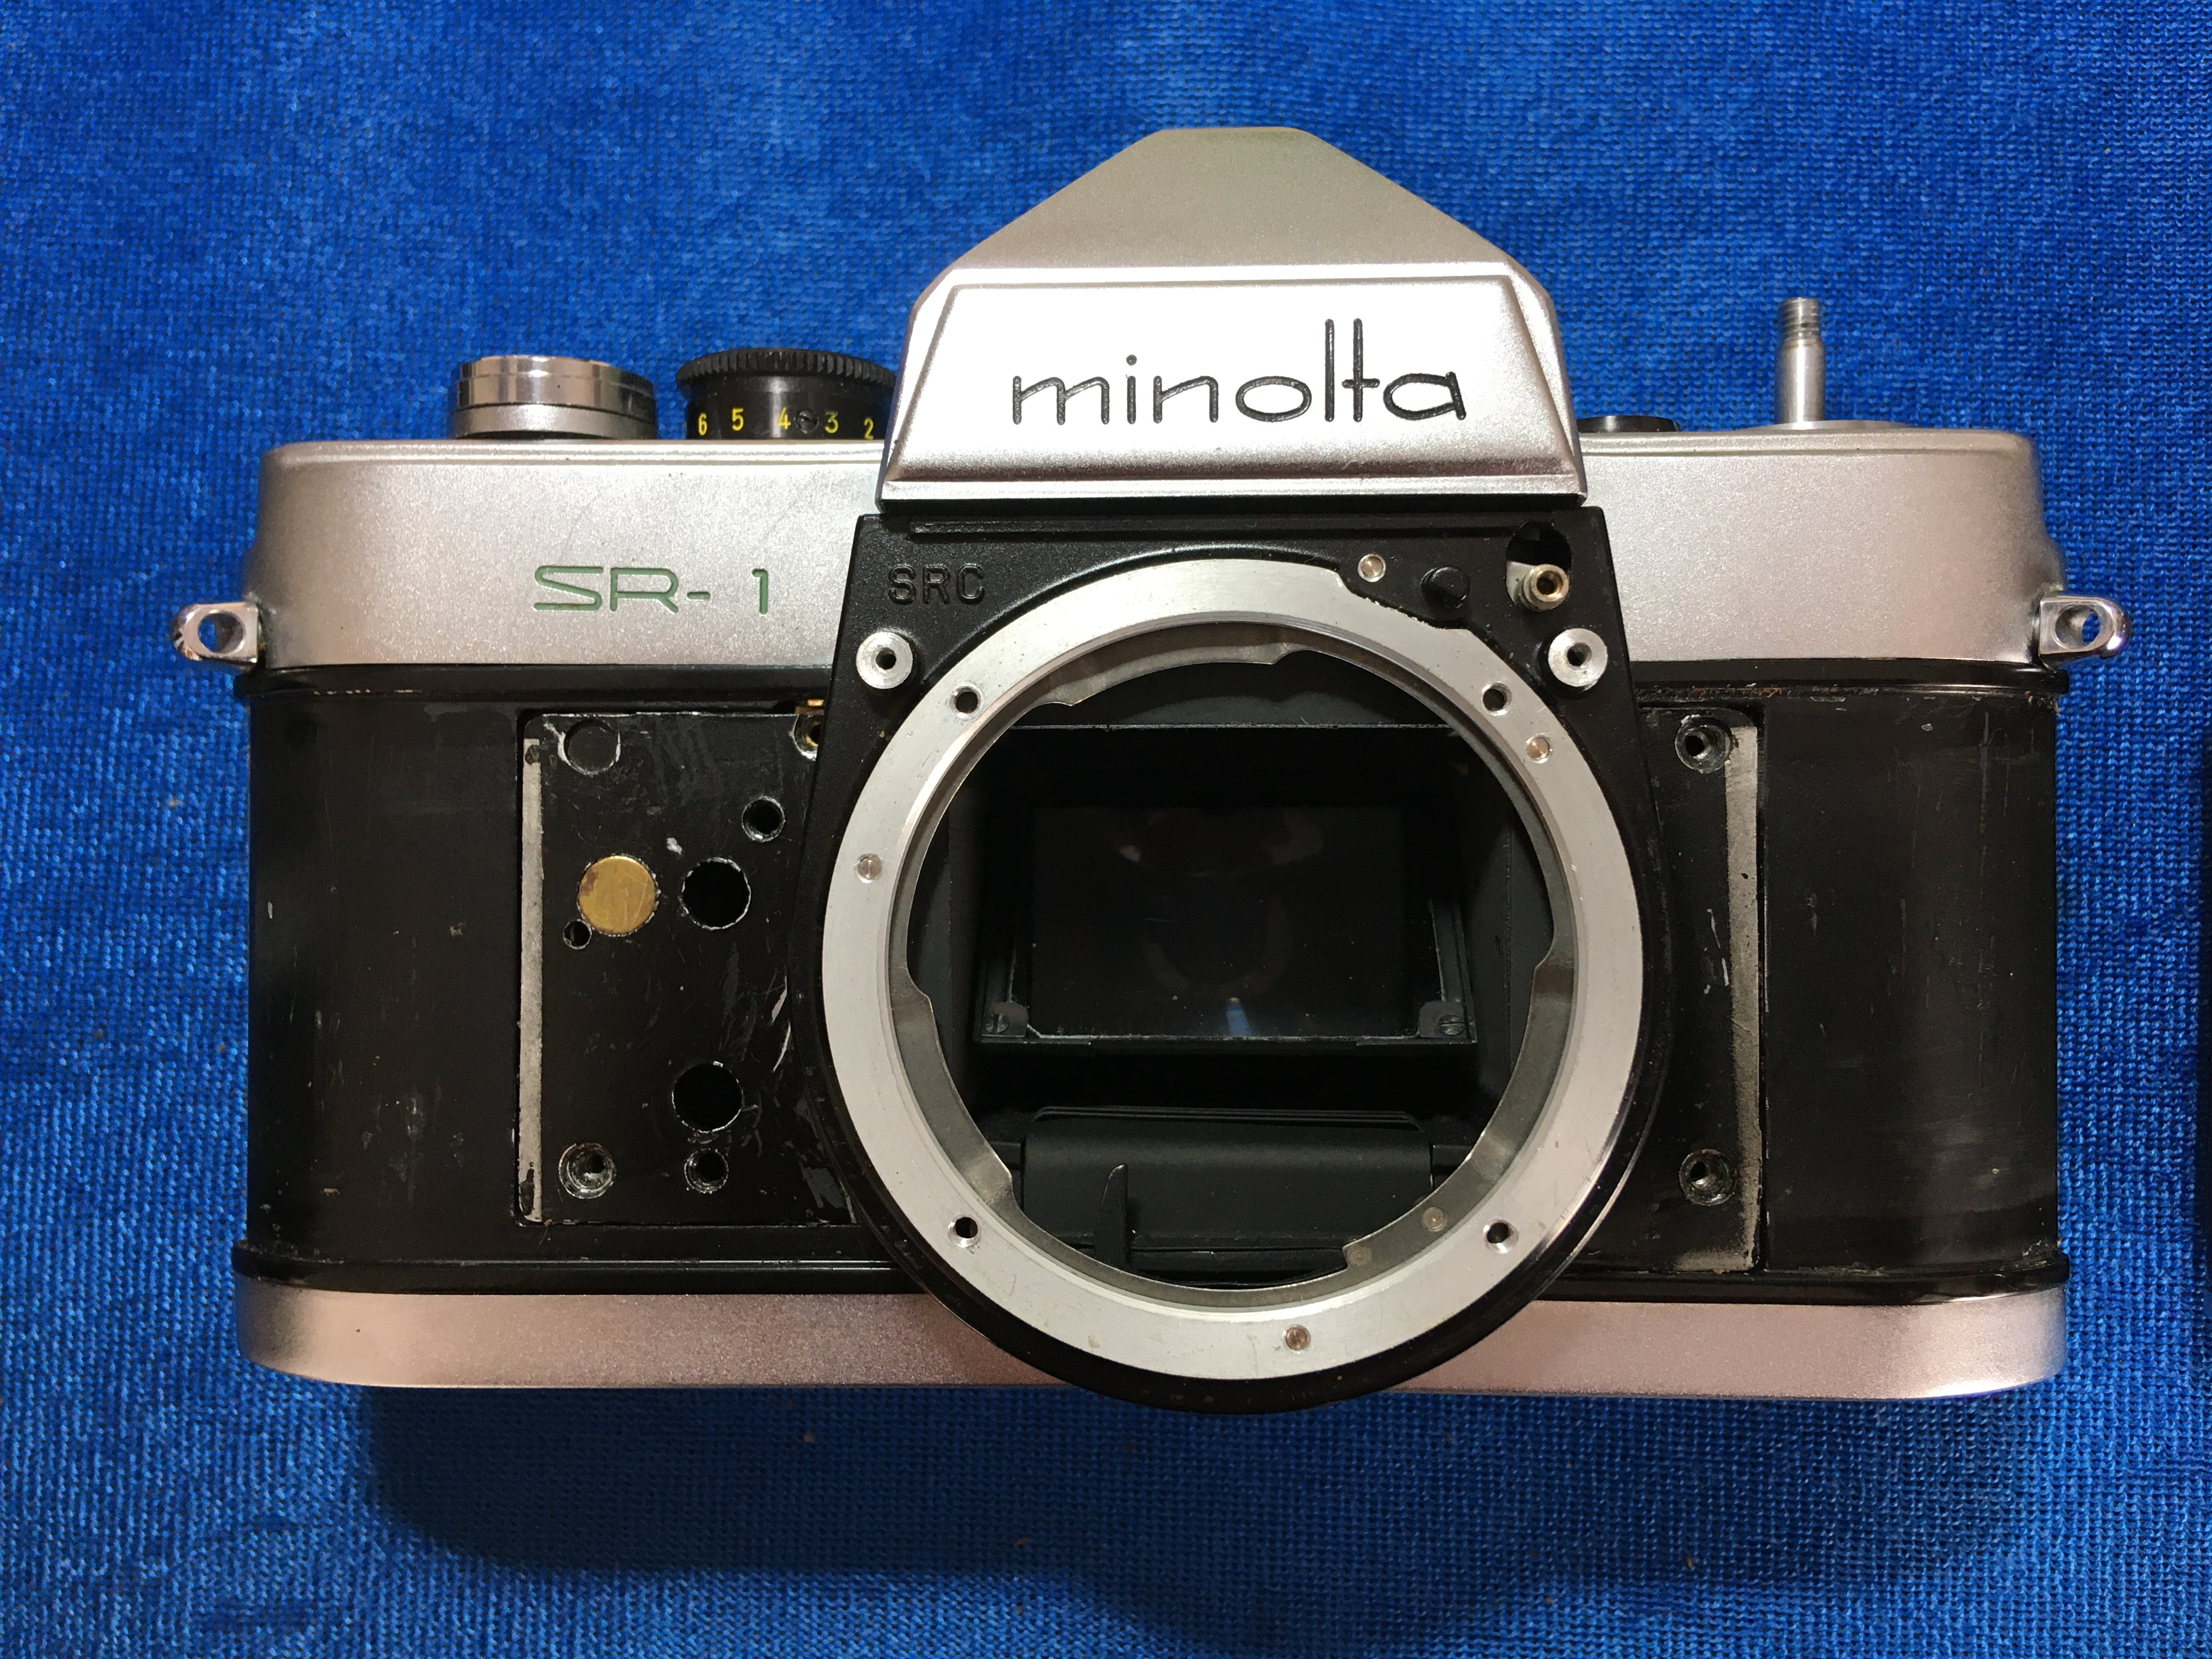
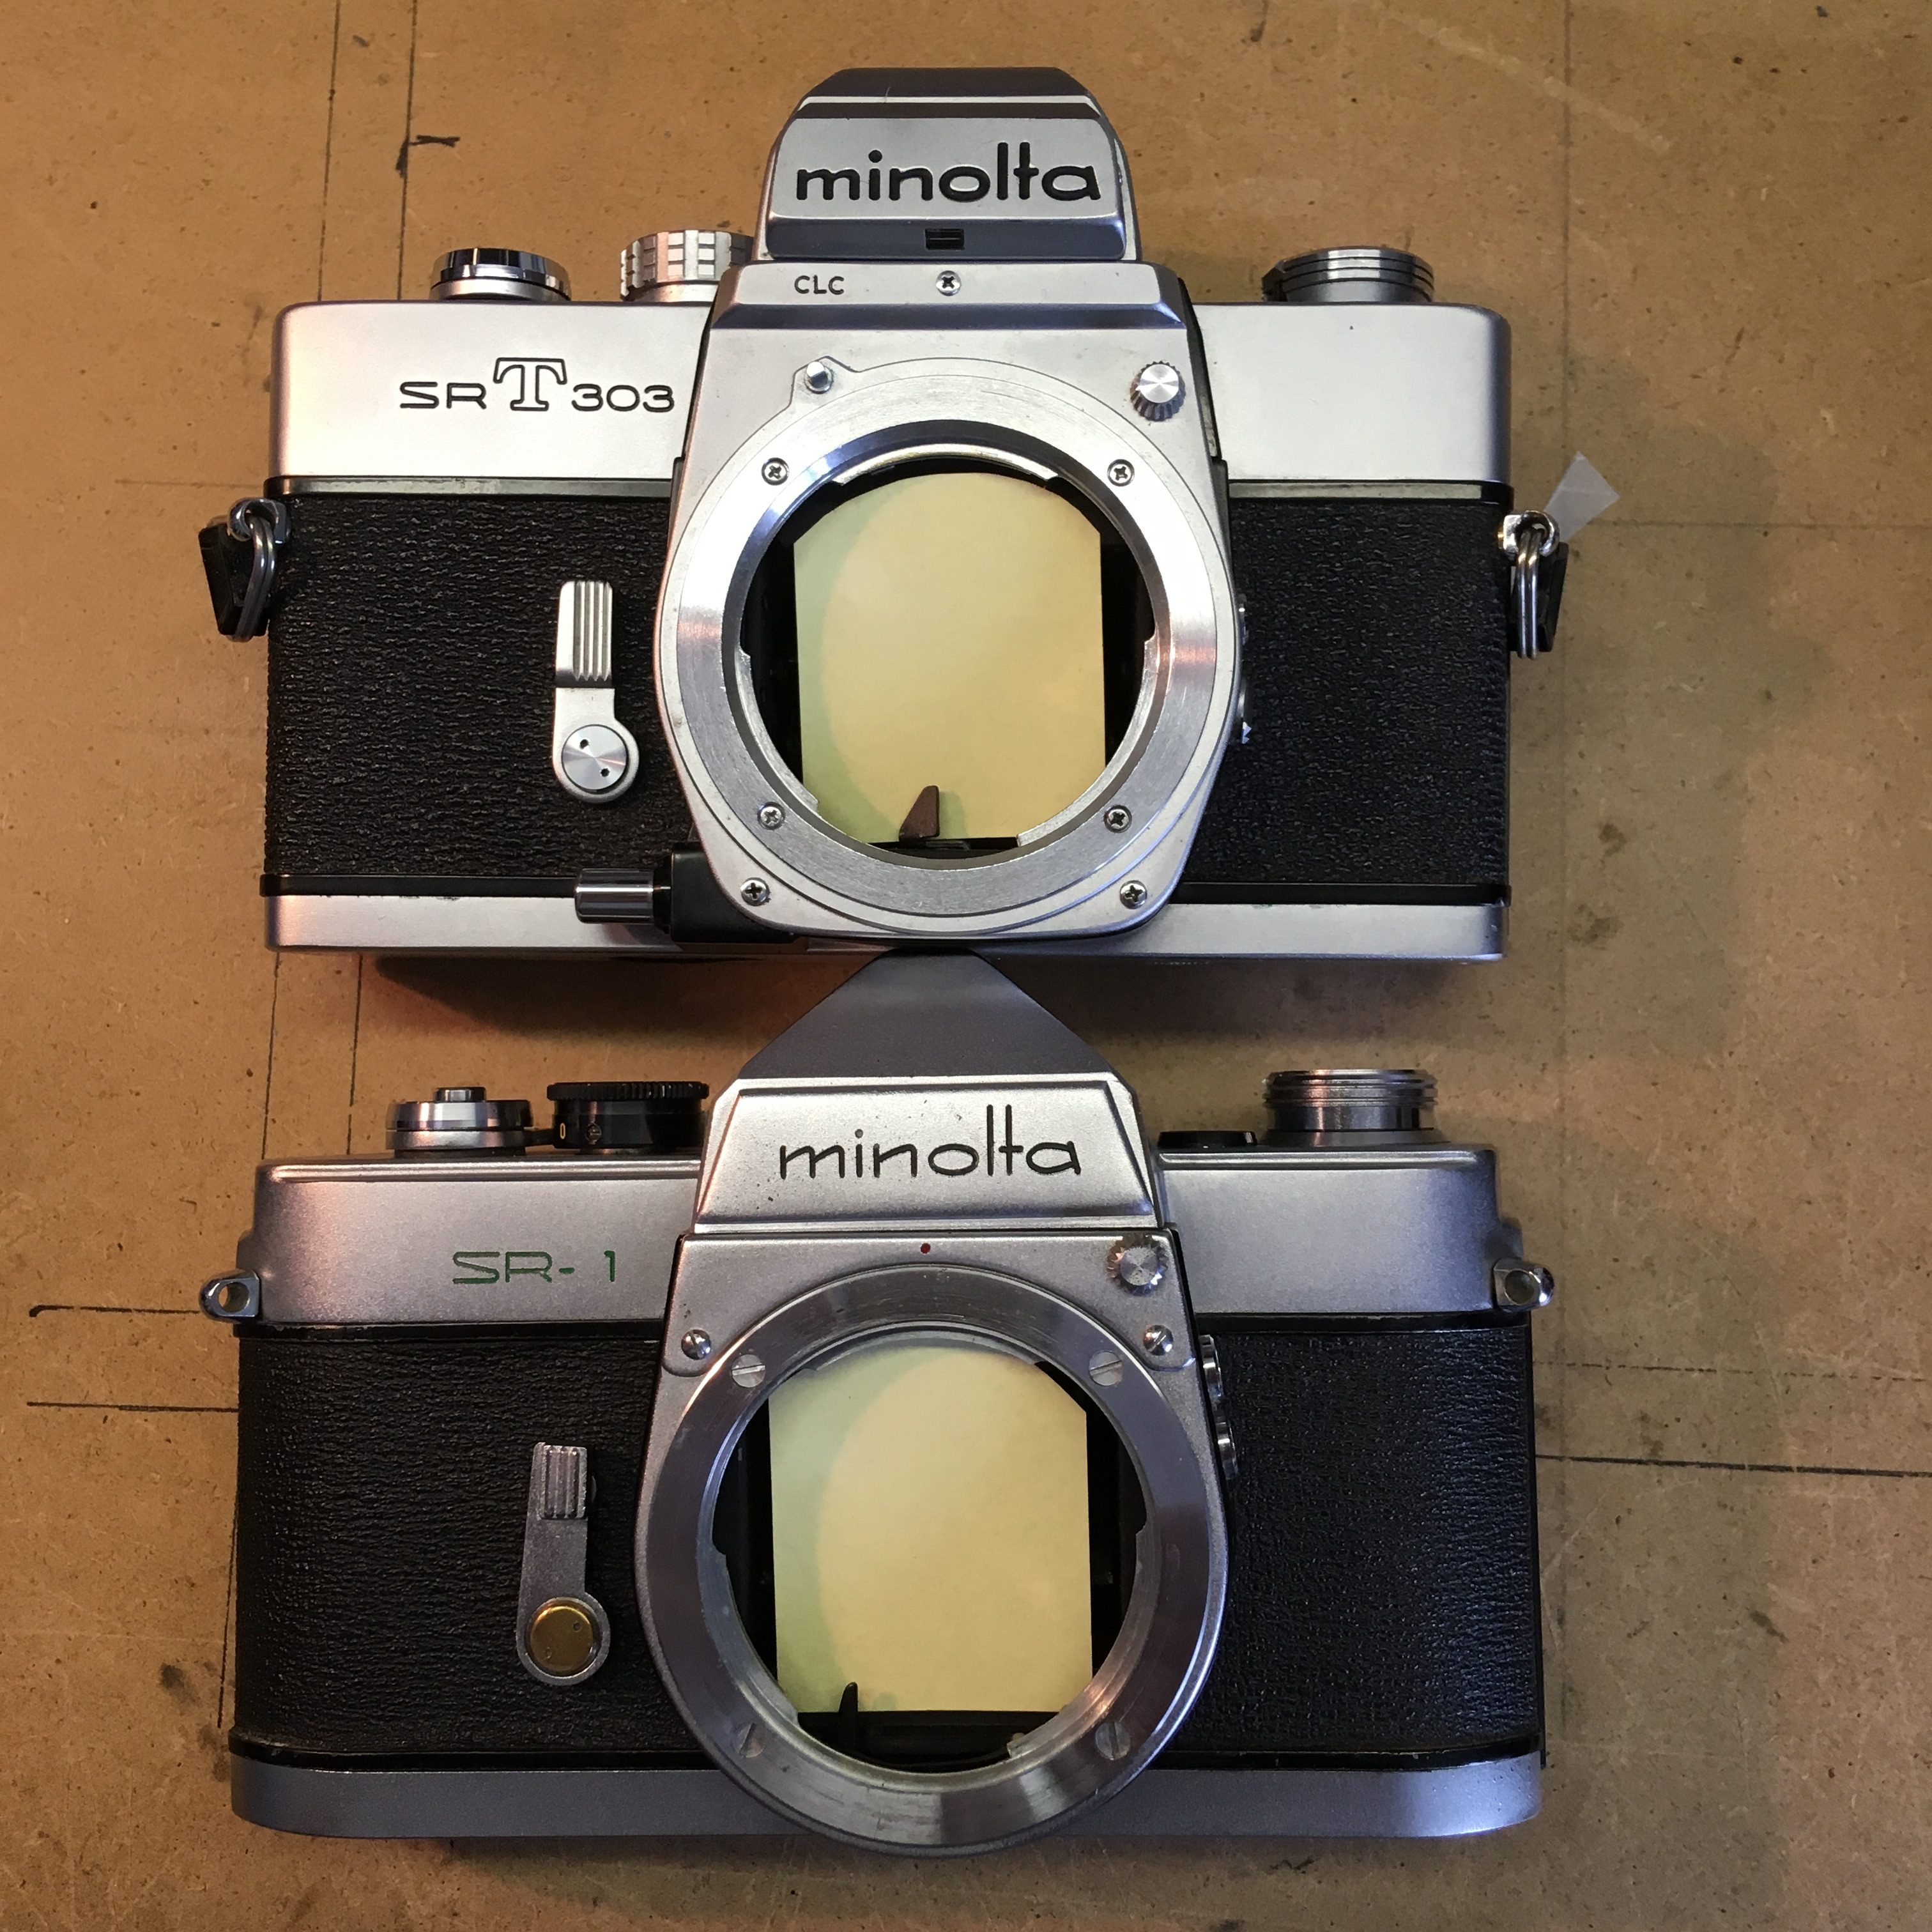
Here I’ll give a short look inside to still your curiosity (and mine!). So the SR-2 was the first in late 1958 and is put next to an SR-1 from around 1961, the ‘c’-version; the last one before the change was made to the aperture automatic. Two quite different mechanicals altogether, despite looking very similar, especially the bottom end, where the aperture and shutter actuation takes place.

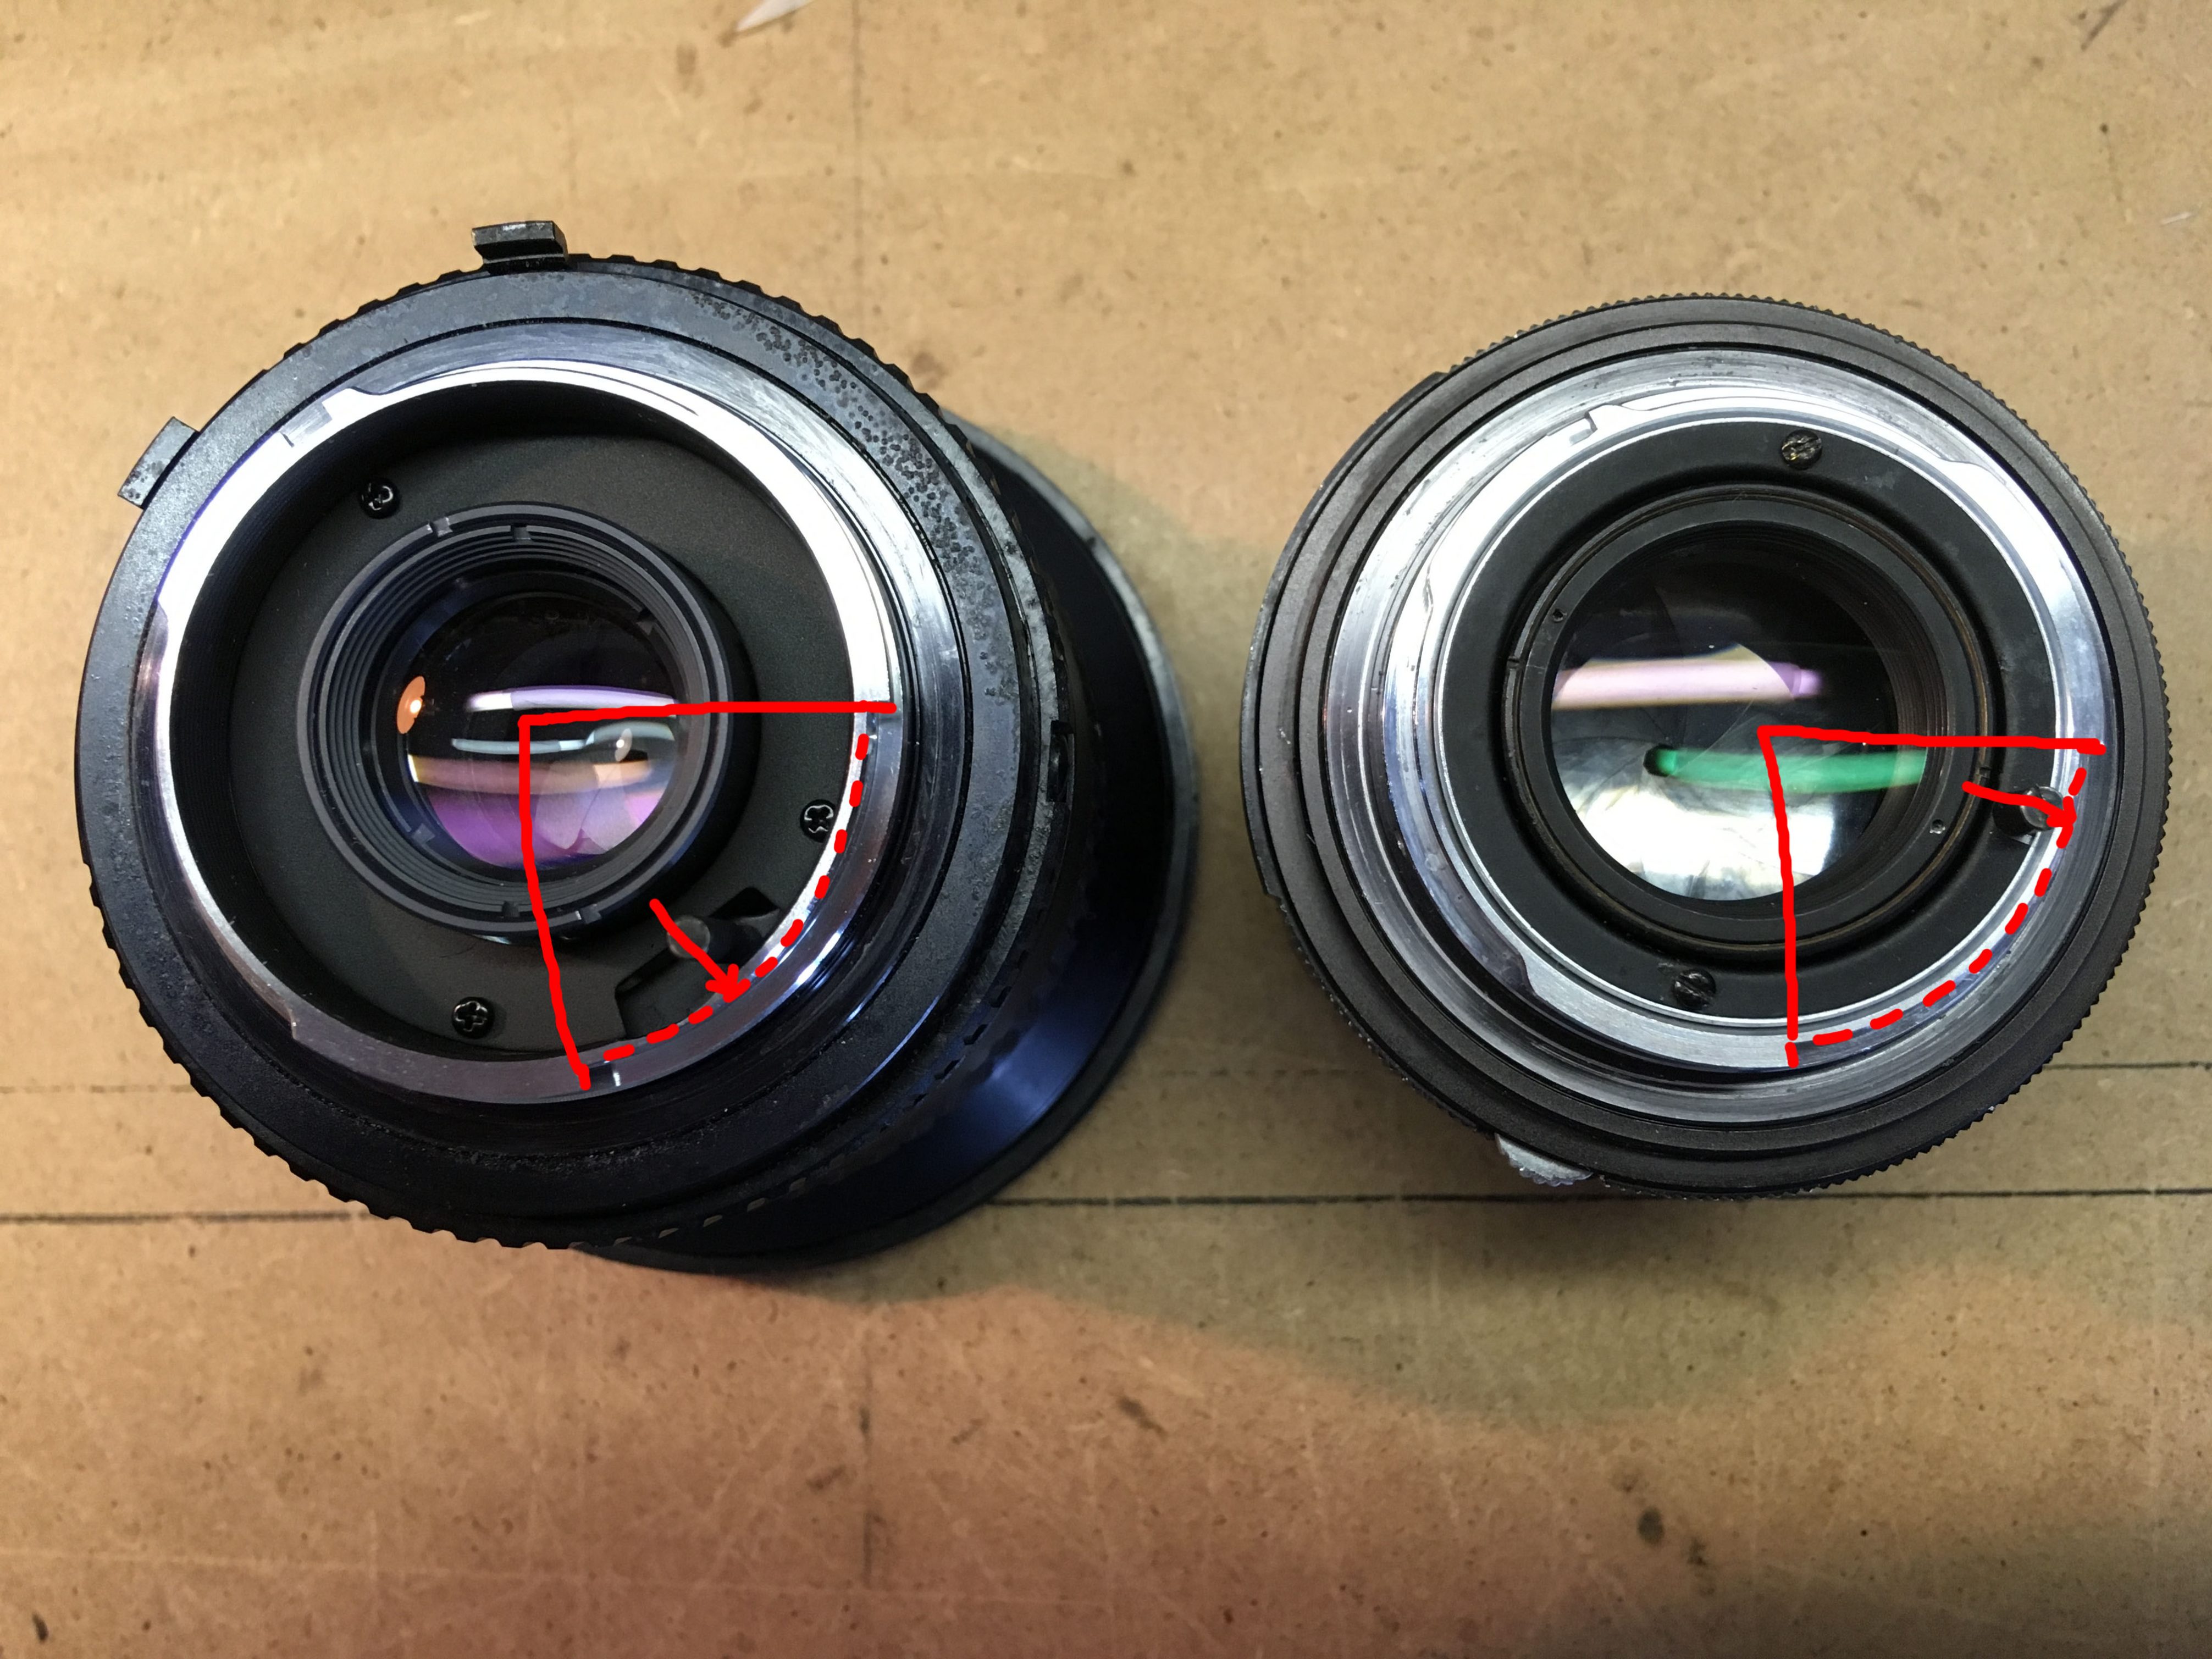
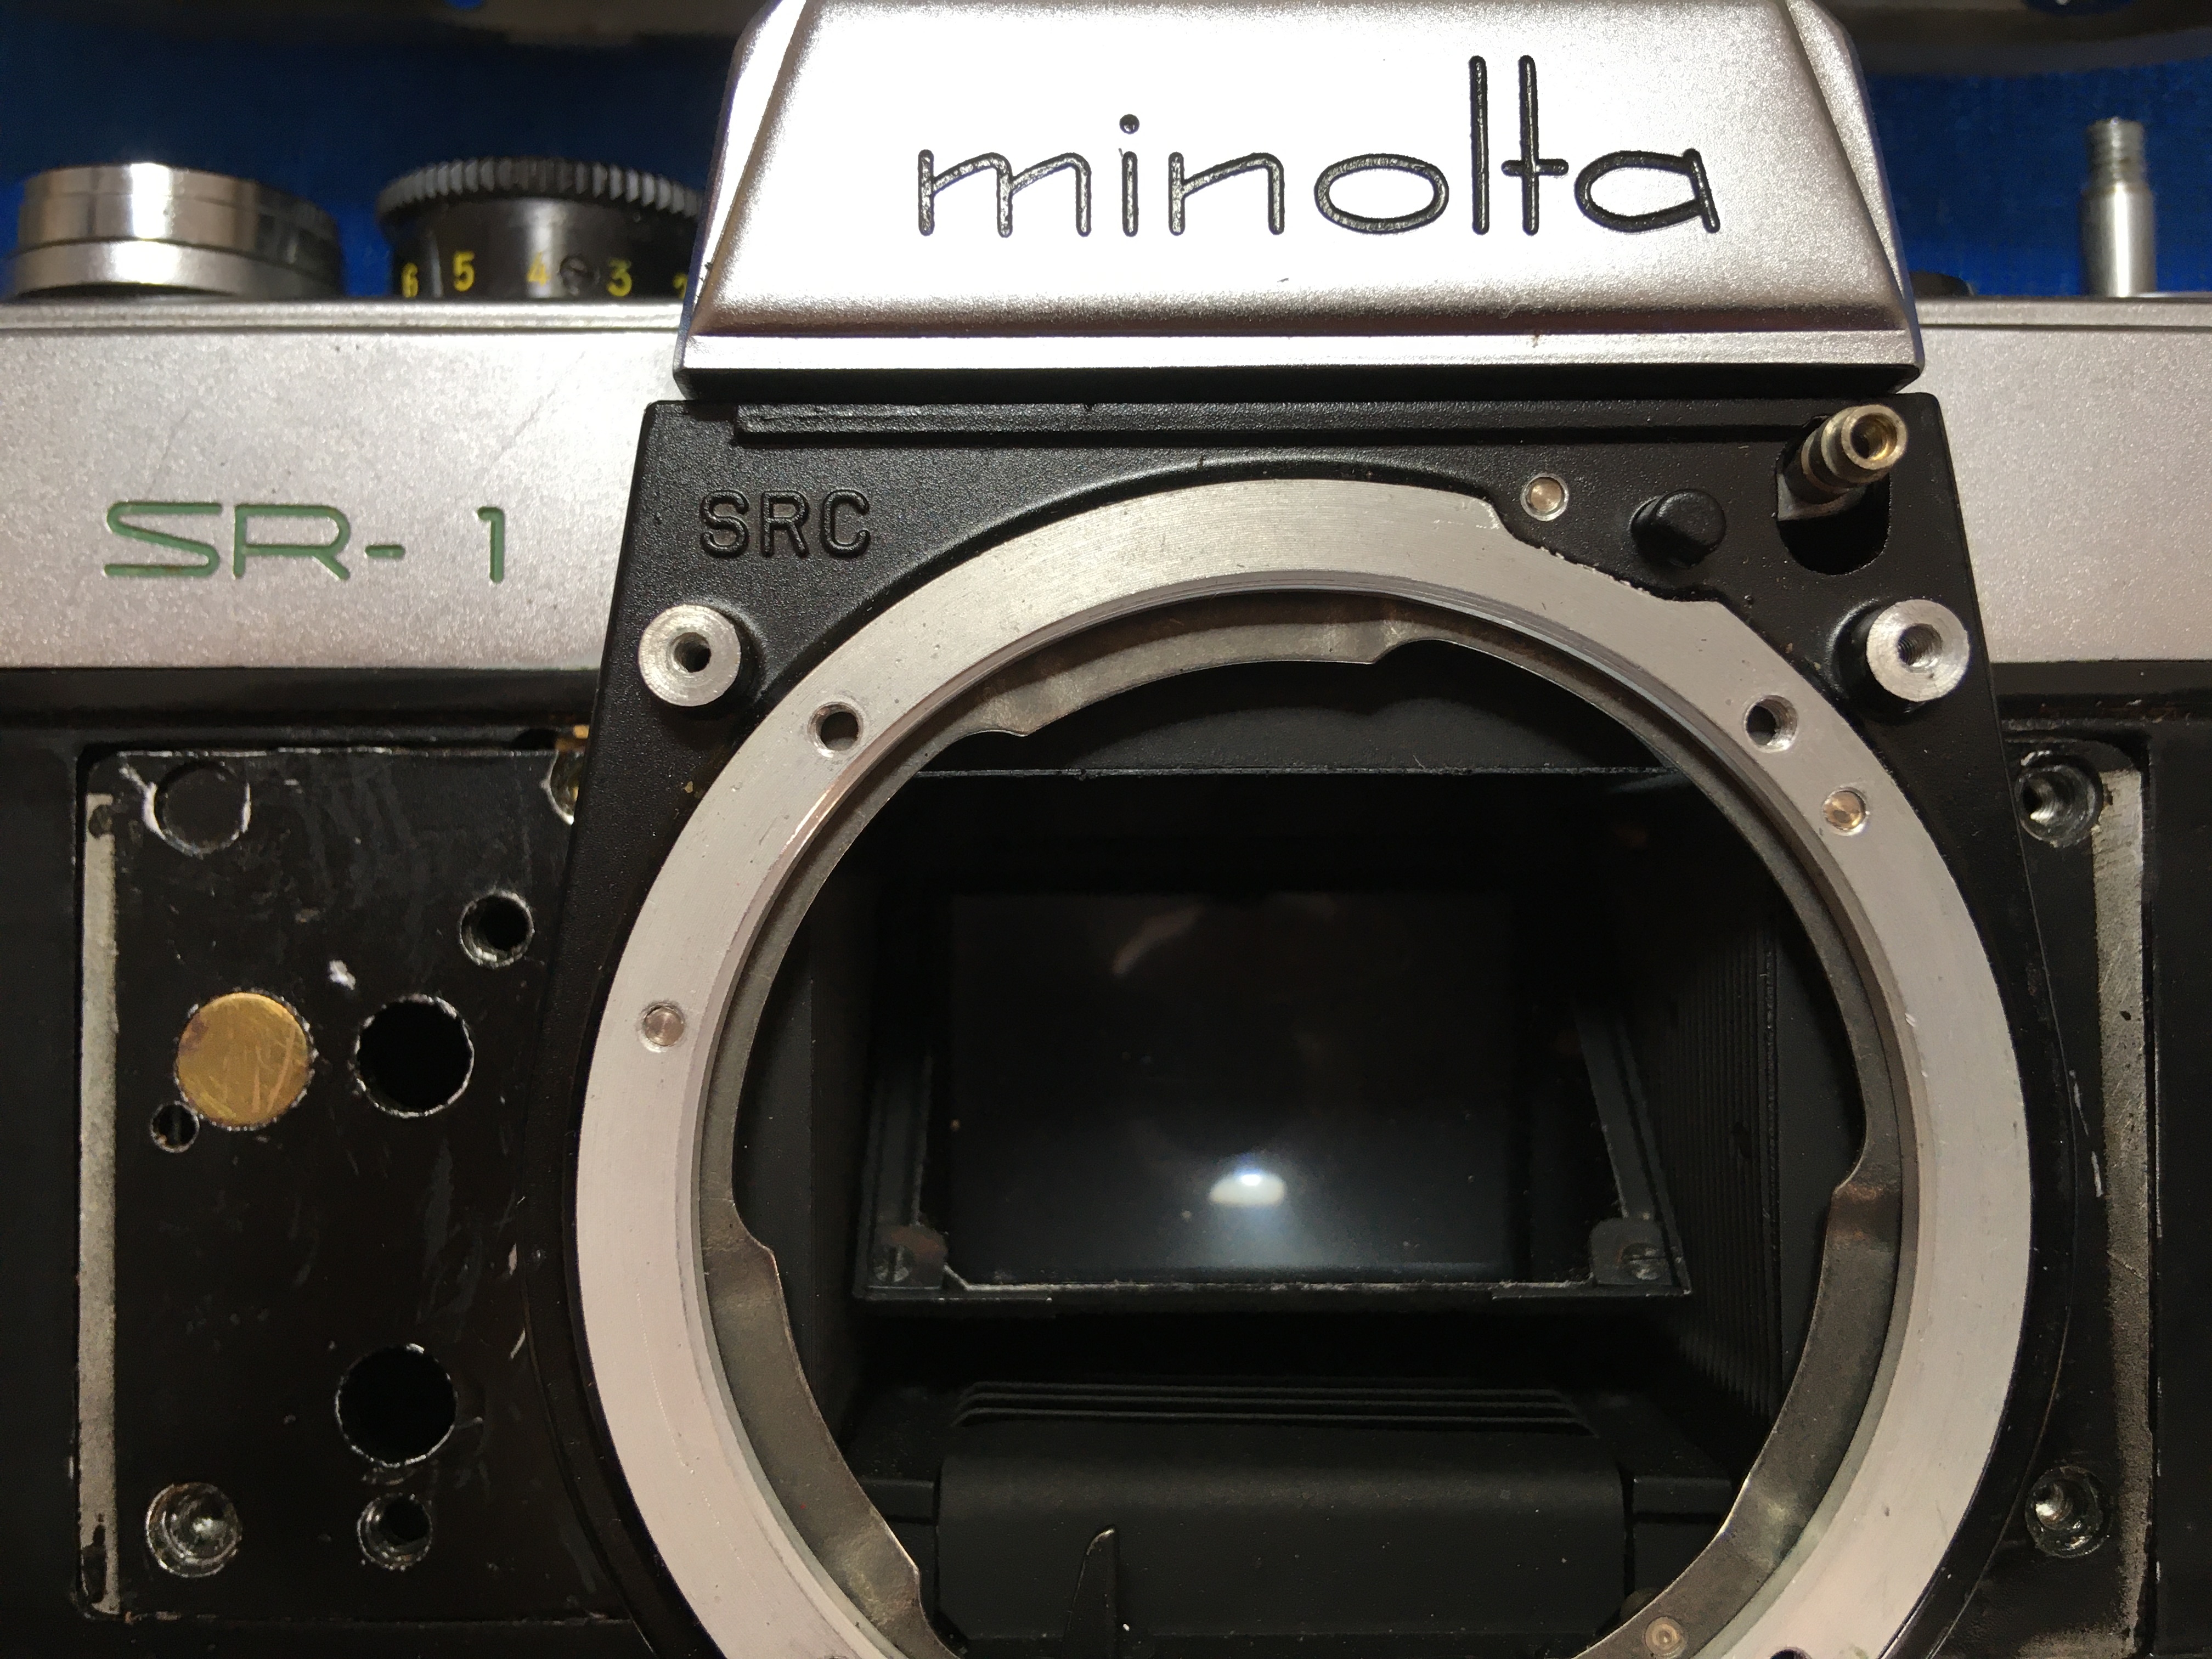
Optically, the early and later models are relatively easy to tell apart if you know what to look for.. all the 1959 models have a much smaller eyepiece on the back, which is not so easy to spot at a glance. Easier to notice is the shutter-speed knob on the really early ones (the SR-1, too) that needed to be lifted to change the shutter-speed. On the top the scale is not quite evenly distributed, the 250, 500 and 1000 look evenly spaced, but they do have a little white line engraved to show the actual position needed to dial in those three speeds. From the front, the early dial is more conical in shape, wider at the bottom and smaller in diameter on the top than the later model (there is about a 2mm gap to the winder-lever). The later one, as you can see, is more straight from the side, and is as a result larger on top and has evenly spaced engravings up to 500, without the extra lines. The earliest SR-1 shutter-speed dial was similar in shape and size to the SE-2, missing the top speed, of course. There follows a series of photos showing some of the the external and the internal differences. Later I will show the internals of the first SR-1 model, but the differences between these two models are more obvious 🙂 The picture below shows the SRC on the casting rather more plainly.

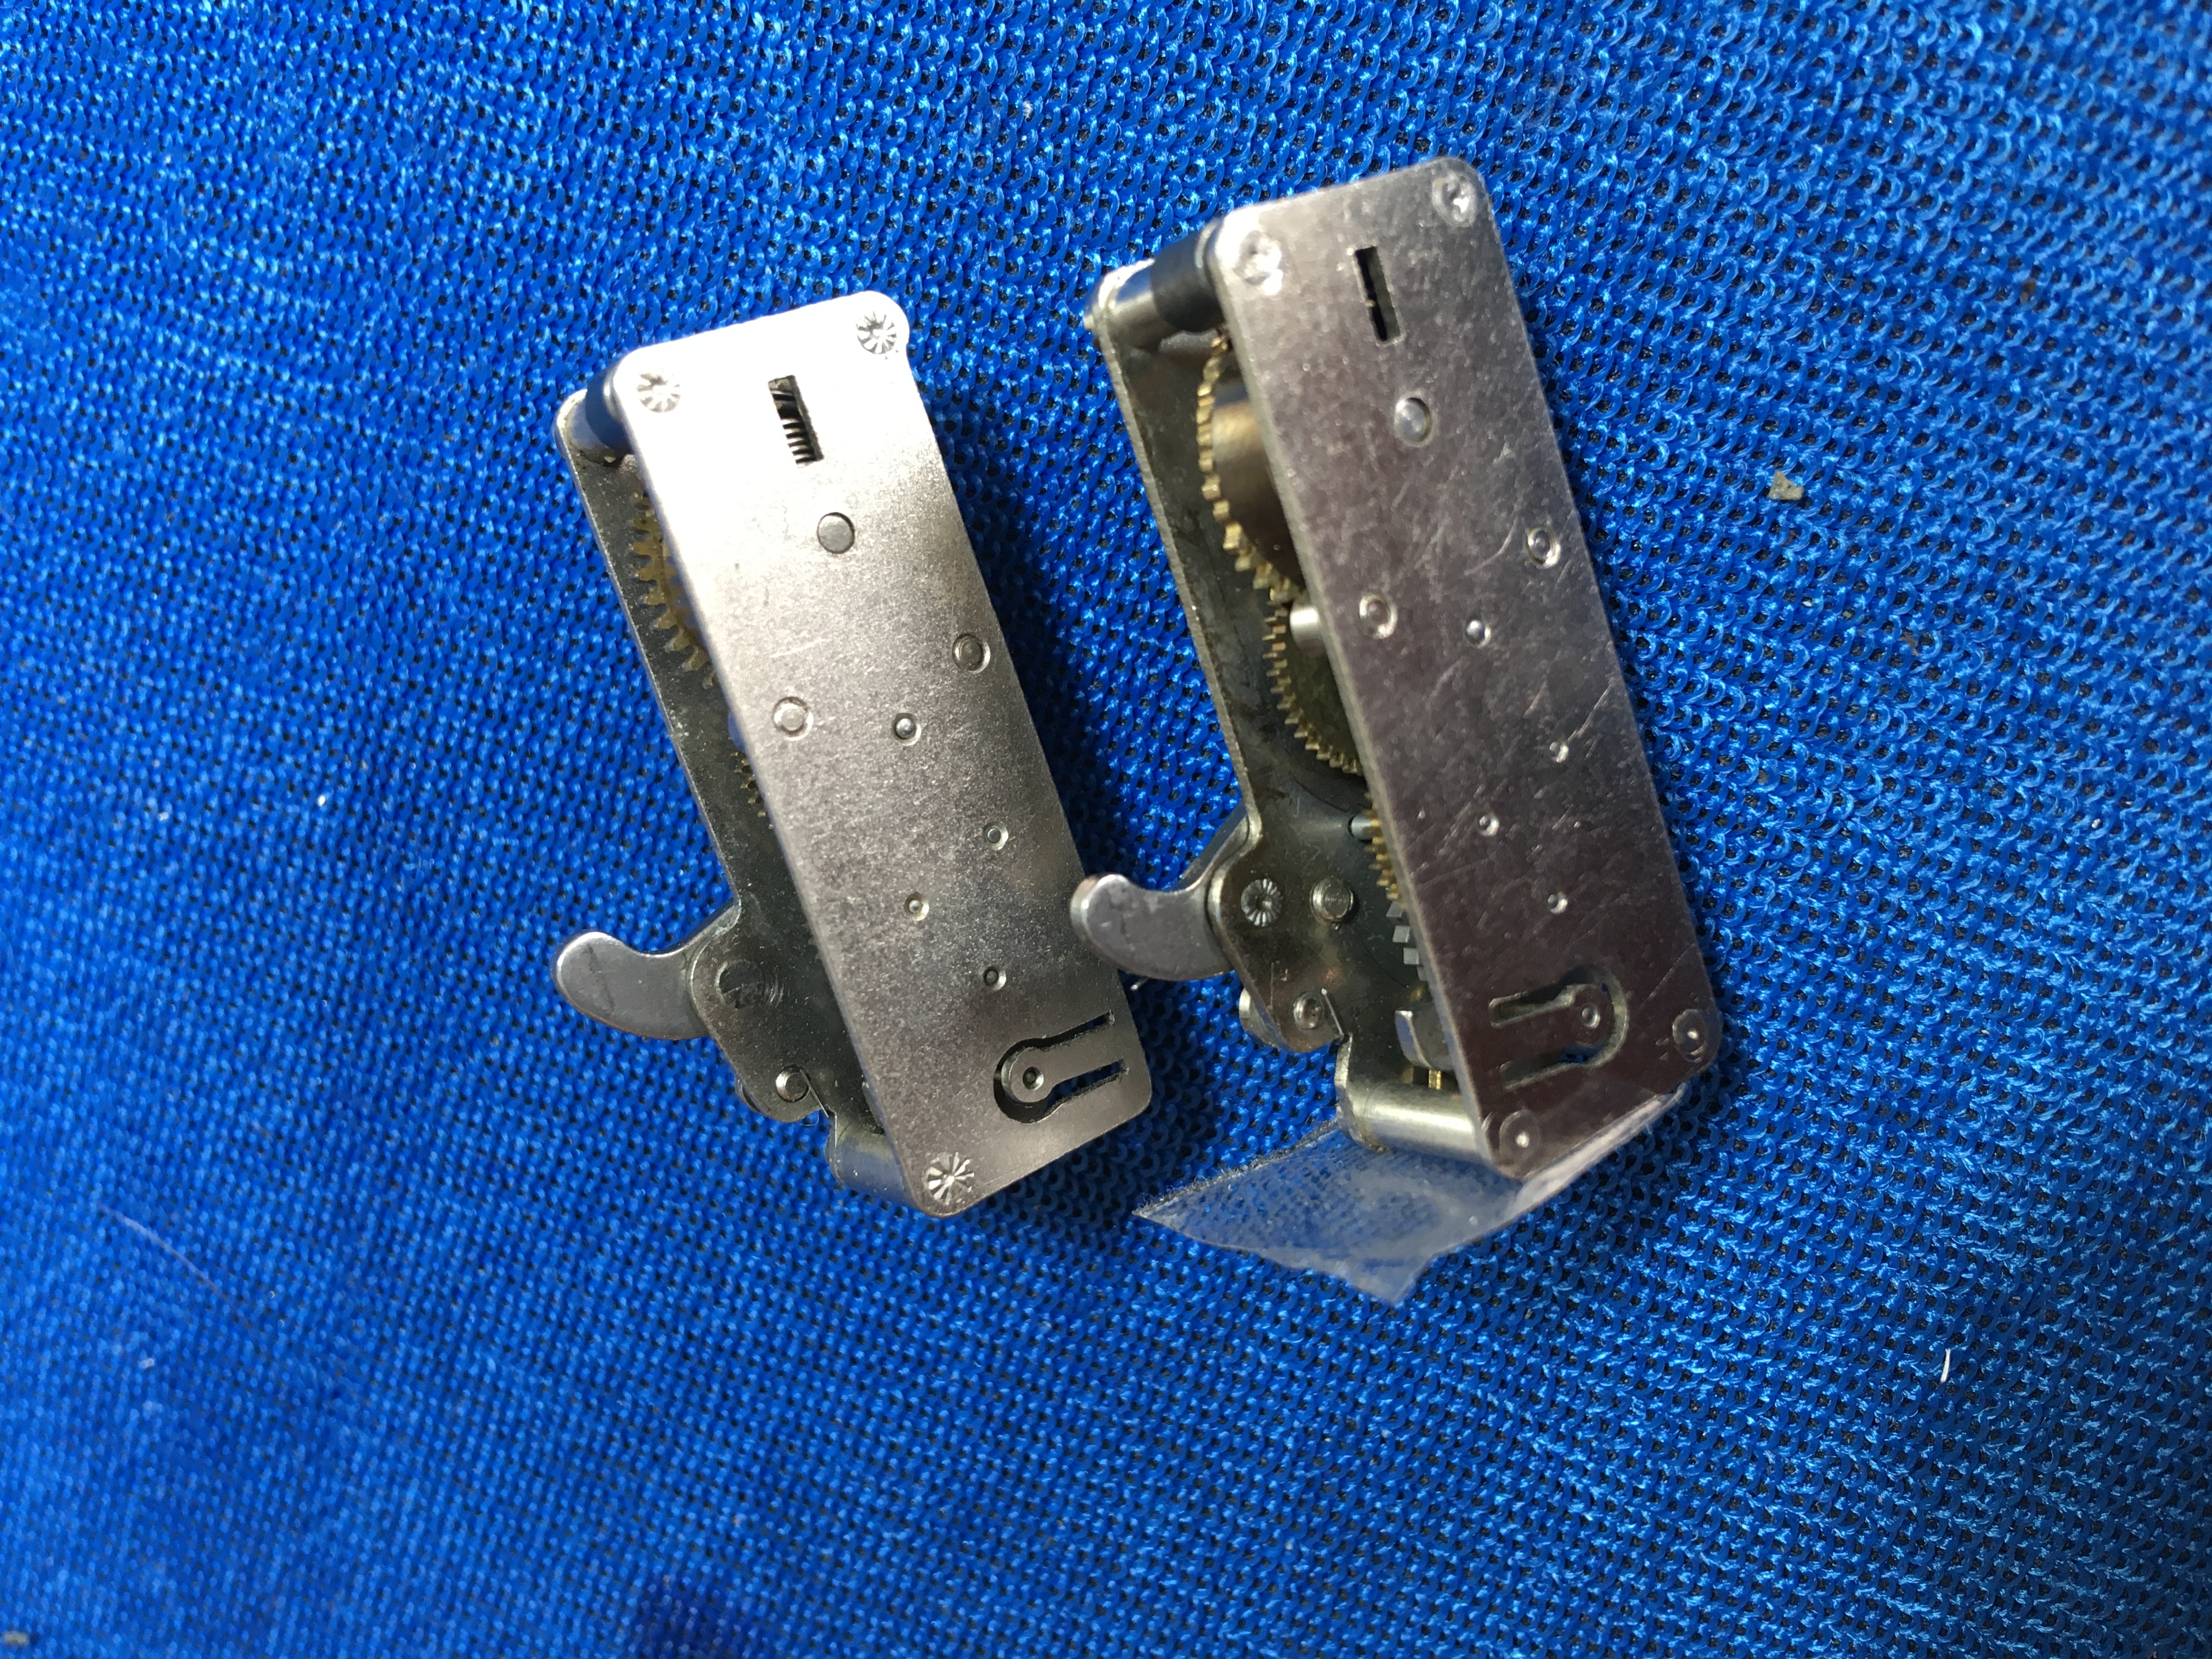
There are, of course, lots of detail differences, that are too many to mention here, but worth mentioning and visible in this shot, is the mirror-fixing with screws, rather than the riveted-on mirror in the SR-2 🙂 There are also subtle differences between the self-timers, not only the front casting which they are mounted to: The one on the bottom or the right in this picture is off the SR-2 and fits behind the oblong brass plate. It also has an extra large flat screw (taken off on this picture below, but visible later once mounted) on the front side and the teeth on the spring-gear (the largest one) look like they have been ground or worn down… look closely at the pictures and you will see what I mean! The difference in the gear is plain to see.

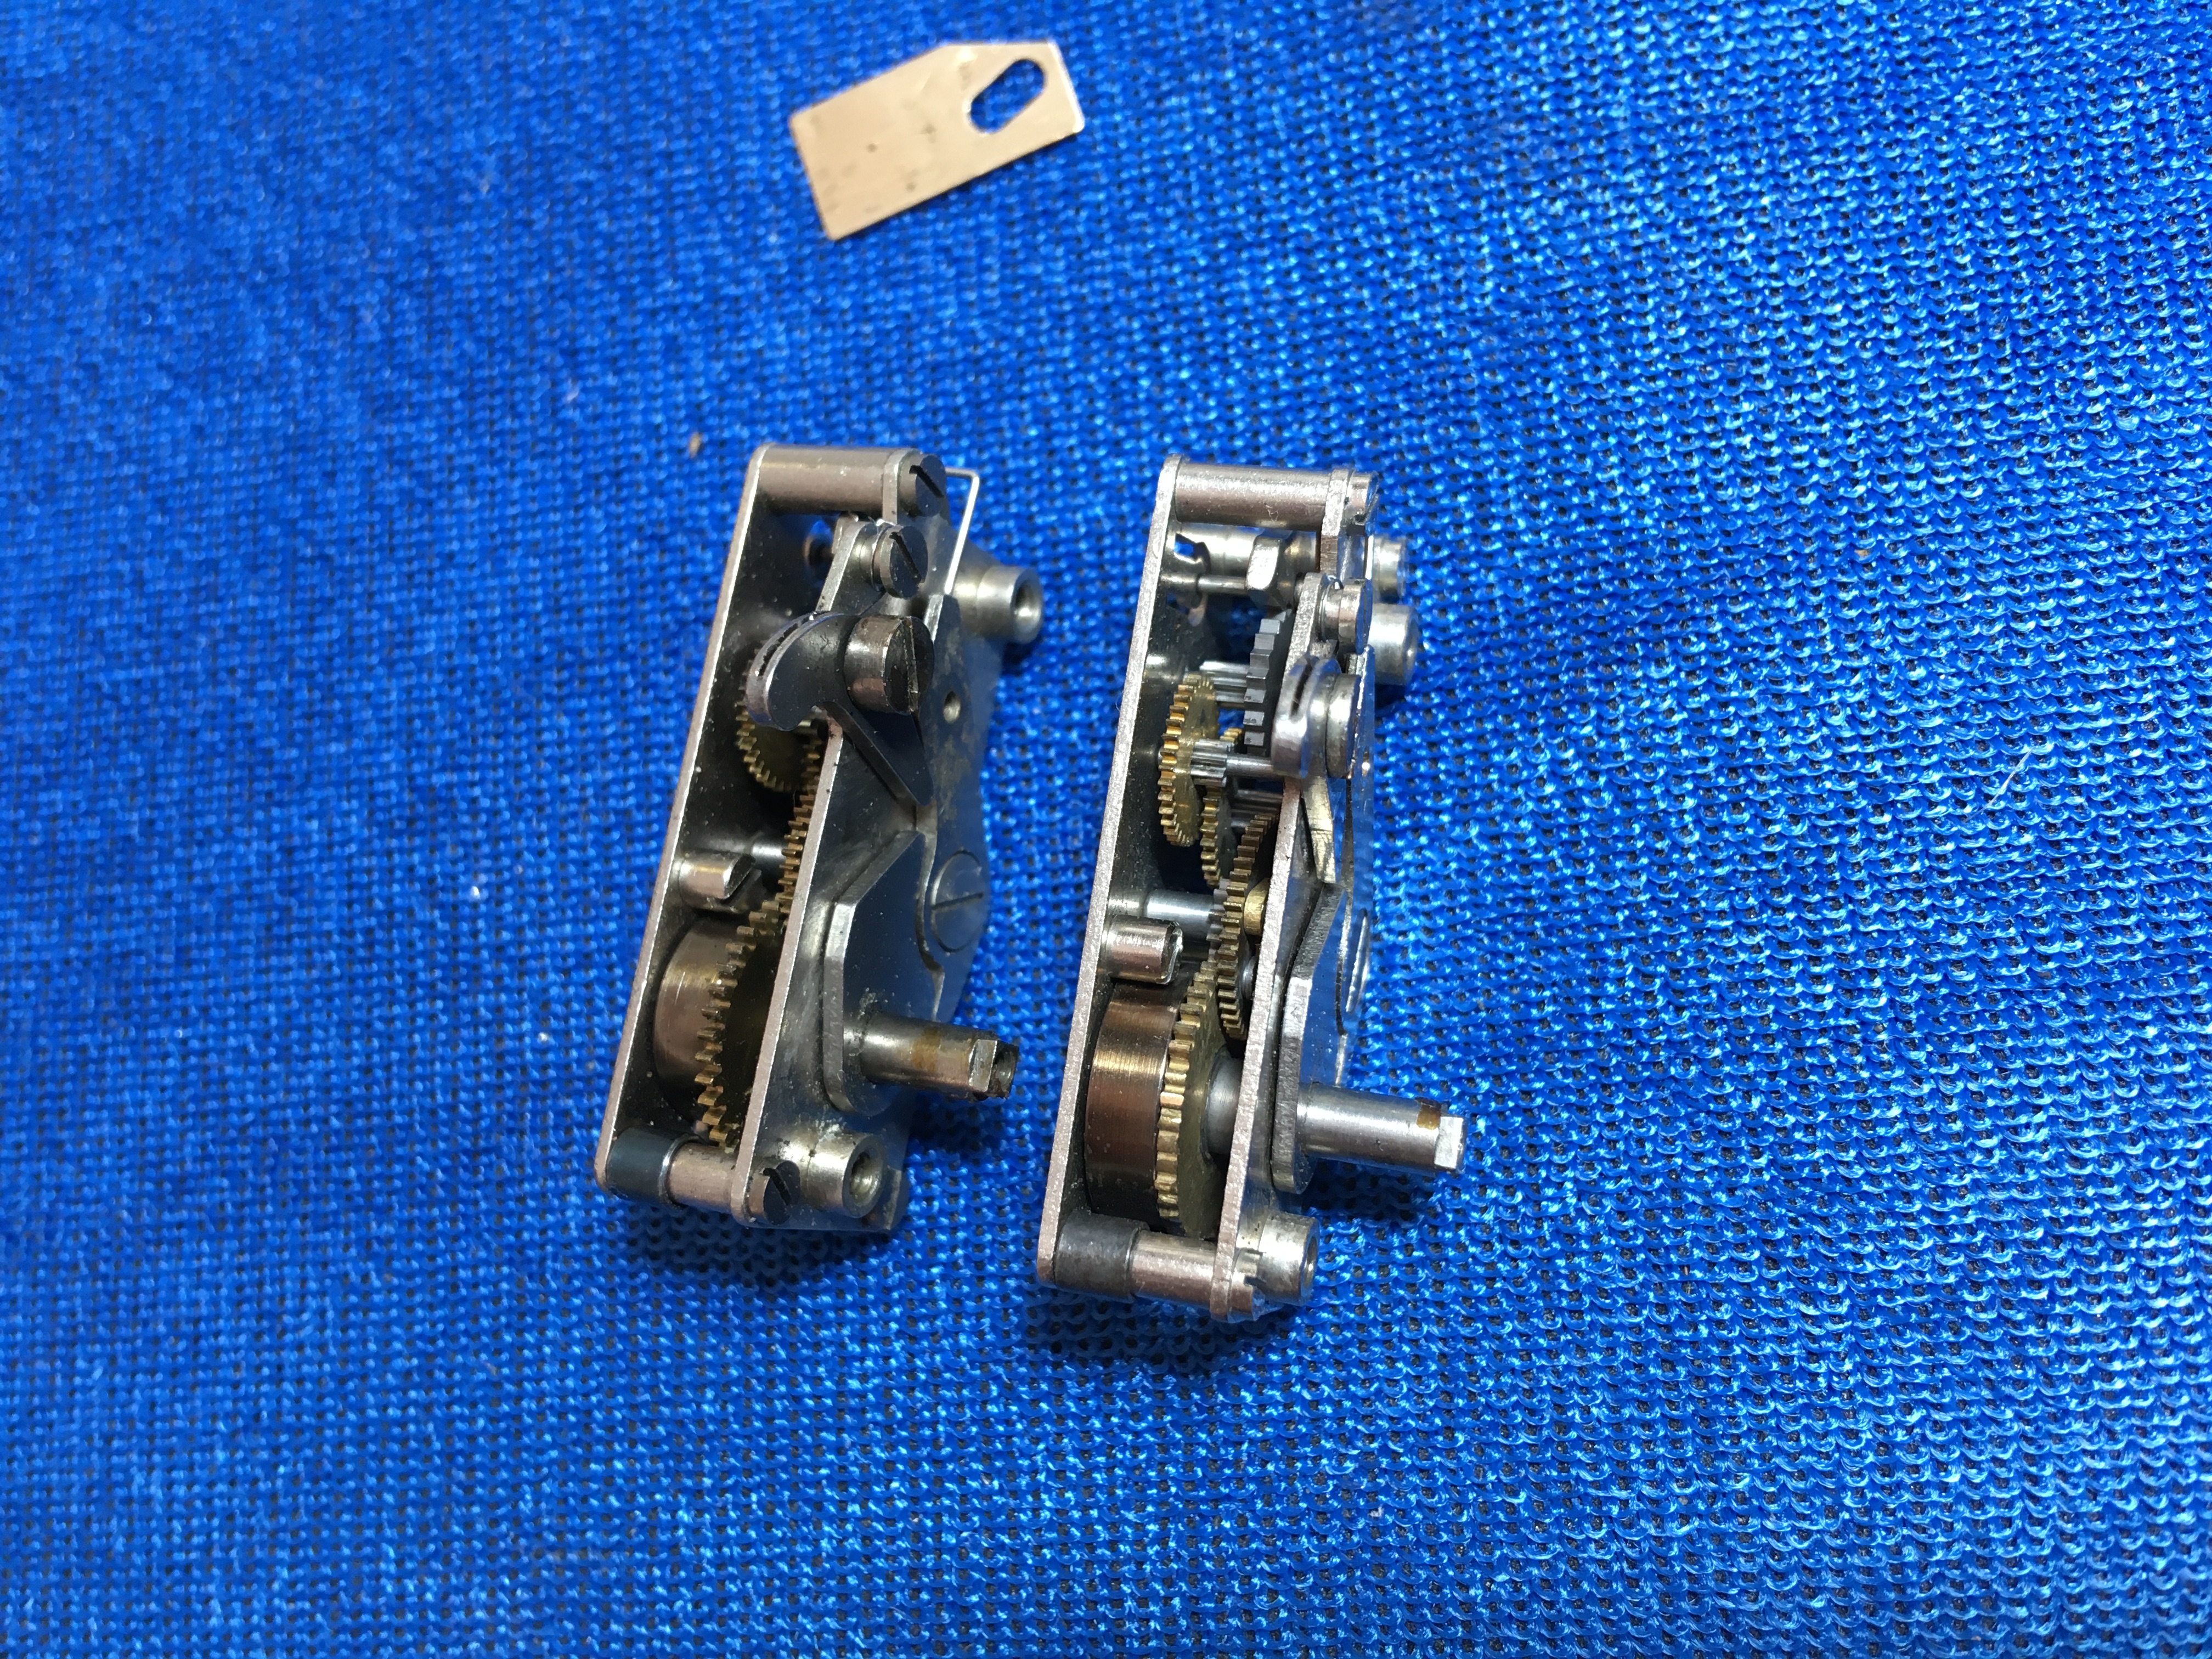
SR-2 with the sellotape and here the differences in the gear-teeth are more obvious on this one. Note also that the backing plates are not the same, though the mechanisms are largely interchangeable:

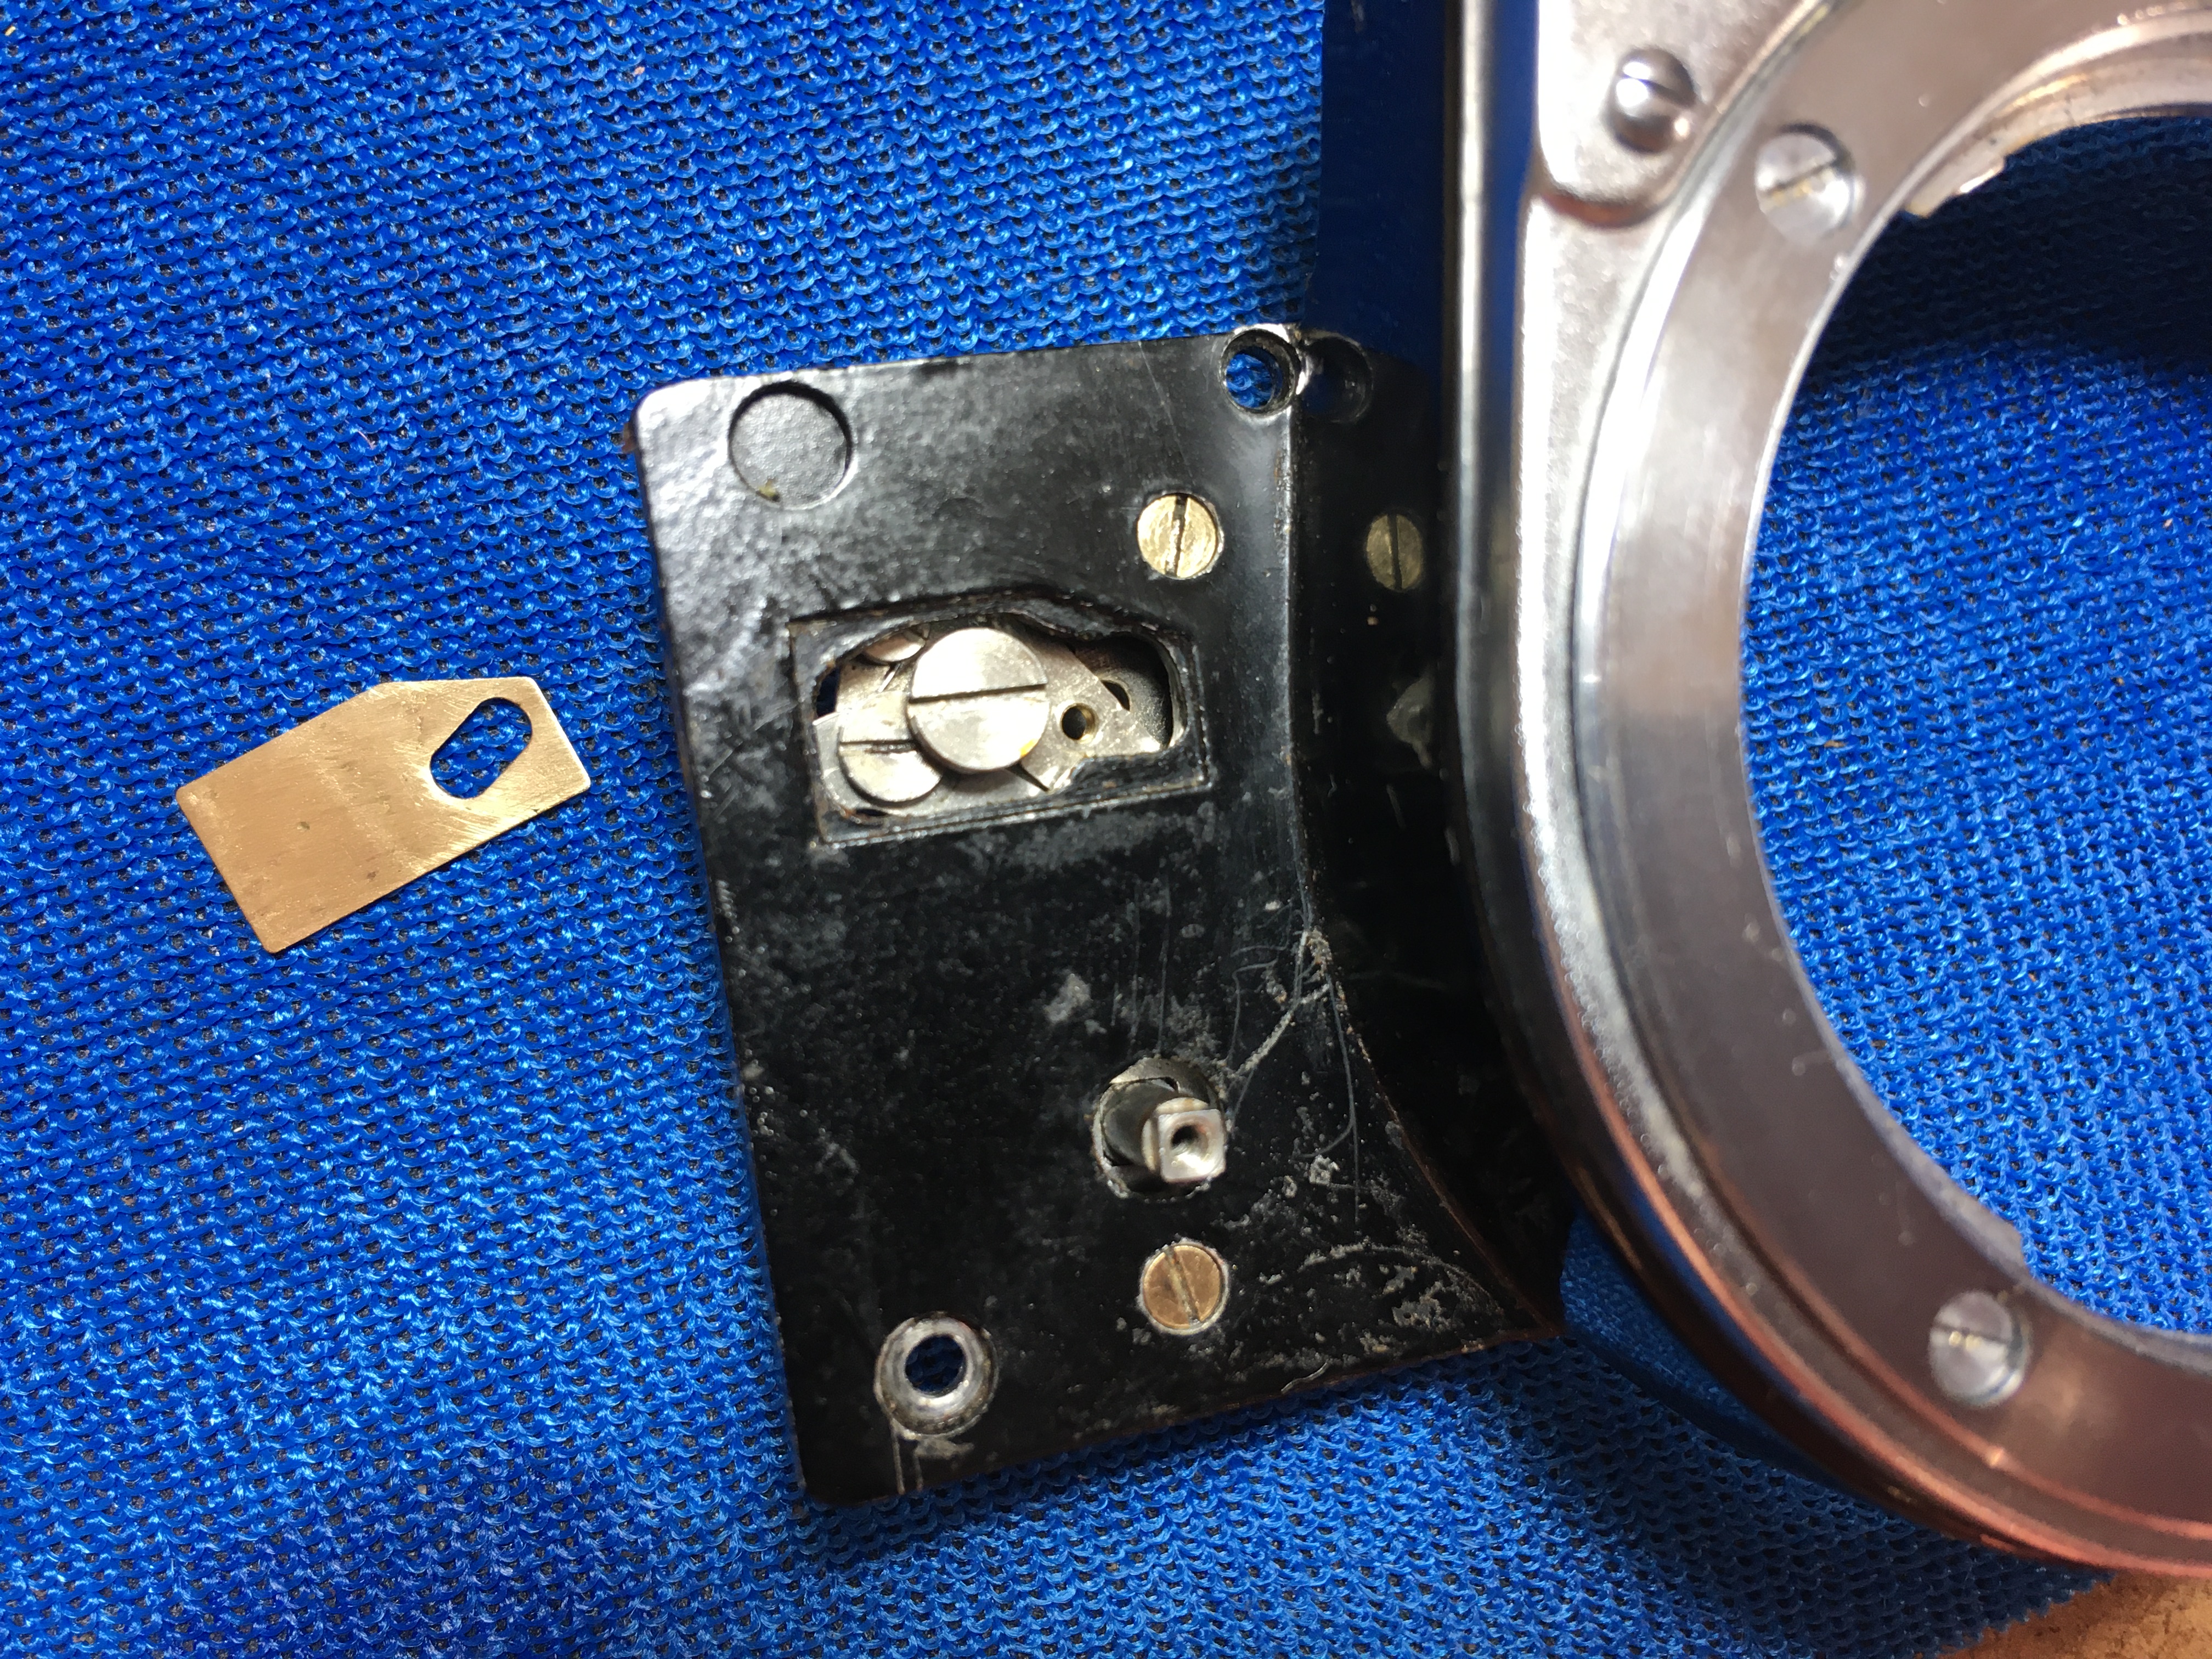
Here the SR-2 self-timer is fitted and the large screw which is no longer on the later models at the front is rather obvious. The screw behind it on later ones is also significantly thicker (see pictures above).


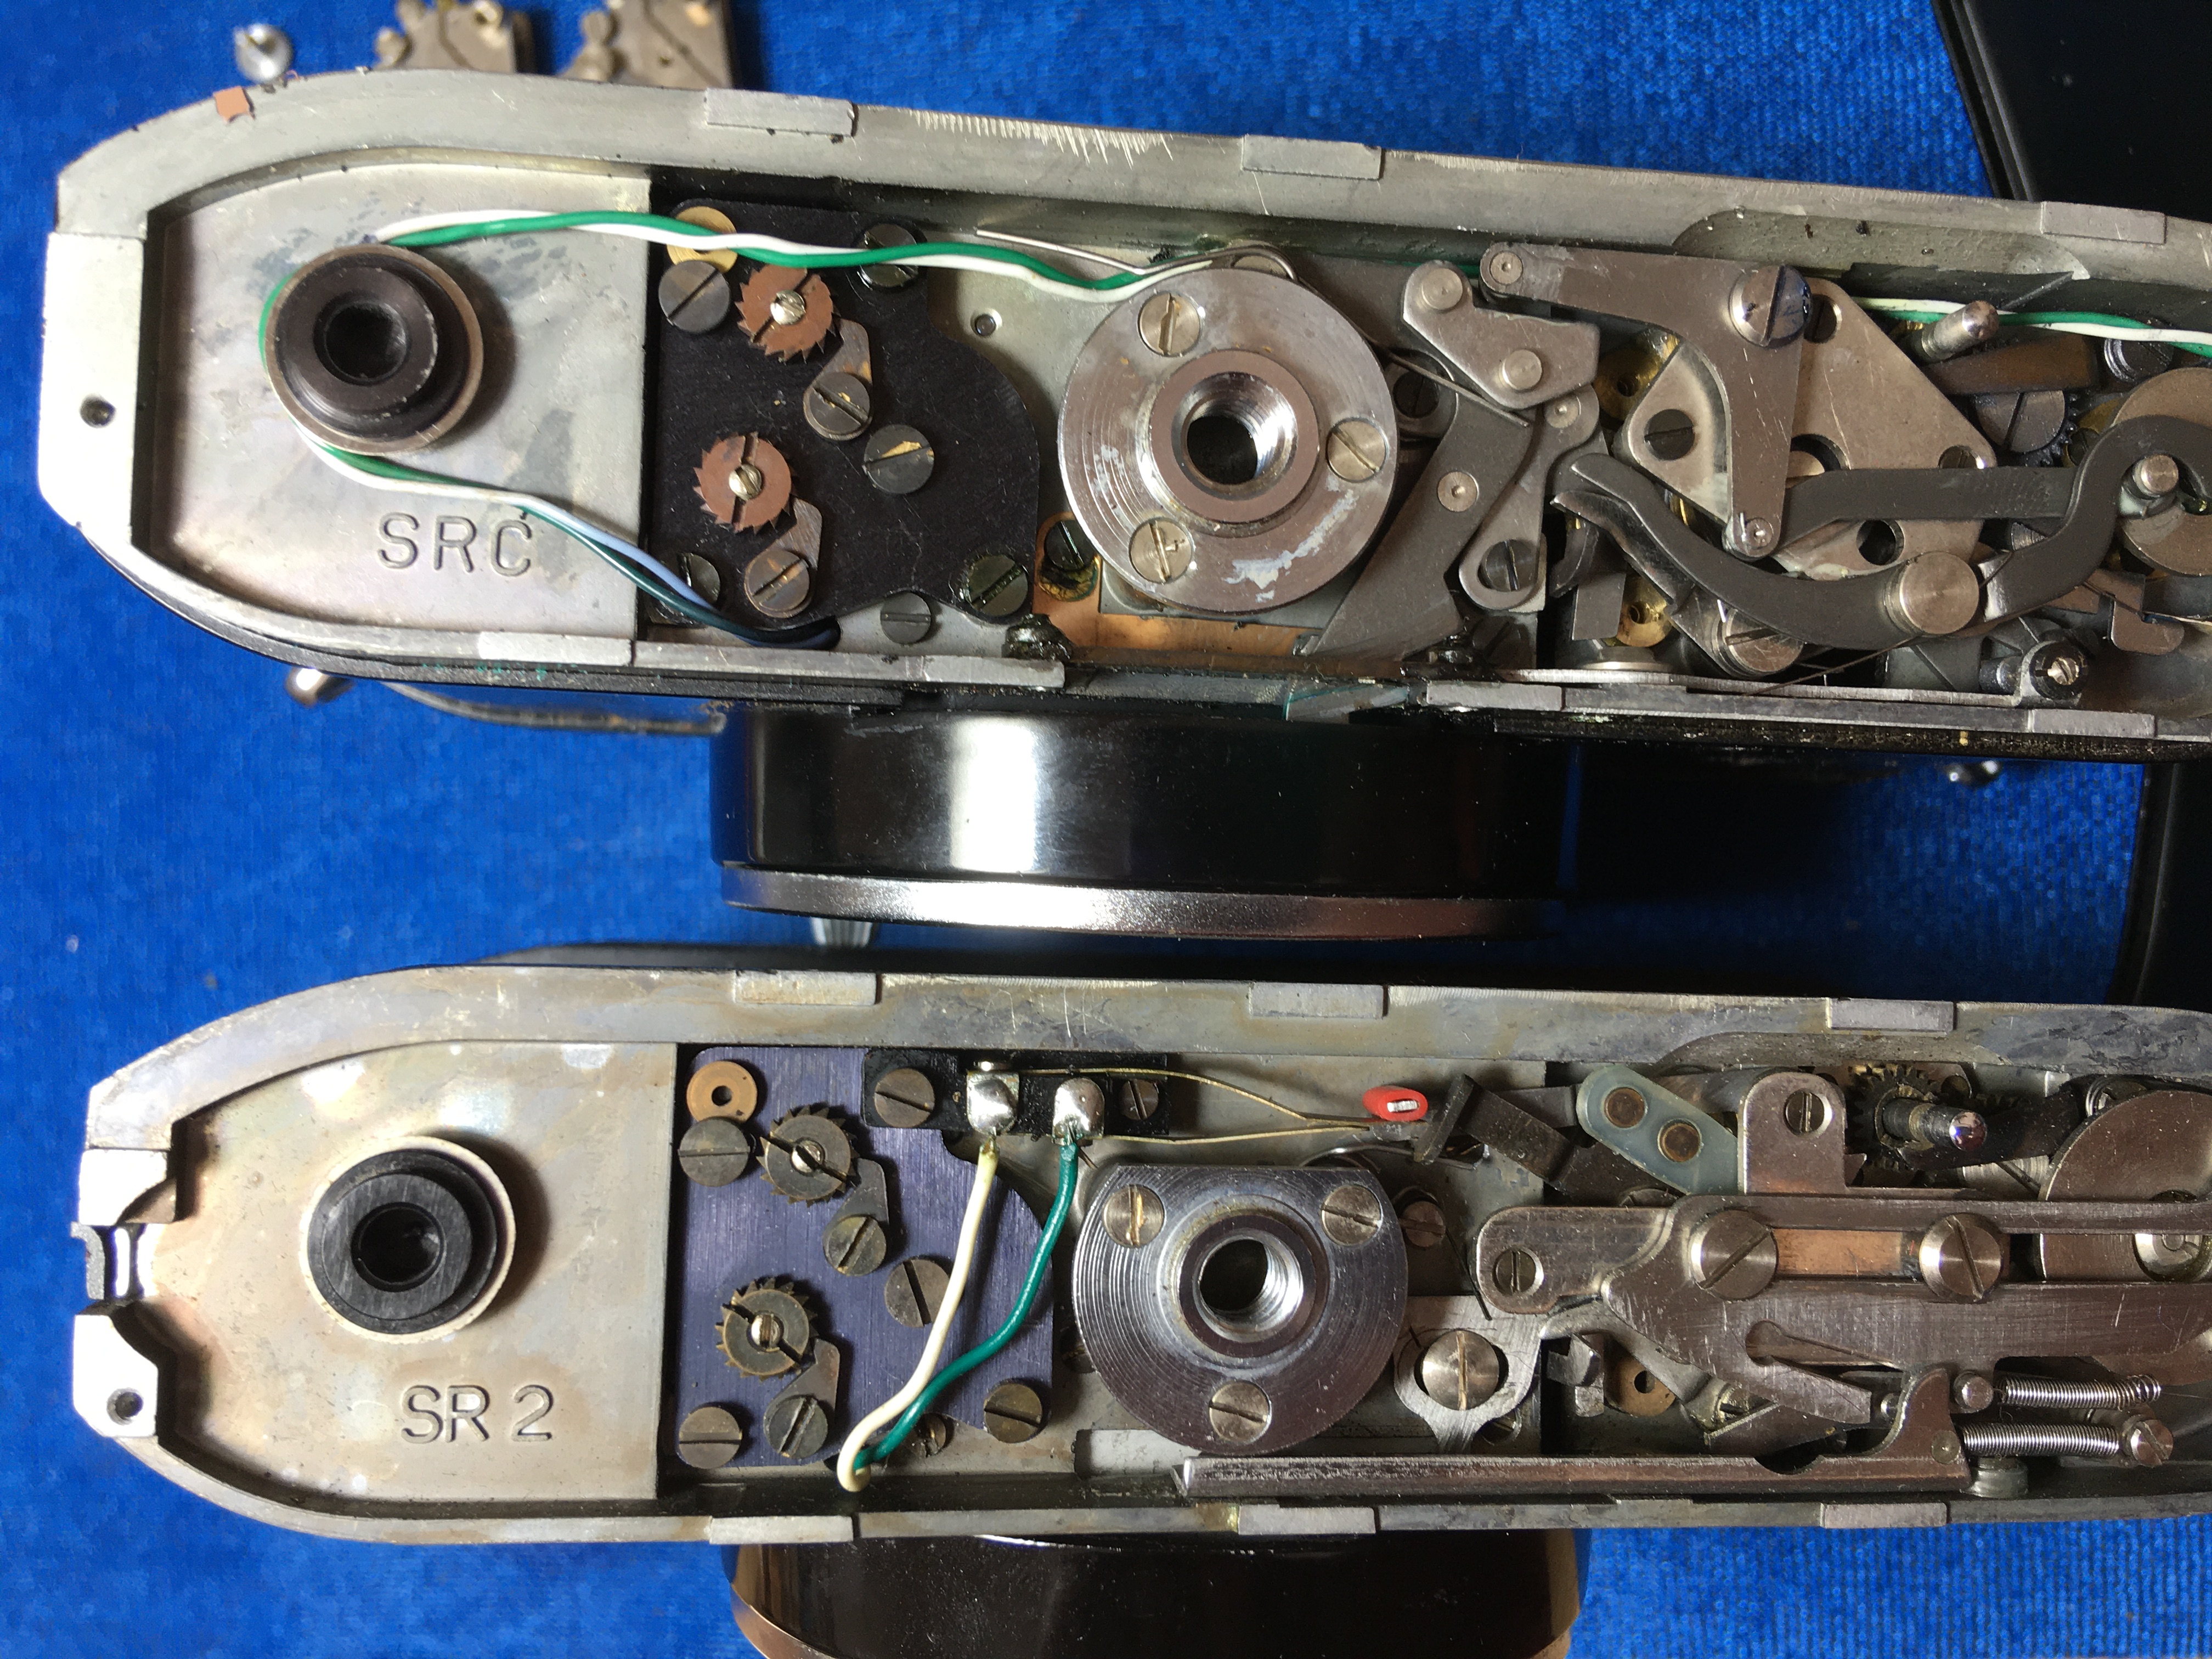
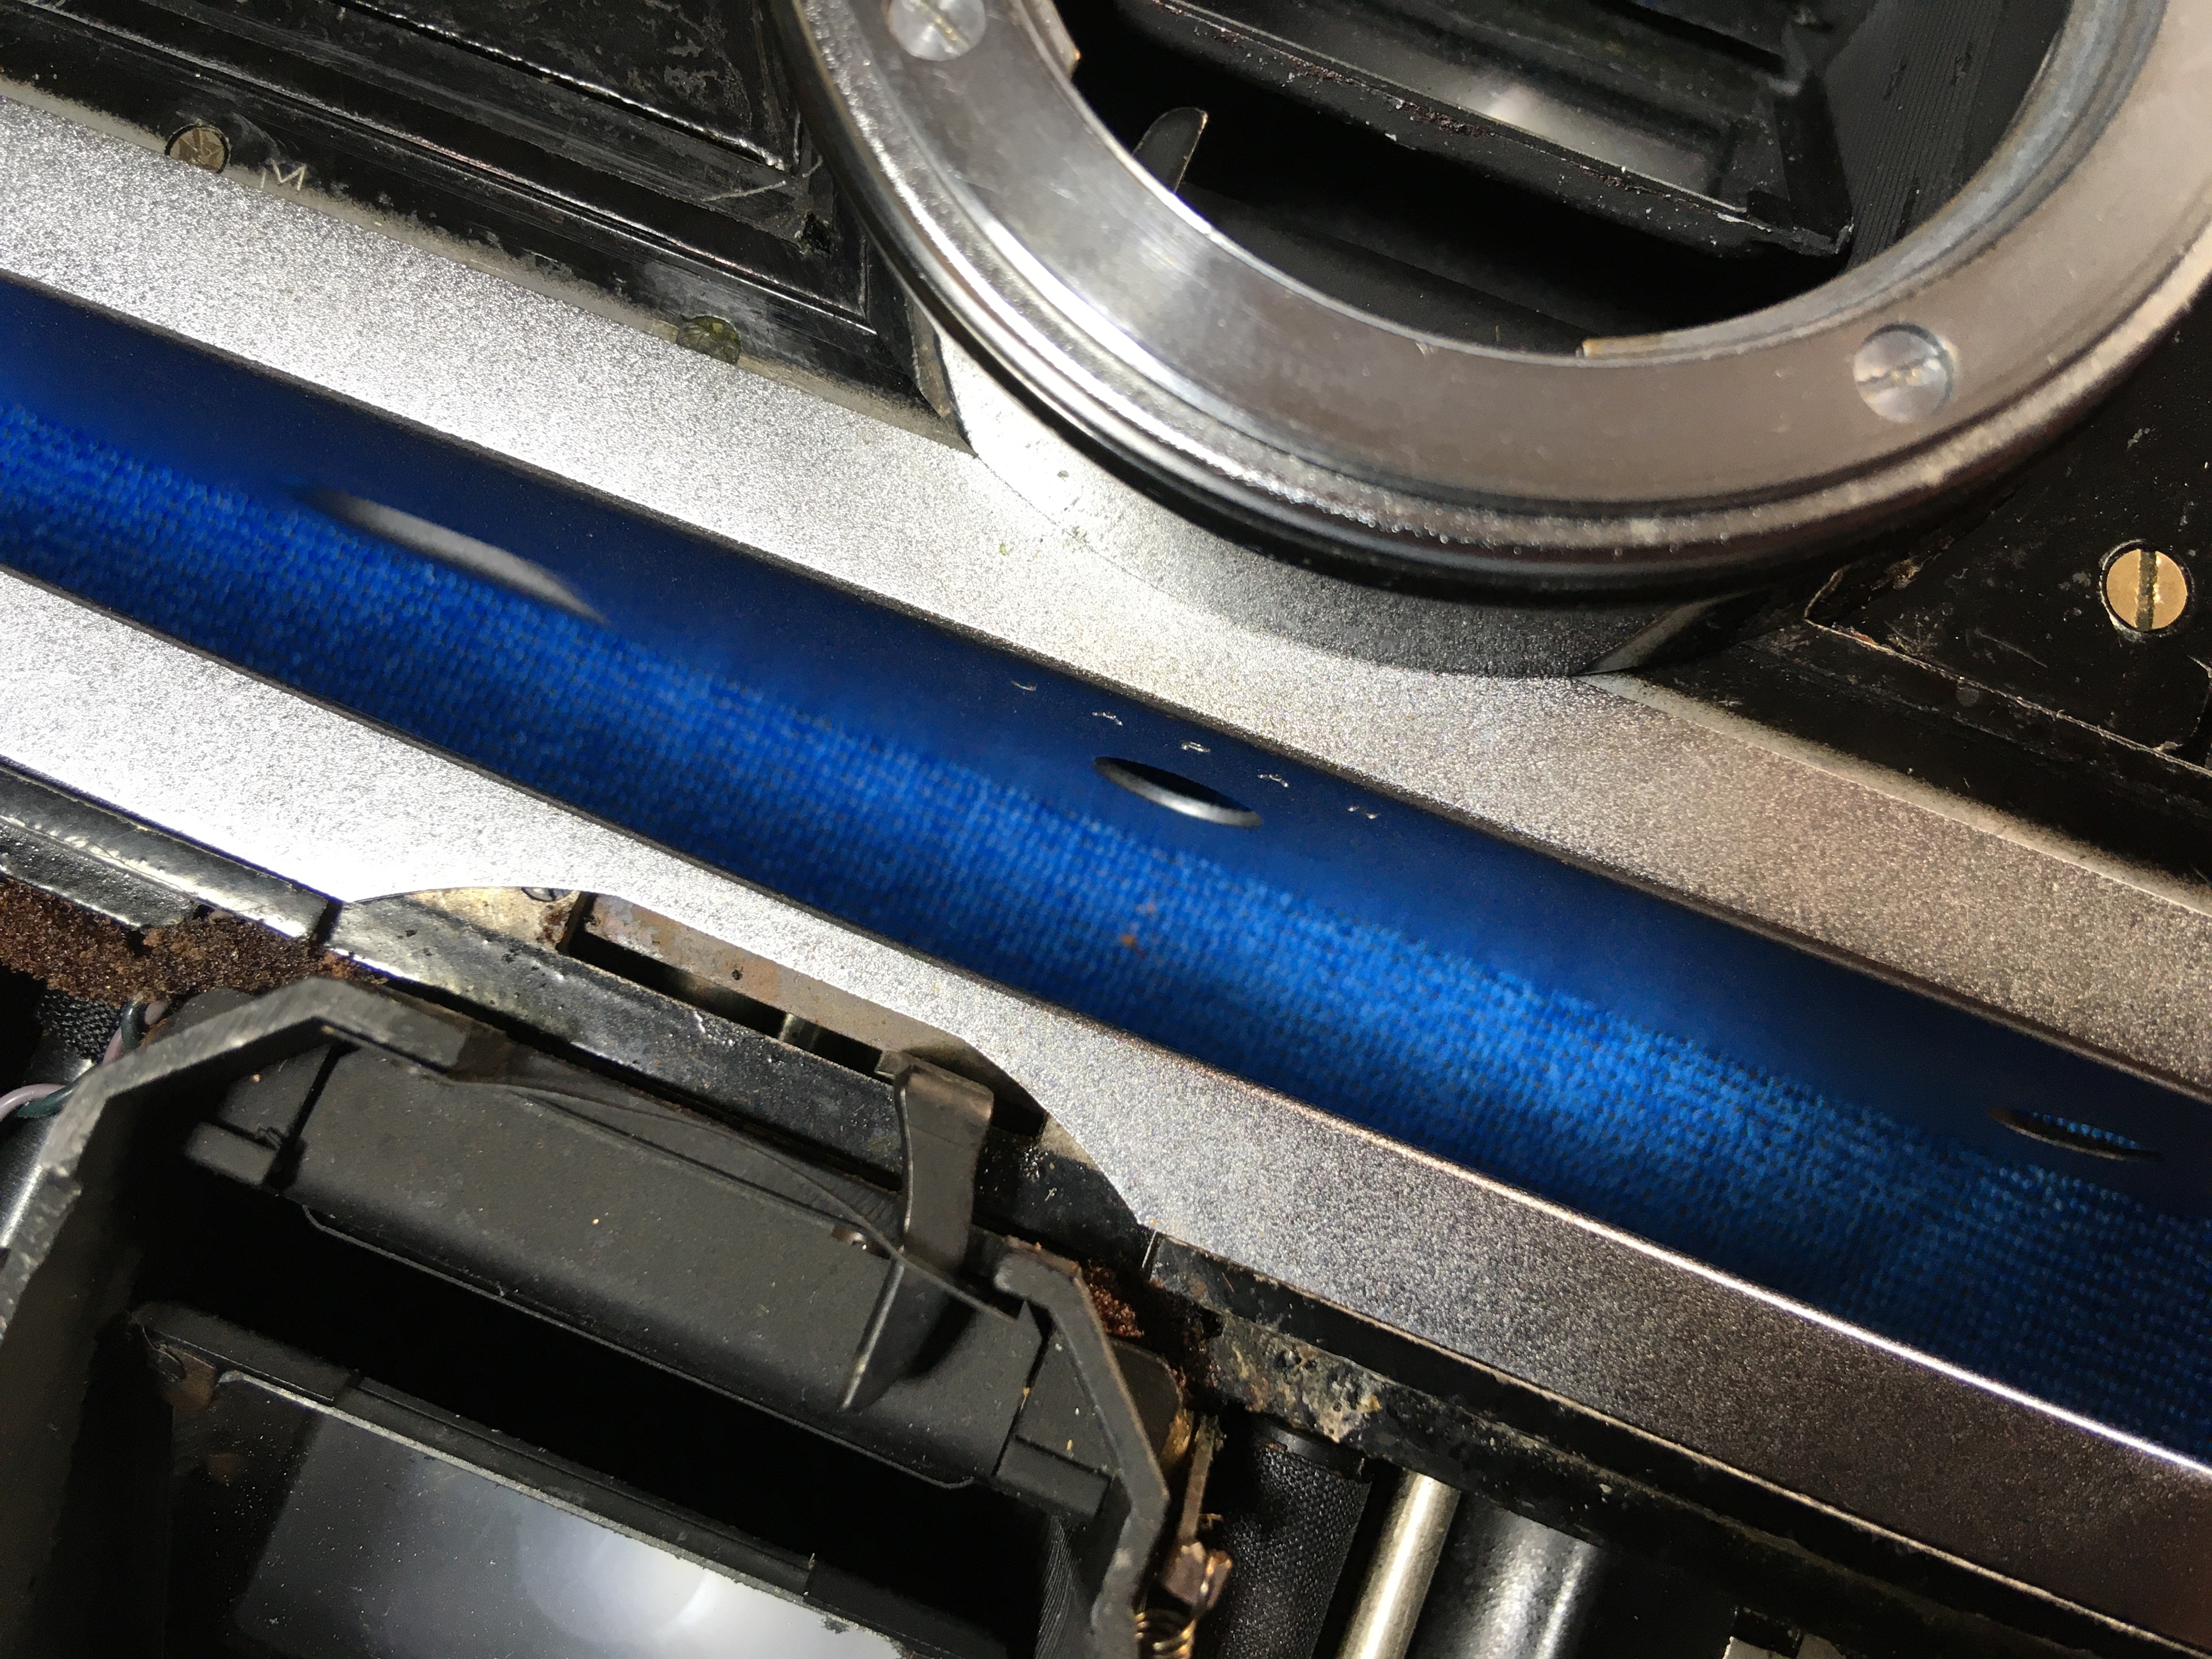
Below shows the shutter-release mechanism in the base which is distributed half-half between topside and bottom. Most jamming can/must be sorted down here, the shutter speeds are controlled on topside. The lead-wires are for the flash synch and every camera seems to have them differently routed, depending on the wishes of the assembler! Here the difference in the size and shape of the tripod-mount is also visible, along with the completely different mechanical layout… few interchangeable parts here!

A look at the base plates shows that both are also different, as the mechanism on the SR-1 needs a cut-out at front (behind the lens-mount) to accommodate it – in preparation for the following model. At this stage, they both still have the long-travel aperture lever. the hole for the tripod-thread is also larger on the baseplate of the later body.

Well, that wraps it up for today. I will sort out the orientation of the pictures when I get home… I wrote this on my phone and it won’t let me do everything I want to!

Minolta SR lenses NOT the same as MC/MD

OK, So everywhere we see the ads, mostly on eBay, where Minolta SR lenses (the ones called Auto Rokkor, with ‘W’ for wide or ‘Tele’ added on) are broadly equated to MD-Fit or something similar. Beware! This is not necessarily so!  The very early lenses do FIT ON the Minolta Bayonet, but DO NOT STOP DOWN to their minimum aperture. This has physical reasons, which I shall explain.

This means that the first series of these lenses attach correctly (the Minolta bayonet stayed the same until Auto-Focus came along) BUT the lenses only stop down on the later cameras to an aperture of around f8, no matter what you pre-set on the lens. This is due to the placement of the lever inside the cameras and lenses, that are, to put it simply, in different places! From f8 upwards in the direction of ‘more open’ I have found no limits and the restriction does NOT apply to fitting to Digital cameras with adapters that anyway don’t stop down, which is great news.

Take a look why: I have taken shots of an early SR1 (‘b’ series) from 1960 and compared it to the mount on the SRT* (in this case a 303) when the ‘MC’ notation was introduced. Note the placement of the lever at the bottom of the mount, that closes the lens down at exposure.

Firstly here, the back of an SRT/MC/MD Mount lens on the left compared with the early SR (Auto Rokkor without the MC/MD) mount lens on the right. You will note the difference in the placement of the Iris-Lever, although both are stopped down to f22. What you can’t see, is the range of travel of the lever for the lens on the right, which is almost the whole arc as drawn in. compared to the tiddly bit which is obvious in comparison on the left lens (physically limited by the slot it can move in axially – less than half of the arc); on the later Auto Rokkor lenses, from about 1960, the stop-down lever for the iris is the same as for the MC lenses operating from inside a ‘window’ and will work perfectly on later cameras – definitely any camera made after 1961.

Below the positions of the actuating levers inside the back of the mount on the cameras themselves can be seen. The SRT 303 is representative in its proportions of ALL manual Minolta mounts from then up until the introduction of the Auto Focus mount.

In this picture, the lens would be STOPPED DOWN, on the SRT using the button on the side of the mount and on this early SR (1959) by simply not cocking the shutter – fully automatic diaphragm came in 1961 when both the SR3 and SR1 got the modification. The difference in the position at maximum deflection is pretty obvious.

The same two cameras when the aperture is held open: Actually identical.

Here we have both cameras with the lens mounted and stopped down to f22. I think the difference speaks for itself. The picture speaks a thousand words?

The SRT manages just smaller than f8. This will happen to ALL early Auto Rokkor lenses if mounted on SRT and later cameras (actually any Minolta after at the latest 1961, when the automatic diaphragm was introduced). The other way around, ANY Manual lens will work correctly on the earlier, pre-SRT cameras and of course with any of the Digitals, too – with an adapter.

So, it’s up to you, but buying the earlier lenses, with very few exceptions, is not better than a comparable MC or MD, despite being cheaper (mostly). Quite apart from the mentioned deficit in the usability on later cameras, for the most part the performance and definitely the coatings just doesn’t make it worthwhile – unless you have the very much earlier cameras! The thing to look out for to positively identify the first series of lenses is the flat ring on the back of the lens without the ‘window’ for the iris-coupling, as clearly shown in the pictures above. Another indicator, if not definitive, is the aperture-ring with the engraved yellow ‘LV’ values below the f-numbers. Some, however, even with these engravings also had the later mechanism 🙂 The thing to look for is the evenness of the aperture engravings (if they look ‘wonky’ then they probably have the long travel) and the back of the lens, of course. If the pin sticks out of a narrow window, then you are fine. Watch out for lenses over 100mm, they might be long-travel AND have a window for the pin: the length of the window will give it away.

The SR-2 and both ‘a’ (first series with ‘lift-up’ shutter-speed dial) and ‘b’ versions of the SR-1 without the meter block all have the long-travel lever, but in 1960 alongside the introduction of the SR-3, there was also a ‘plain’ SR-1 (‘c’) without the block, but with the automatic diaphragm…